Configuration
Version 1.1 Telephone Access System User Guide 23 (42)
LT-968 Copyright 2012
Figure 11. Entering Resident’s Names
Note: If you accidentally enter the wrong character while configuring a
name, press * once to backspace or press 0 to delete the letter.
For example, to enter the last name “Doe”,
a. Press “3” four times for the upper case letter “D”.
b. Press “6” three times for the letter “o”.
c. Press “3” two times for the letter “e”.
d. Press the telephone key to save and continue.
3. Once you have entered the name, press the telephone key to accept. The
following screens will appear as shown in Table 1.
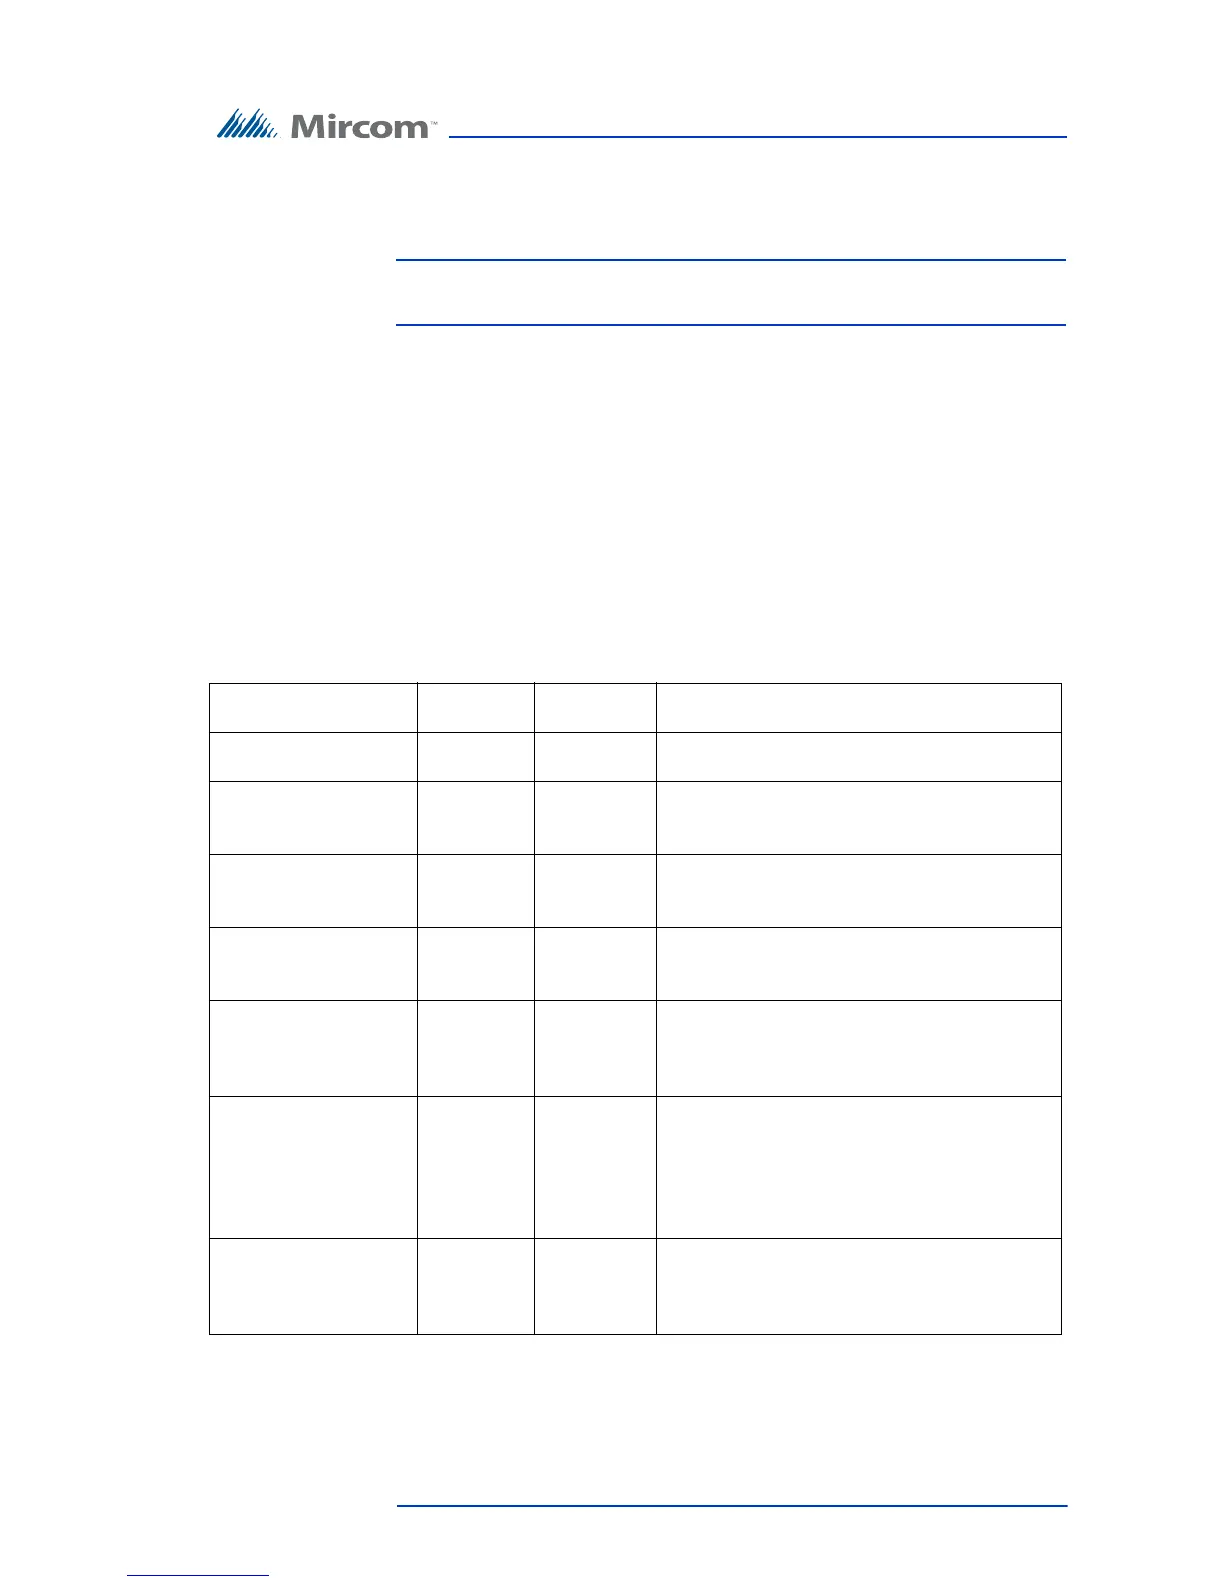
Table 1: List of Screens
Database Menu NSL
System
ADC
System
Explanation/Description
Enter Resident Name YES YES Enter the resident’s name. The name must be
unique and a maximum of 15 characters.
Enter Apt No
[_ _ _ _]
YES YES Enter the resident’s apartment number (up to 4
digits).
Enter Dial Code
_ _ _ _
YES YES Enter the resident’s dial code (up to 4 digits).
Enter Keyless Code
[_ _ _ _]
YES YES Enter the assigned keyless code, up to 6 digits
(if used). See below for using keyless entry
codes.
Enter Relay Code
[_ _ _ _]
YES N/A Enter the resident’s assigned relay code.
Note: Relay codes start at 1 for the first relay,
up to 1535.
Enter Telephone #
[____________]
N/A YES Enter the resident’s telephone number (up to
18 digits including a comma that is used as 1
second delay). Use the up arrow key for a
comma and the down arrow key for a dash
which is optional. Press the Enter (telephone
key) to accept the telephone number.
Hide Res Name
[x] Display
YES YES This feature turns the resident information
display ON or OFF. When OFF the resident’s
information is only displayed in configuration
mode.