83
EN
TECHNICAL MANUAL - B CLASSIC / B FUTURA / S CLASSIC
TECHNICAL DATASHEET
5.5 TECHNICAL DATASHEET ST05 - PT1 SENSOR - CHAMBER TEMPERATURE SENSOR
Temperature inside the chamber is measured by a sensor termed PT1, which sits in the middle of the chamber back
wall; this position ensure more accurate readings and reduces the chances of the sensor contacting the load placed
inside the chamber.
The sensor is the PT1000 and features the following resistance ratings:
- 1000 Ω at 0°C
- 1500 Ω at 130.4°C
In addiction, to ensure improved accuracy, the actual resistance reading given the by sensor at 130.4°C is stamped on
the sensor
This value is stored in the autoclave at the factory and must be checked/modied when the sensor is replaced (ref.
SERVICE MENU – SQ26)
The PT1 sensor is connected to the general electronic card, which incorporates a sensor input calibration circuit, which
automatically checks calibration during operation.
Automatic input calibration is provided for the other sensors as well:
- PT2 – steam generator
- PT3 – chamber tube bundle heating element
This eliminates the need for manual calibration.
SERVICE OPERATIONS
Replacing PT1
- Power off the autoclave from the main switch and disconnect the power cord.
- Remove the right side cover and the metal rear cover to gain access to the general electronic card and the rear area
of the chamber.
- Remove the protective cover of the general electronic card, which is held in place by 3 snap locks.
- Disconnect the PT1 sensor wiring from the general electronic card.
- Loosen the fastening ring nut of the PT1 sensor to release it completely.
- Extract the PT1 sensor together with the ring nut from the seat in the chamber back wall.
- Mark the new PT1 sensor at a position 60mm away from the sensor end and measure its actual reading at 130.4°C,
which is stamped on the wiring output terminal.
- Fit a new fastening ring nut and a new taper tting onto the new sensor.
- Insert the sensor into its seat; make sure not to distort or bend the sensor.
- Secure the sensor using the ring nut; when the ring nut is properly tightened, the 60mm mark should be ush with
the ring nut edge.
- Position and connect the sensor wiring; the connector has a mounting position, be sure to observe it.
When you have installed the new sensor and retted the card protective cover and the external covers, you will need
to check/modify the PT1 value stored at the factory as follows:
- Activate the device.
- Access the SETUP menu.
- Access the SERVICE menu using password 0829.
- Select the PT1 CALIBRATION menu (ref. SERVICE MENU – SQ26).
- Compare the value at 130.4°C stored with the actual reading of the new PT1.
- Change and conrm the new value if needed.
NOTE: The value at 0° C must be stored at 1000 Ω.
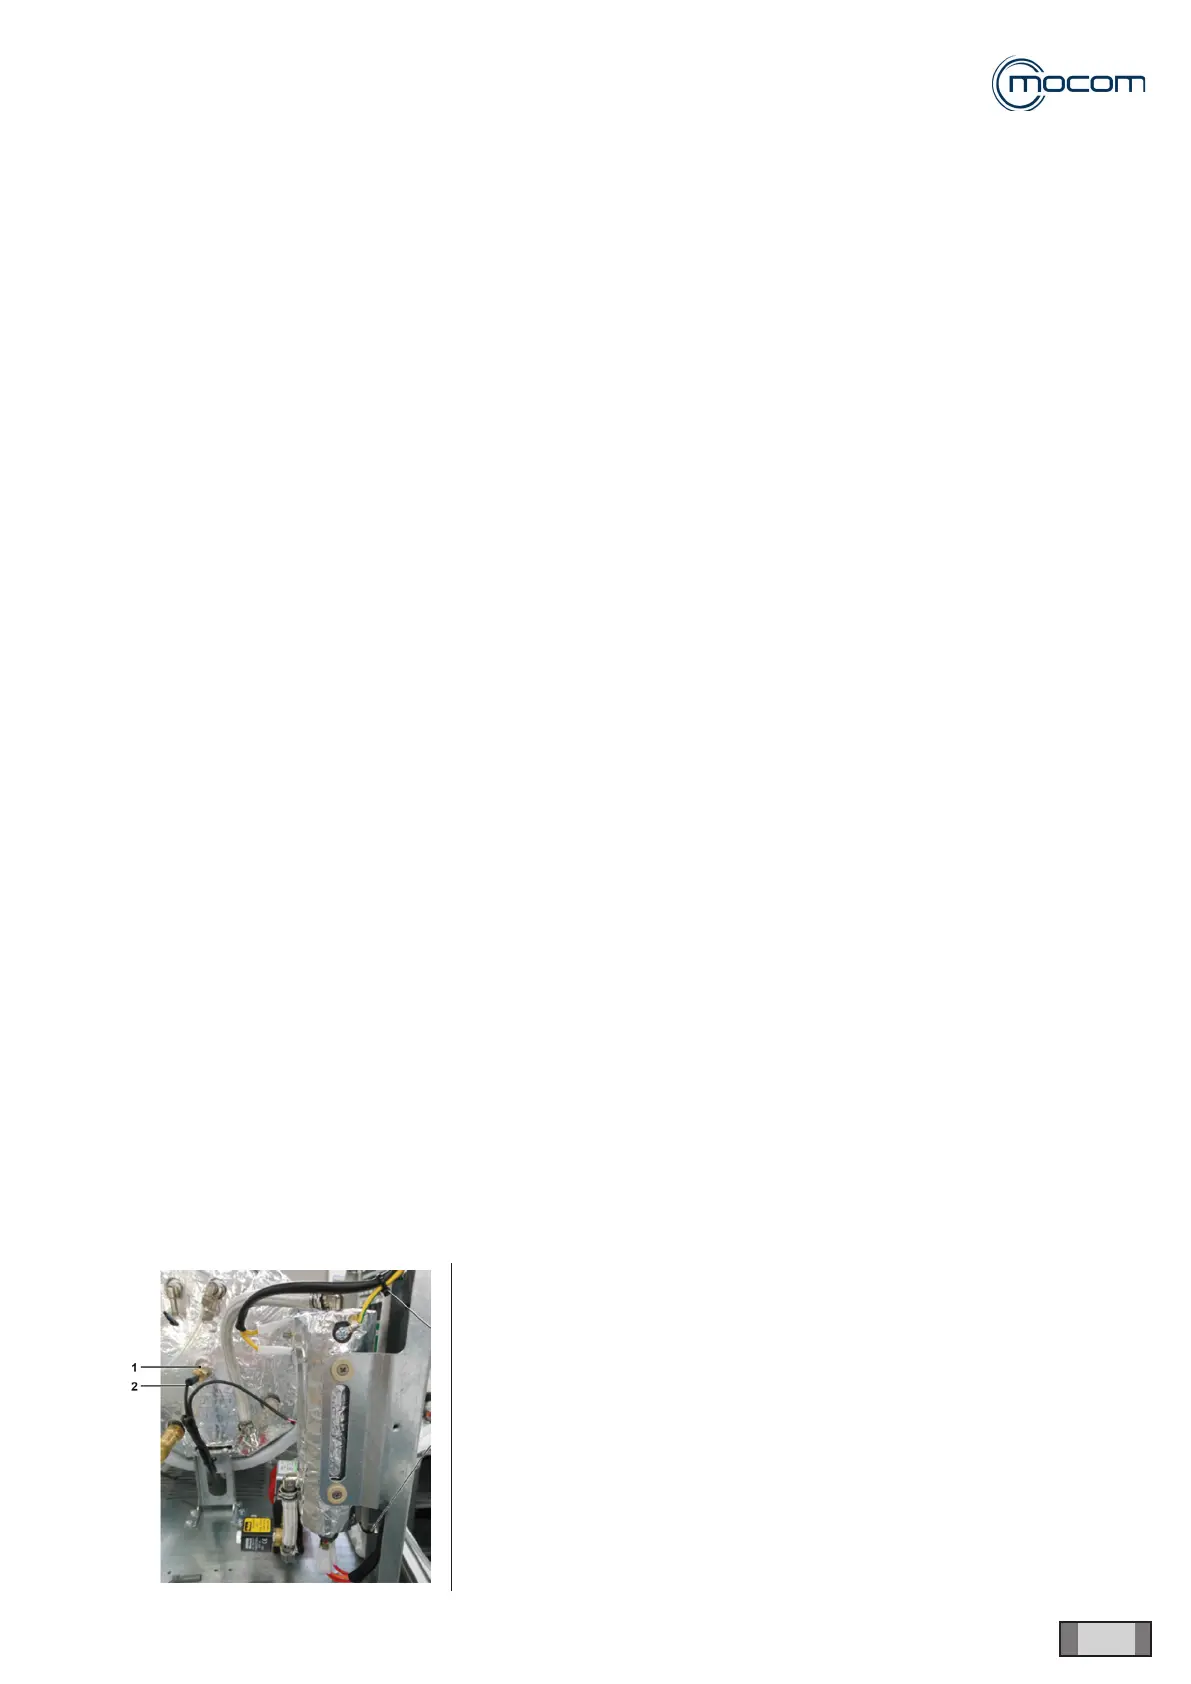
1. PT1 SENSOR complete with fastening ring nut.
2. PT1 actual reading at 130.4°C.