MONITOR HEATING SYSTEM
Section
4:
Maintenance/Servicing
4-1
CLEANING
THE
CABINET
When
the
cabinet
is
soiled, wipe
it
with
a
damp
cloth. Restore
the
shine with
a dry
cloth.
The use
of
abrasive household cleaners
may
dull
the
finish.
4-2
CHECKING
THE
FLUE
PIPE
At
the
beginning
of
each heating season, check
the
inside
of the
flue
pipe.
Foreign matter, spider
webs,
etc. must
be
removed.
Be
sure
all
fittings
and
joints
are
tight.
NOTE:
Make sure that
all
exhaust pipe
and
intake
pipe connections
are
firmly mated.
Make
sure that
the
connections between
the
flue pipe
and
exhaust/air intake pipe
and
hose
are
secured
by the
pipe holder
(P/N
4006)
and the
hose band (P/N 4008).
4-3
CLEANING
THE
INTERIOR
Remove
the
front cover
and
louver,
and
vacuum
and
wipe away dust
and
other accumulation.
4-4
CLEANING
THE
BLOWER
GUARD
Heating efficiency will
be
reduced
if the
blower
guard
at
rear
of the
cabinet
is
blocked with
dirt
or
dust.
Blockage also produces
a
rise
in
heat that
could
cause
the
heater
to
shut
off.
Wipe
the
guard clean
at
least once
a
week.
4-5
ELECTRIC
MOTOR
MAINTENANCE
Motors
are
permanently
lubricated
and
need
no
lubrication.
Keep
fan and
motor free
of
dust
and
dirt
by
cleaning annually.
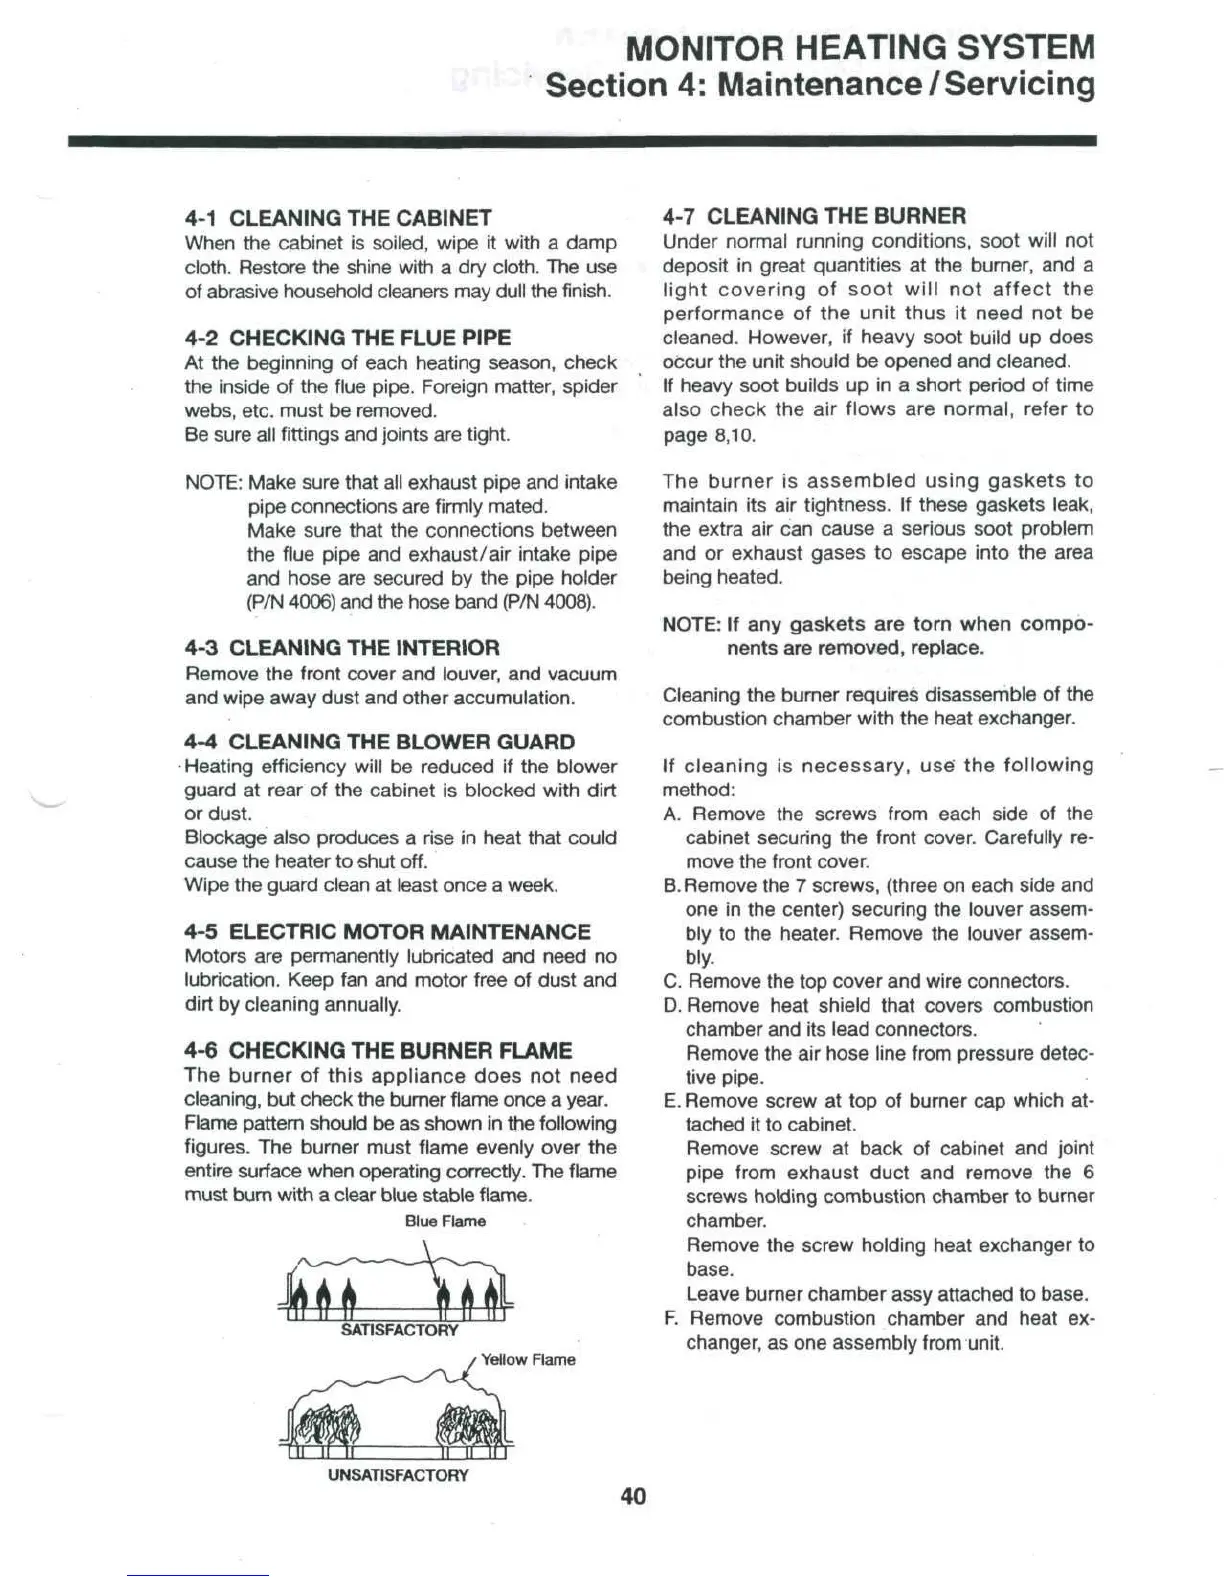
4-6
CHECKING
THE
BURNER
FLAME
The
burner
of
this
appliance
does
not
need
cleaning,
but
check
the
burner flame once
a
year.
Flame pattern
should
be as
shown
in the
following
figures.
The
burner must flame evenly over
the
entire surface when operating
correctly.
The
flame
must
bum
with
a
clear
blue
stable
flame.
Blue
Flame
Yellow
Flame
4-7
CLEANING
THE
BURNER
Under normal running
conditions,
soot will
not
deposit
in
great quantities
at the
burner,
and a
light
covering
of
soot
will
not
affect
the
performance
of the
unit
thus
it
need
not be
cleaned. However,
if
heavy soot build
up
does
occur
the
unit
should
be
opened
and
cleaned.
If
heavy soot
builds
up in a
short period
of
time
also check
the air
flows
are
normal, refer
to
page 8,10.
The
burner
is
assembled
using
gaskets
to
maintain
its air
tightness.
If
these gaskets leak,
the
extra
air can
cause
a
serious soot problem
and or
exhaust gases
to
escape into
the
area
being heated.
NOTE:
If any
gaskets
are
torn
when
compo-
nents
are
removed,
replace.
Cleaning
the
burner requires disassemble
of the
combustion chamber with
the
heat exchanger.
If
cleaning
is
necessary,
use
the
following
method:
A.
Remove
the
screws from each side
of the
cabinet
securing
the
front
cover. Carefully
re-
move
the
front cover.
B.
Remove
the 7
screws, (three
on
each side
and
one
in the
center) securing
the
louver assem-
bly to the
heater. Remove
the
louver assem-
bly.
C.
Remove
the top
cover
and
wire connectors.
D.
Remove heat shield that covers combustion
chamber
and its
lead connectors.
Remove
the air
hose line from pressure detec-
tive pipe.
E.
Remove
screw
at top of
burner
cap
which
at-
tached
it to
cabinet.
Remove
screw
at
back
of
cabinet
and
joint
pipe
from
exhaust duct
and
remove
the 6
screws
holding
combustion
chamber
to
burner
chamber.
Remove
the
screw holding heat exchanger
to
base.
Leave
burner chamber assy attached
to
base.
F.
Remove combustion chamber
and
heat
ex-
changer,
as one
assembly
from
unit.
UNSATISFACTORY
40