HTP-1 Installation and User Guide Release 1.8.1
Front Panel LCD Display
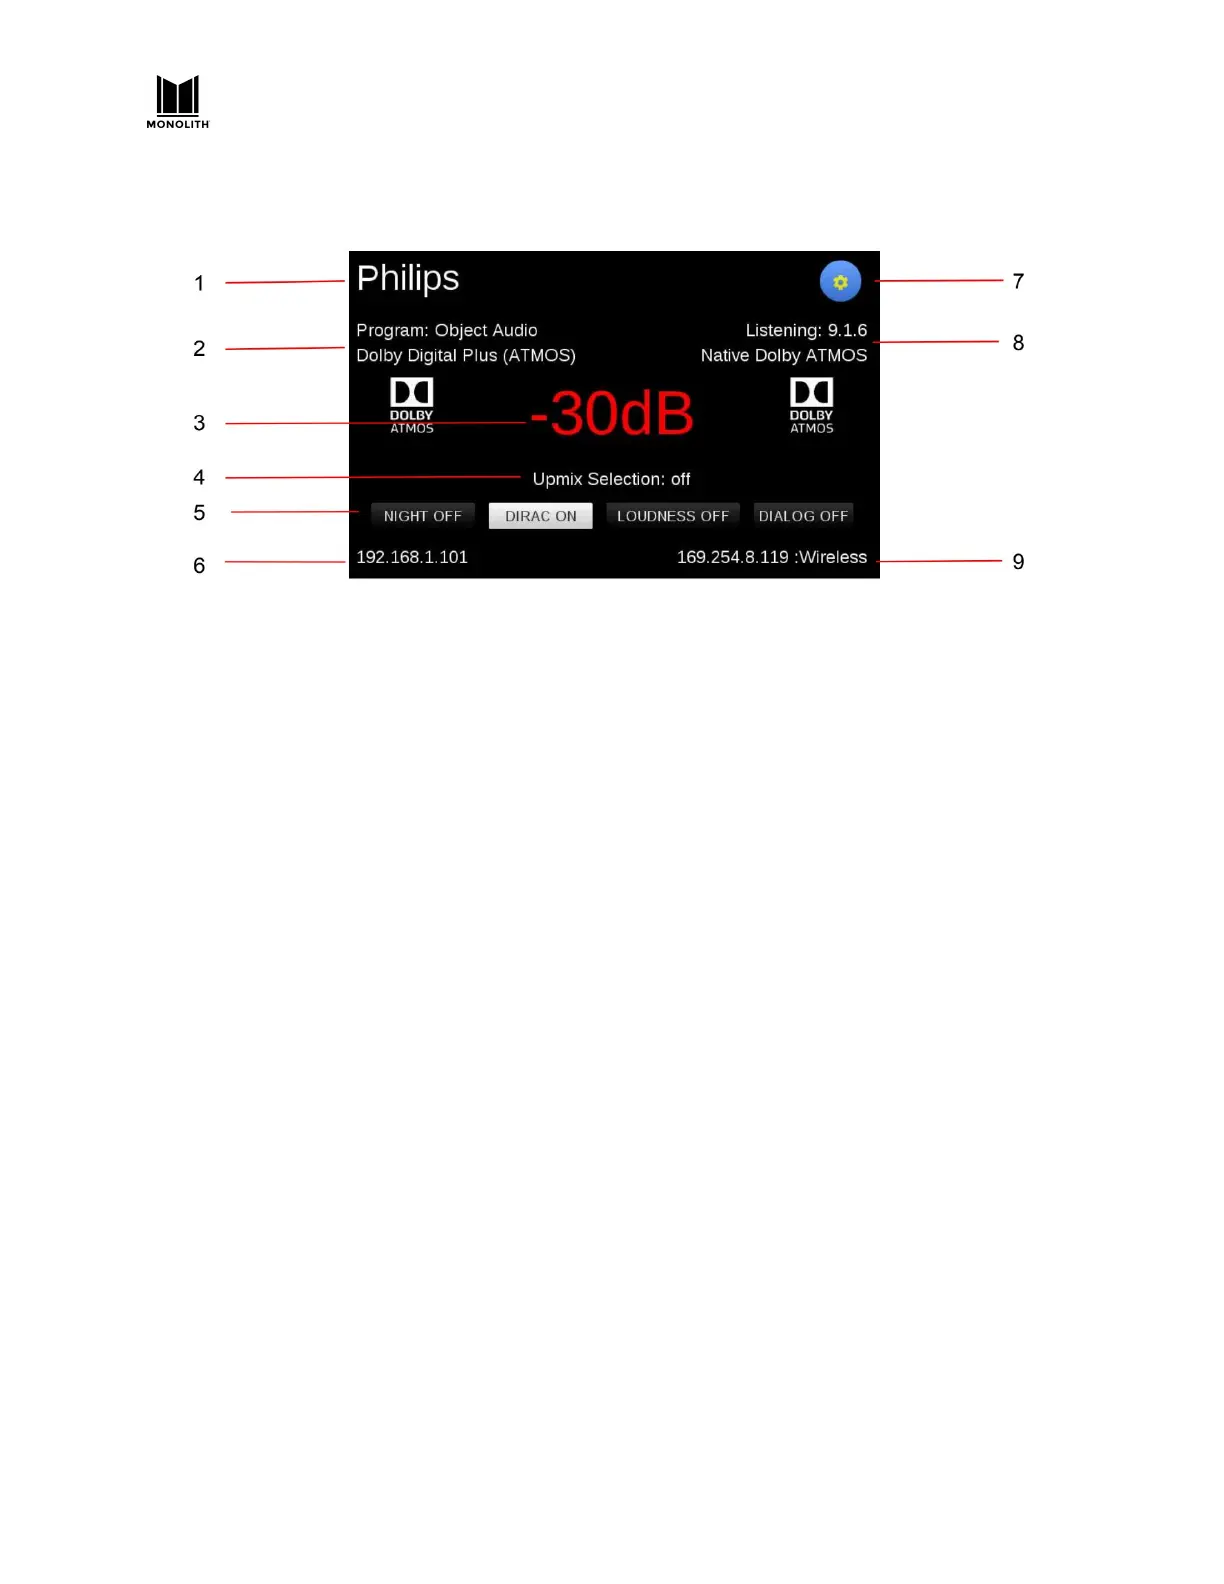
1. Input: The current active Input is displayed in the upper left corner of the screen. The sample
screenshot above shows Philips as the Input. The text for each input can be configured on the
INPUTS tab on the System Configuration screen in the Web GUI.
2. Program Format: The Program Format displays the audio format of the selected Input. The
sample screenshot above shows Object Audio Dolby Digital Plus (Atmos) as the Program
Format. See the About Speaker Configurations
section for details of the number displayed.
3. Volume: The Volume level is displayed in the center of the screen. The sample screenshot above
shows -30dB as the Volume. The decibel (dB) value is relative to the amplifier input sensitivity,
which can be configured on the CALIBRATION tab on the System Configuration screen in the
Web GUI. When the audio is muted, the display changes from white to red. Mute can be toggled
on or off by touching the Volume display on the screen, using the IR remote control, or by
clicking the Volume display on the built-in Web GUI Home Page.
4. Upmix Selection: The current Upmix Selection setting is displayed beneath the Volume on the
screen. The upmix is selected using the IR remote control or with the built-in Web GUI. The
selected mode is only the desired/requested upmix mode. The system will perform the
requested upmix mode only if it is supported. The Listening Format (see 8 below) is displayed
beneath the Setup icon and shows the actual upmix mode algorithm being used, which may not
match the requested mode. See the Using Surround Modes
section for details.
5. Special Listening Modes: The status of the NIGHT, DIRAC, LOUDNESS, and DIALOG modes is
displayed beneath the Upmix Selection.
6. IP Address: The current wired IP Address is displayed in the lower left corner. The sample
screenshot above shows the IP Address as 192.168.1.101. You access the built-in Web GUI by
typing the IP Address into the address bar of your web browser. Some browsers default to
https:// before the address, which will not work. The address must begin with http://.
7. Wi-Fi Setup: Touch the gear icon to display the Wi-Fi® Setup screen. See the WI-FI SETUP
section for details. If the icon is yellow, a software update is available for the HTP-1.
HTP-1 User Manual Page 14 V1.8.1