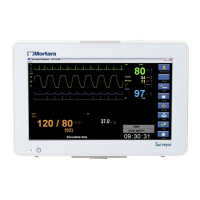
35
To calibrate the CO2 module:
1.
Prepare the gas apparatus by attaching the sample line to the calibration gas canister. Mate the shorter
of the two orange connectors of the sample line with the clear connector found on the larger tubing, all
supplied with the calibration kit. Verify that the gas apparatus is functioning properly by very briefly
depressing the actuator and listening for gas expulsion. Set aside.
2.
Power on the S12/19 device and verify the ETCO2 function is enabled by navigating through the
following menus: Setup > Parameters > ETCO2 Enabled = Yes > OK > Close.
3.
Connect the CO2 sampling line to the S12/19 device by inserting the orange connector into the
Microstream receptacle and turning clockwise half a turn. Do not over tighten.
4.
Navigate through the following menus: Setup > Administration > Service > Code Entry 53, 51, 54 >
OK > Calibration.
5.
Select Start CO2 Calibration on the screen while immediately depressing and holding the gas canister
actuator/trigger for approximately 1 minute. The Surveyor patient monitor will display “CO2
Calibrating” at the bottom of the screen.
6.
Once completed, the Surveyor patient monitor displays “CO2 Calibration Okay” or “CO2 Calibration
Failed”.
7.
If the calibration fails, determine the cause of the failure appropriate to the displayed error message
given. Repeat the CO2 procedure. If the calibration is unsuccessful after 3 attempts, contact Mortara
Technical Support.
8.
Upon successful completion, disconnect the calibration gas and hold the power button to power down
the S12/19 device. It is not necessary to exit out of the calibration menus.
9.
Turn monitor on and reconnect the CO2 sampling line to the S12/19 device in preparation for verifying
ETCO2 performance is within specified tolerances.
10.
Apply the calibration gas to the Surveyor patient monitor in pulses of 5 seconds on, 5 seconds off, to
simulate patient breaths of 5-6 RR. Continue long enough for the ETCO2 to stabilize in both inhale and
exhale states, or approximately 1.5-2 sweeps across the screen. The ETCO2 value should read 38 ± 2
mmHg. The FICO2 value should read 0 ± 2 mmHg and a ± 0.05 correction factor for every 100 mmHg
ambient pressure above or below sea level, respectively.
Invasive Pressure Calibration
The Invasive Pressure interfaces are calibrated by the manufacturer therefore a new patient monitor can be put into
clinical use without the need of calibration. Annual Invasive Pressure calibration is recommended after the first year
of use.
In order to calibrate the Invasive Pressure interfaces, perform the following steps:
1.
Connect a static pressure source, such as ambient air, to pressure transducer that is connected to the P1
invasive pressure interface.
2.
Select “Start P1 Calibration” via the “Administration - Service – Calibration” screen (password
required to access this screen).
3.
Await “P1 Calibration OK” message, or similar if the interface is labeled something other than P1.
4.
Repeat for interfaces P2 through P4.
NIBP Calibration
The NIBP module is calibrated by the manufacturer therefore a new patient monitor can be put into clinical use
without the need of calibration. The accuracy of the NIBP pressure sensor and overall functionality of the NIBP
interface can be verified as detailed in the Maintenance section in this manual. Based on the results of the
verification testing, calibration may be required.
If further calibration is required, contact Mortara Technical Support or your authorized service personnel.