41
To enable/disable overlap invasive pressure waveforms:
1.
Select the Setup quick action key on the main screen to access the Setup dialogue.
2.
Select the Waveforms button to access the Setup Waveform Area dialogue.
3.
Locate the Overlap Invasive Pressure label:
a.
Select Yes to overlap all available invasive pressure.
b.
The invasive pressures will occupy the space of four waveform slots.
c.
The overlapped invasive pressure have independent waveform sizes.
d.
Select No to keep the invasive pressure waveforms in separate waveform parameter tiles.
4.
Select the OK button to enter that change OR select the Cancel button to cancel the changes.
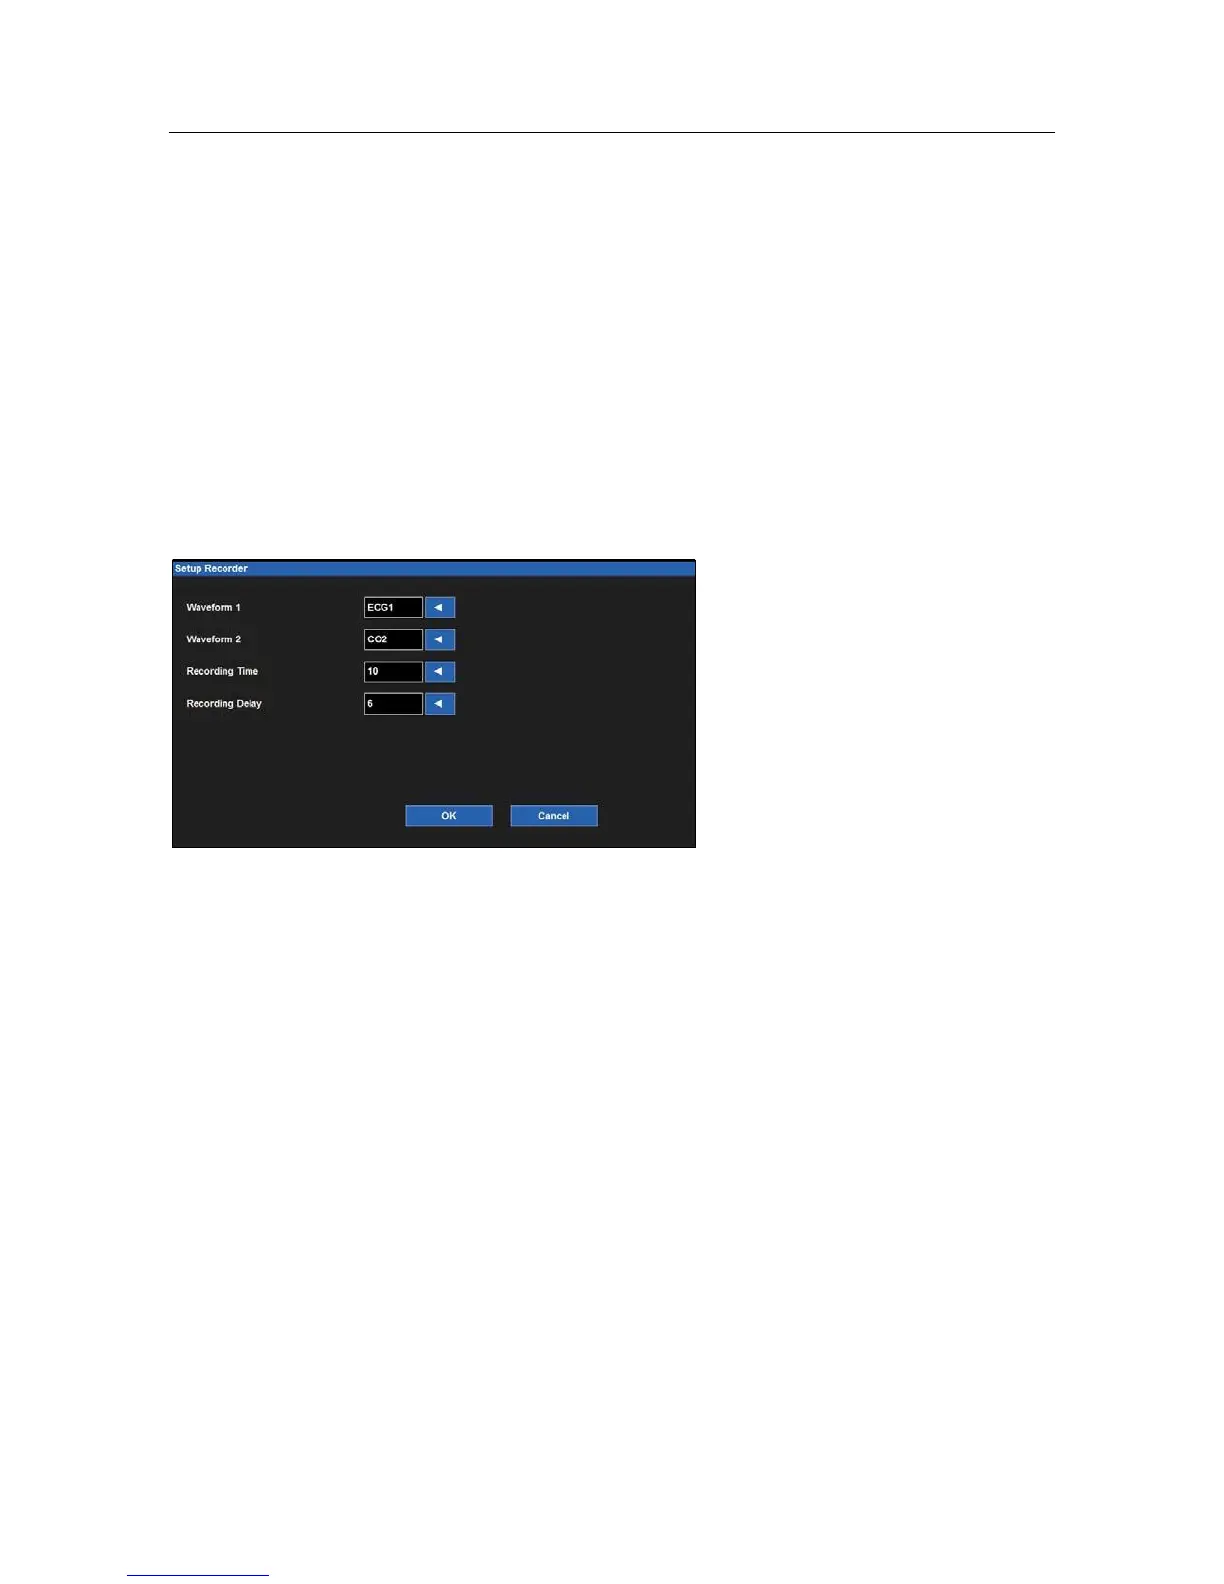
Recorder
The Surveyor S12 and S19 patient monitors may have a two-channel thermal bedside recorder as a purchasable
option. The Recorder dialogue provides configuration for which two waveforms print, the length of the recording
strip, and the recording delay.
Example Setup Recorder Dialogue
To select the two waveforms to print on the bedside recorder (optional):
1.
Select the Setup quick action key on the main screen to access the Setup dialogue.
2.
Select the Recorder button to access the Setup Recorder dialogue.
3.
Locate the Waveform 1 (prints in top waveform position of the thermal recorder printout) label.
4.
Locate the Waveform 2 (prints in the bottom waveform position of the thermal recorder printout) label.
5.
Select the arrow to display the drop down list box (Choices are dependent upon monitor configurations).
6.
Select the waveform desired.
7.
Select the OK button to enter that change OR select the Cancel button to cancel the changes.
To select the recording length to print on the bedside recorder (optional):
1.
Select the Setup quick action key on the main screen to access the Setup dialogue.
2.
Select the Recorder button to access the Setup Recorder dialogue.
3.
Locate the Recording Time label.
4.
Select the arrow to display the drop down list box (Choices are 5 seconds, 10 seconds, and 16 seconds).
5.
Select the recording time desired.
6.
Select the OK button to enter that change OR select the Cancel button to cancel the changes.
 Loading...