40
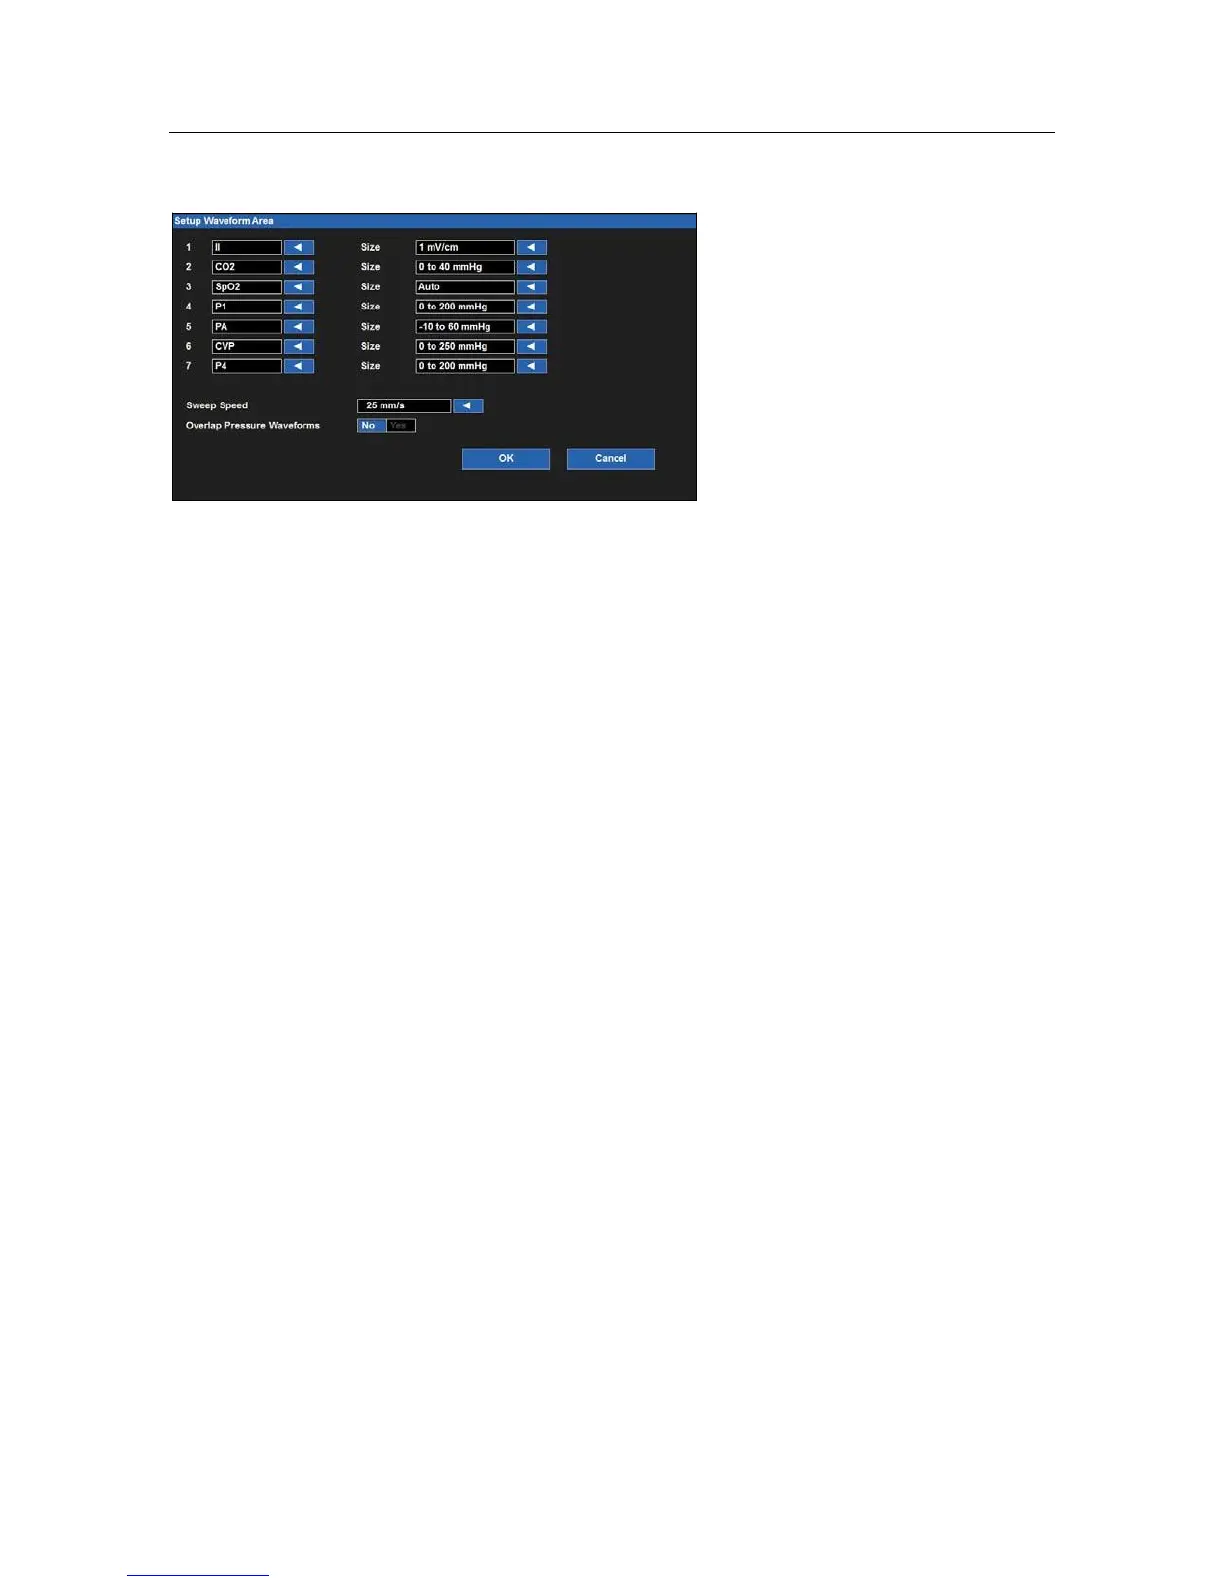
Example Setup Waveform Area Dialogue
To select a waveform for display on the main screen:
1.
Select the Setup quick action key on the main screen to access the Setup dialogue.
2.
Select the Waveforms button to access the Setup Waveform Area dialogue.
3.
The numbers 1-7 indicate waveform position on the main screen.
a.
Waveform position #1 is always reserved for an ECG tracing..
b.
Waveform positions #4-7 are always reserved for an invasive pressure tracing
c.
The waveform selections are based on monitor options, ECG lead set, and the parameters that have
been enabled/disabled in the Setup Parameters dialogue.
4.
Choose the desired waveform position.
5.
Select the arrow to display the drop down list box of available waveform choices.
6.
Select the OK button to enter that change OR select the Cancel button to cancel the changes.
To select a waveform size for display on the main screen:
1.
Select the Setup quick action key on the main screen to access the Setup dialogue.
2.
Select the Waveforms button to access the Setup Waveform Area dialogue.
3.
Locate the Size label next to the parameter requiring adjustment.
4.
Select the arrow to display the drop down list box of available waveform size choices.
a.
The choices available are based on the specific waveform parameter.
b.
Select the desired waveform size.
5.
Select the OK button to enter that change OR select the Cancel button to cancel the changes.
To select the sweep speed for waveforms displayed on the main screen:
1.
Select the Setup quick action key on the main screen to access the Setup dialogue.
2.
Select the Waveforms button to access the Setup Waveform Area dialogue.
3.
Locate the Sweep Speed label.
4.
Select the arrow to display the drop down list box (Choices include 6.25 mm/s, 12 mm/s, and 25 mm/s).
5.
Select the sweep speed desired.
6.
Select the OK button to enter that change OR select the Cancel button to cancel the changes.
 Loading...