ATTENTION!
To install the device use the fasteners provided in the kit so as not to damage its enclosure and sealing!
1. Disconnect the battery.
2. Insert the device in a spare room in the dashboard (standard diameter – 85 mm)
3. Fasten the U-shaped bracket to the mounting screws of the device on the back side of the dashboard and tighten the
mounting nuts firmly fixing the device to the dashboard. It is assumed that the dashboard is not more than 15 mm
thick. If your dashboard exceeds this limit, cut off the ends of the bracket to secure the device.
Attention! If installation of the device requires disassembling of some elements of the dashboard, refer to the manual of
your water vehicle to determine the correct sequence of actions when dismantling and installing the interior
elements.
2. Installation and connection
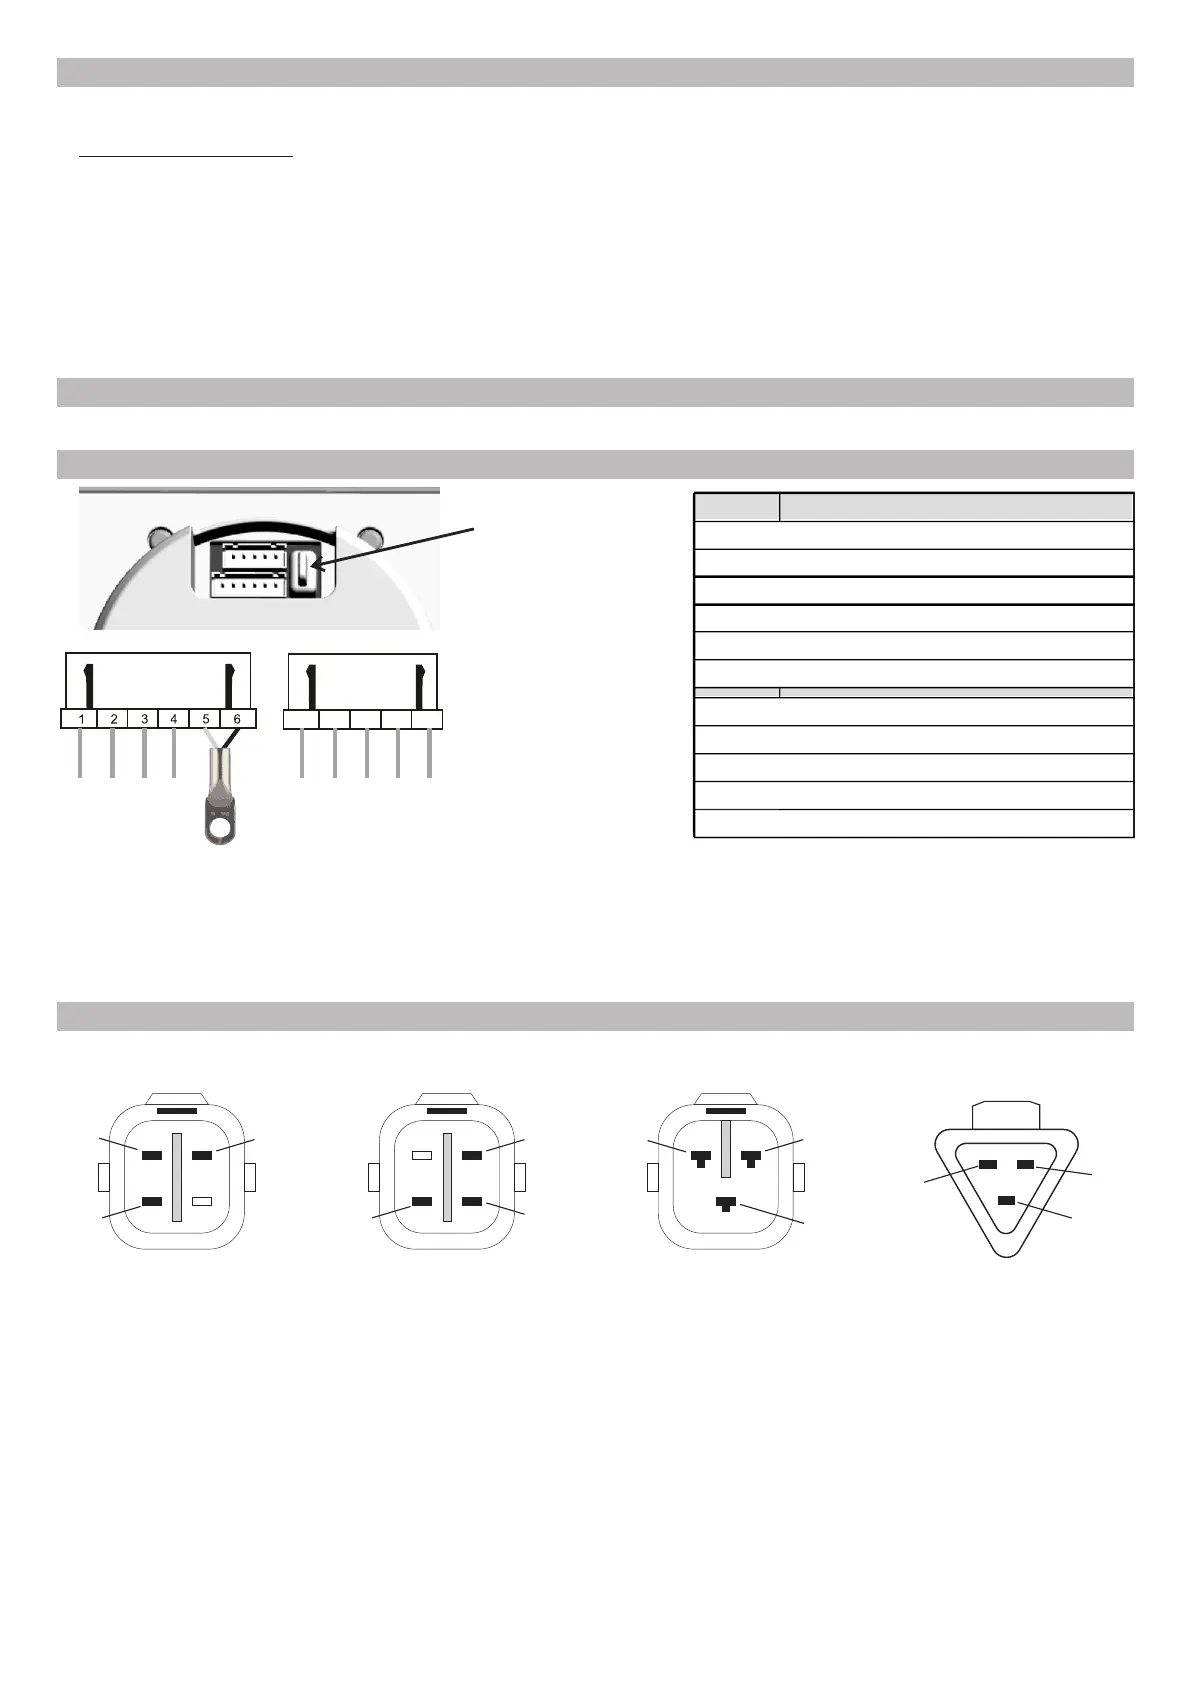
2.1. Cables and connectors
To connect Multitronics CL-950E to the diagnostic connector of the corresponding engine manufacturer, it is equipped
with various cables and connectors (you should choose the appropriate cable type when purchasing the device).
7 8 9 10 11
6-pin connector 5-pin connector
2.2. Multitronics CL-950E connector pinout
diagnostic connector (male)
HONDA
(view from the contacts side)
K-line
+12V
(batt)
GND
diagnostic connector (male)
SUZUKI
(view from the contacts side)
K-line
+12V
(batt)
GND
diagnostic connector (female)
YAMAHA
(view from the contacts side)
K-line
+12V
(batt)
GND
2.3. Types of diagnostic connectors
If the engine is equipped with a different diagnostic connector, it is possible to "twist" contact to contact in accordance with
their assignments (see detailed information in the connection diagrams).
outside temperature sensor (*) - option.
Can be used to take temperature readings of the:
- engine (mounted directly to the engine, only for carburetor engines);
- seawater (mounted outside the boat in water, the upper part of the sensor with a wire mustn’t be submerged in
water);
- air inside the cabin of the boat (mounted inside the cabin).
After connection is completed, select the established connection option in: Settings display-Sources-Signature Temp.
diagnostic connector (male)
EVINRUDE
(view from the contacts side)
RX
TX
GND
pin № purpose
1 trim (motor angle sensor)
2 +12V battery
3 K-line / fuel sensor (for carburetor)
4 GND (mass)
5 temperature sensor (signal)
6 temperature sensor (mass)
7 ignition lock / speed sensor
8 fuel sensor
9 CAN-Low
10 CAN-High
11 injection plug / interrupter (for carburetor)
-5-
temperature sensor*option
protective cover for
the mini-usb
(to update the software
and configure the device
from a computer)