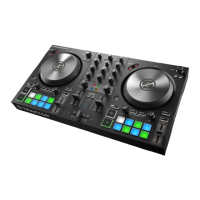
7.4 Using the LOOP Section
The Loop section.
The Loop section holds all necessary controls for setting and modifying Loops in your tracks.
The Loop section consists of two buttons in the middle and two push encoders on the sides.
From left to right, you find the following controls: Loop MOVE encoder, LOOP IN button, LOOP
OUT button, and Loop SIZE encoder.
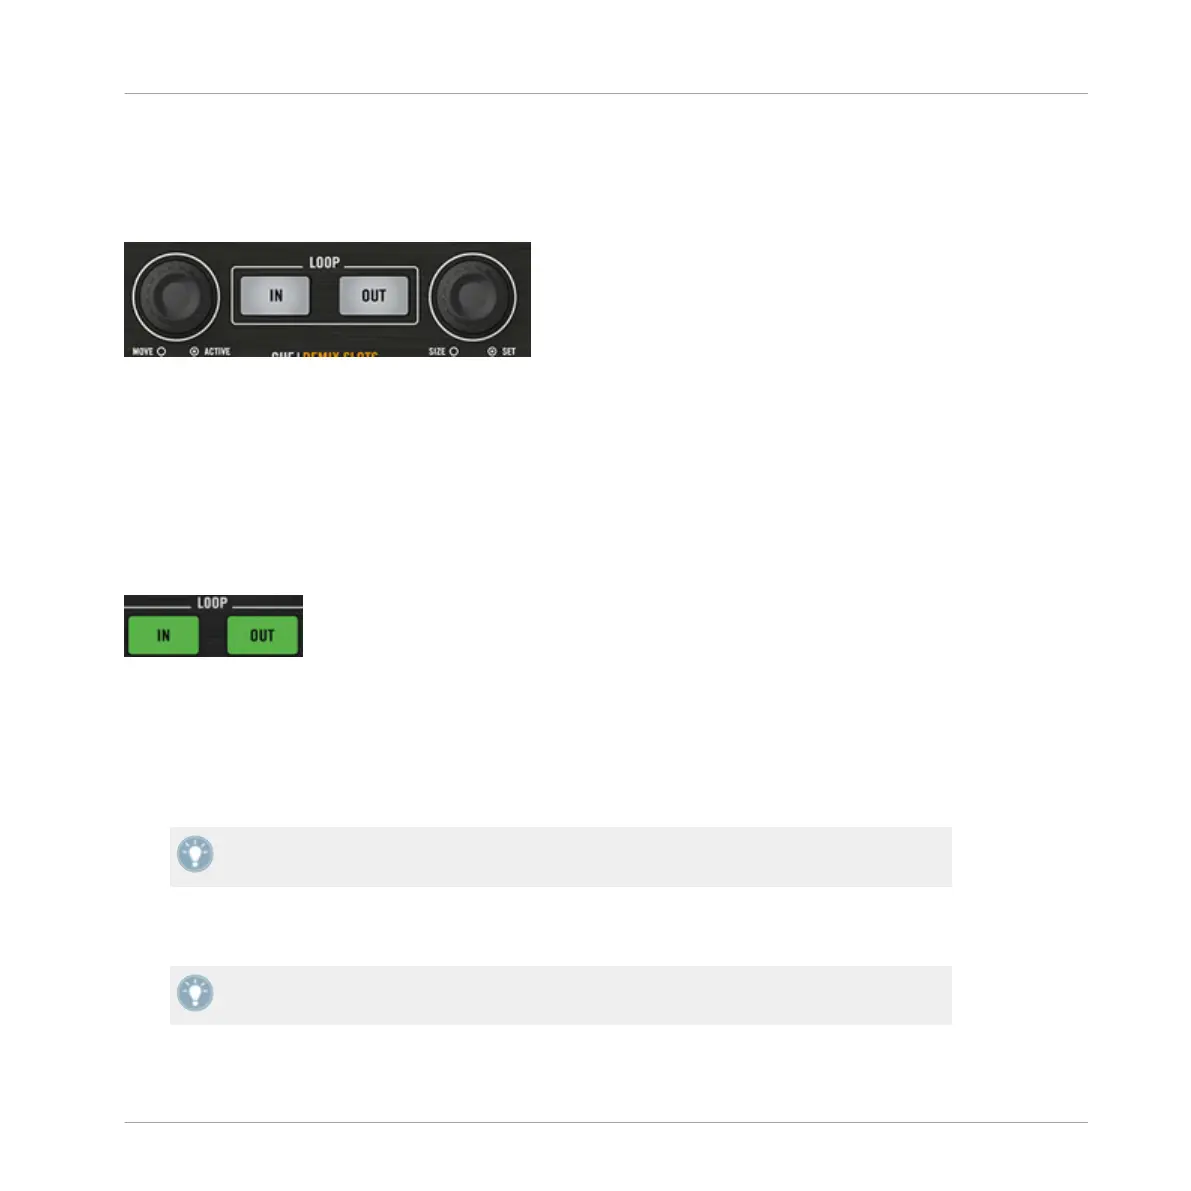
7.4.1 LOOP IN and LOOP OUT Buttons
The LOOP IN and LOOP OUT buttons.
The LOOP IN and LOOP OUT buttons
allow you to manually define a Floating Loop in the play-
ing track.
Pressing the LOOP IN button sets a Floating Cue Point at the current playback position. This
Floating Cue Point will serve as Loop In Point as soon as you press the LOOP OUT button.
Hint: The LOOP IN button is the perfect tool for setting a Floating Cue Point without stop-
ping the playback, whether you set a Loop Out Point later or not!
Pressing the LOOP OUT button sets a Loop Out Point at the current playback position and acti-
vates a Floating Loop between the previously set Floating Cue Point and this Loop Out Point.
You can reuse the same Loop In Point for several Loops: simply set a new Loop Out Point,
and the previous Loop In Point will be used for the new Floating Loop!
Hardware Control Reference
Using the LOOP Section
Traktor Kontrol S2 - Manual - 108