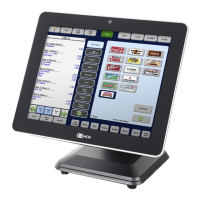
NCR P1235 e*SmartClock Installation Guide, Ver. 1.1
US-IT Restaurant Architecture Team
Page 8 of 37 12/6/16
7. Installation of e*SmartClock Solution
The e*SmartClock is wall mounted. Some important information about the installation are listed as follows
• Please follow the pre-checks as mentioned in section 3 above.
• Clock should be out of customer view
• Location visible to manager’s as they run their shifts
• Not in a location with heavy traffic to minimize bumping by bun carts, delivery carts, etc.
• In an environmentally friendly area of restaurant – not near heat, water or grease source
• Not above/near an oven
• Not near hand sink, washing sink, spray hose for shake/sundae machine
• Not near a vat
• Keep ADA requirements in mind regarding height
• May be restrictions based on placement of clock and other items placed on that wall e.g. Ansul pulls,
thermostats, fire alarms, etc.
See Appendix D
for BR Metal Technology Bracket Mount Details and illustrations. And if issues are encountered
within this section, please refer to the Trouble Shooting Guide
7.1 Installation of Network Cable
Step Step Description Pictures
a. Run network cable from the device location
to the Primary POS Network switch.
b. Connect network cable to any available slot
on the Primary POS Network switch.
c. Label both ends of the network cable as
‘e*SmartClock’ or ‘eSC’.
d. Connect the patch cable to the
e*SmartClock, then attach the other end,
using proper cable management and
standards, to an open port on the POS
switch
Note: If no open ports are available on the
primary POS Switch:
• Do not plug into the Backup POS Switch.
• Contact your Help Desk Installation Support
- you will need to purchase a new switch
• Proceed with the installation; a revisit will
be required to connect e*SmartClock to the
new POS switch.

 Loading...