NCR P1235 e*SmartClock Installation Guide, Ver. 1.1
US-IT Restaurant Architecture Team
Page 13 of 37 12/6/16
7.3 Installation of Receipt Printer
Installation of a printer is optional. Check that all the Printer-related contents have been included for installation.
e*SmartClock printer solution contents EPSON TM-L90P USB/Parallel printer, printer power cable with brick, and
Printer Bracket. The NCR P1235 does not support a Powered USB printer.
Step Step Description Pictures
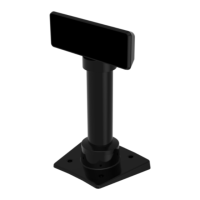
Locate the Printer Bracket
mounting location.
• Leave enough room to allow the printer
to be opened to change paper.
• Do not mount unit over a heat or
moisture source.
• The adjustable bumpers may be
removed.
Note: The newer printer bracket will not
have bumpers.
backing:
• Locate ¼ x 3 inch screws.
• Drill screw holes using a ½ inch drill bit.
If not mounting into a solid backing:
• Locate Toggle Bolt and ¼ x 2.5 inch
Phillips head screw.
• Drill screw hole and insert Toggle Bolt.
Secure the bracket on the wall and turn the
screws tightly to lock the bracket in.
The top hole/slot is for adjusting the angle of
the printer.
Use thumb knobs to tighten, if available
Remove the plastic cover on the bottom of
 Loading...