Stora Application
112
NETGEAR Stora
To enable Power Timer:
1. Select Preferences > Administration > Power Timer.
2. Select the Enable power timer check box.
3. Use the Action and Time drop-down menus associated with each day of the week to set
the schedule.
Note: Scheduling Stora to turn off interrupts data transfers, and pending
backup jobs do not run.
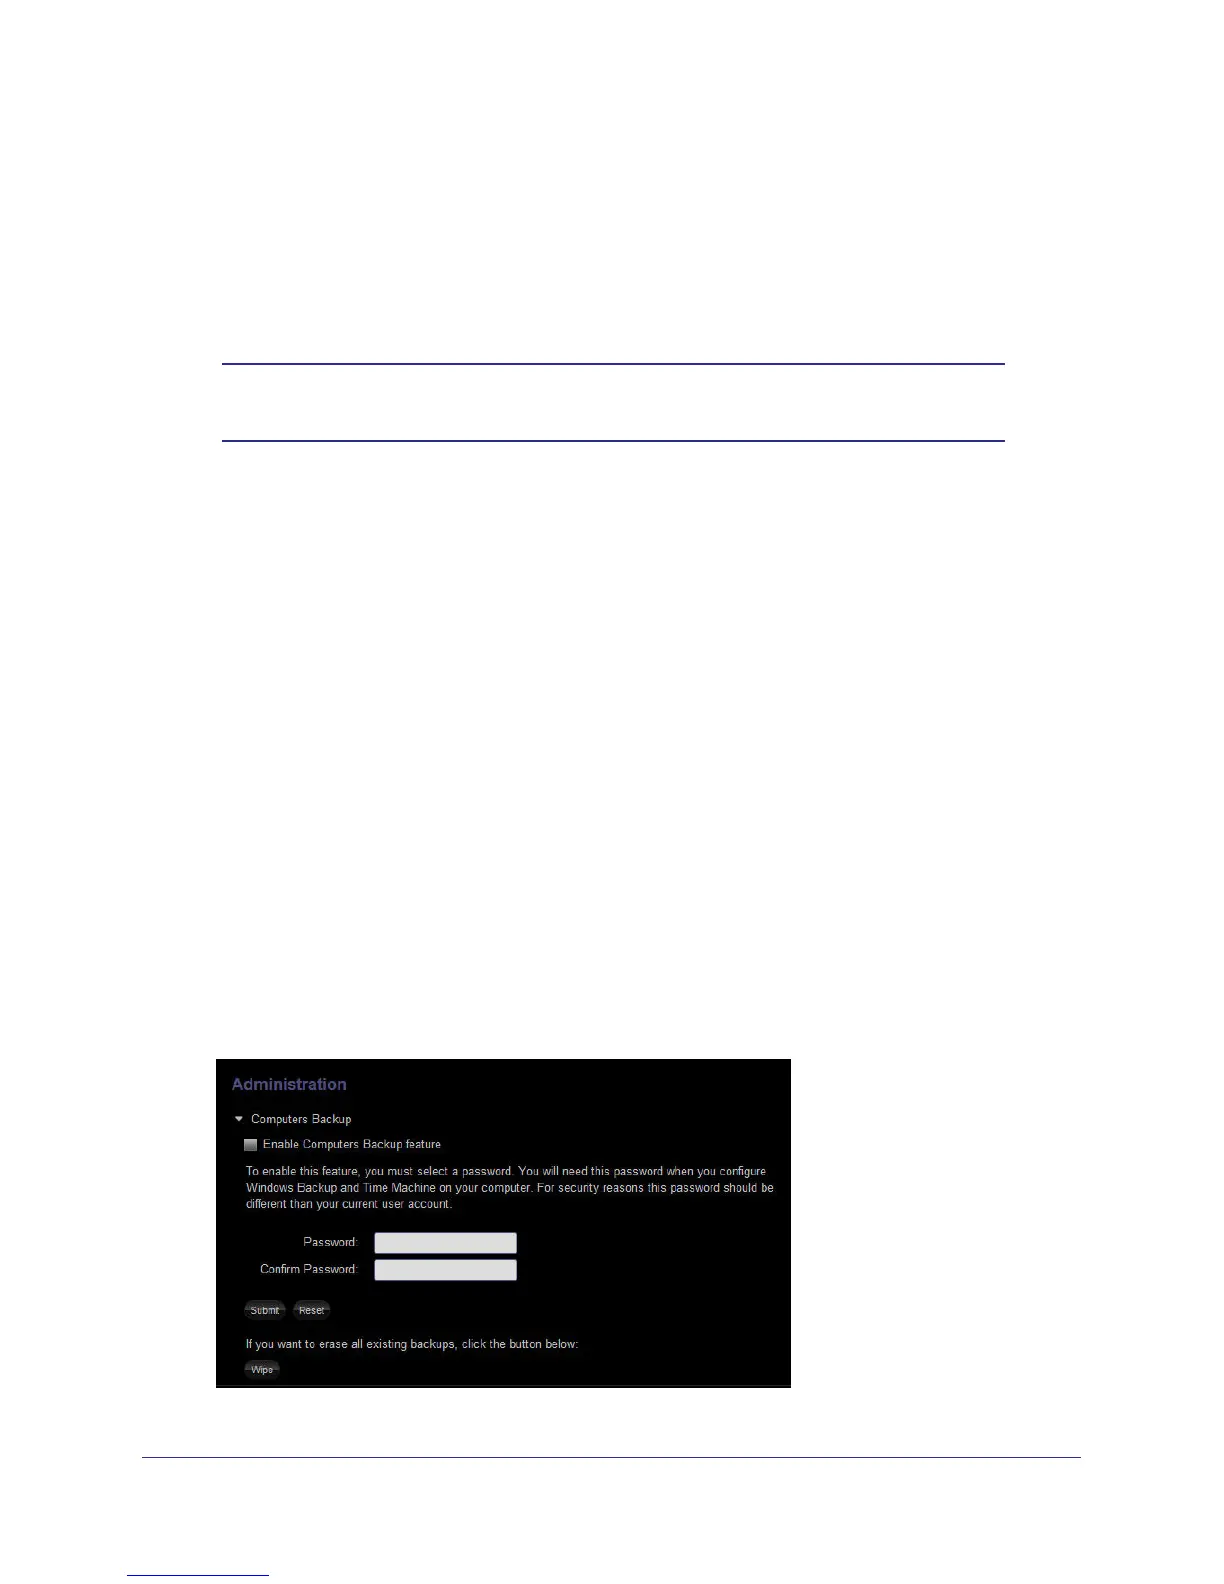
Computers Backup
Your can configure Stora to be the destination for Windows Backup and Mac OS X Time
Machine backups.
When you enable this feature, a special hidden section on Stora is assigned to contain the
backed-up files. This section is not visible to the user because the contents are not usable by
the user directly and can be used only for restoring backups.
Vista Backup users can choose to go through the setup tutorial after installing the desktop
applications or at a later time by selecting Vista Backup in the Stora Desktop Applications
program group. The tutorial provides step-by-step instructions about setting up Vista Backup.
Time Machine backup support is available for Max OS X 1.5 and later. Time Machine backup
users can set up Time Machine backups by selecting Applications > Stora Desktop
Applications > Configure Time Machine. A wizard provides step-by-step instructions about
setting up Time Machine backups.
To enable Computers Backup:
1. Select Preferences > Administration > Computers Backup.
The Computers Backup screen displays.
2. Select the Enable Computers Backup check box.