Mill functions
8-6
N
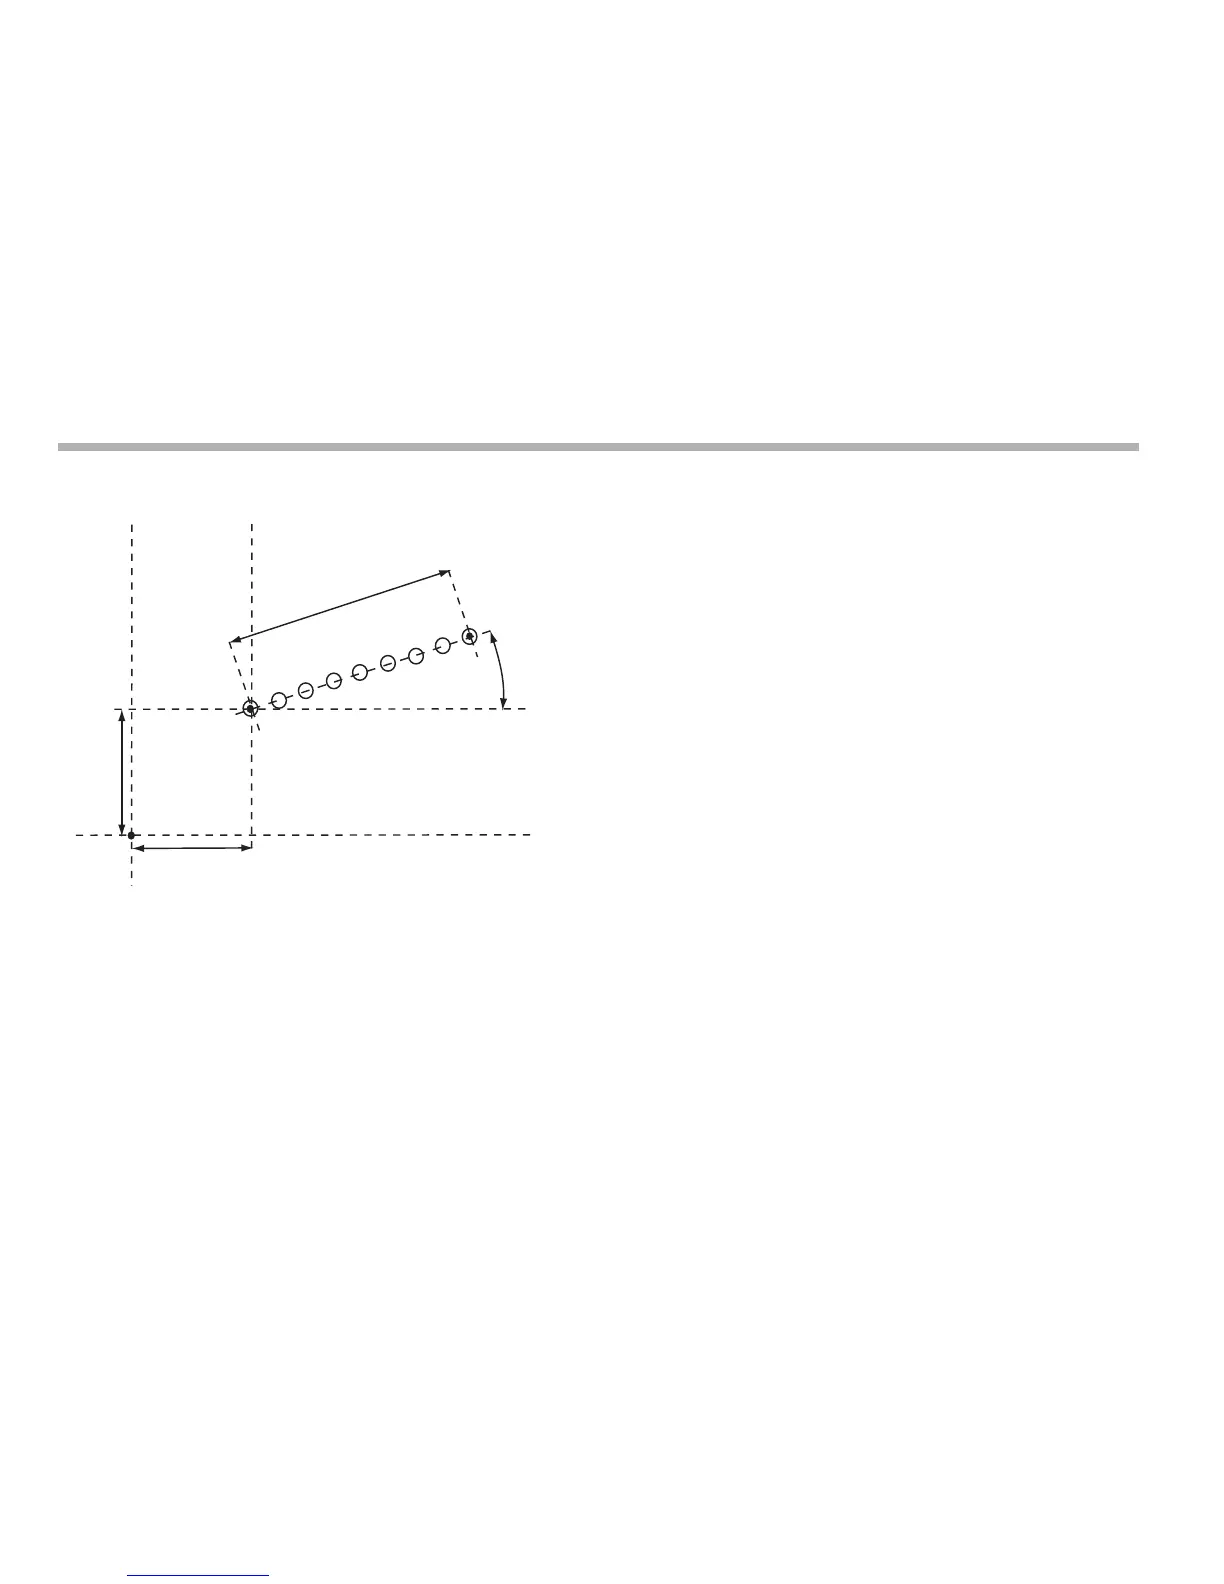
Example
Setting the parameters
1. Press [F1] or [F2] to turn the function on.
(For three axis units only)
The function display shows ‘p’, and the axis displays show
the Plane in which the holes are to be machined.
2. Press the up or down navigation key to cycle through the
three settings X,Y; X,Z or Y,Z.
3. Press the right navigation key to move to the next step.
The function display shows ‘st’, and the axis displays
show the coordinates of the Starting Point.
4. Press the Select Key next to the ‘X’, ‘Y’ or ‘z’, to edit each
value as required.
5. Press the right navigation key to move to the next step.
The function display shows ‘len’, and the top display
shows the Line Length.
6. Enter a new value if required.
For example: Press [3] [5] [0] [ent] to enter a line length of
350.
7. Press the right navigation key to move to the next step. The
function display shows ‘n’, and the top display shows the
Number of Holes.
8. Enter a new value if required.
For example: Press [9] [ent] if you want to machine 9 holes.
9. Press the right navigation key to move to the next step.
The function display shows ‘a’, and the top display shows
the Line Angle.
10. Enter a new value if required.
For example: Press [2] [0] [
ent] to enter a value of 20
degrees.