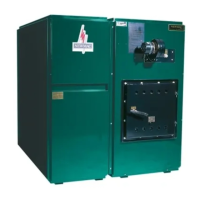
OIL BURNER INSTRUCTIONS
BURNER CARE
This burner is fully automatic in operation. All adjustments should be made by a qualified technician.
Keep the burner free from excess dirt and moisture. Oil leaks should be tended to immediately. If the
burner motor has oiler openings, the motor should be given a few drops of SAE 20 non-detergent oil at
least two or three times a year. No other parts require lubrication.
CAUTION: Do not use gasoline, crankcase or any oil containing gasoline. Do not tamper with the
unit or controls--call the serviceman. Do not attempt to start the burner when excess oil has
accumulated, when the unit is full of vapor, or when the combustion chamber is very hot. Do not
start the burner unless the cleanout doors are secured in place. Do not burn garbage or paper in
the heating system. Never leave combustible materials such as paper or rags near the unit.
OIL BURNER INSTALLATION
Install the oil nozzle in the burner firing assembly, and check the adjustments. See Fig. 6 and Table 6 for the
correct electrode settings. These settings are critical for proper burner operation. Some burner manufacturers
have a gauge available for setting the electrodes. Most burners with adjustable heads have preset stops to
ensure the distance from the nozzle face to the face of the retention head (“Z” dimension) is correct. Set or
check the air tube insertion depth according to Fig. 7 and Table 6. This is the distance from the face of the
burner-mounting flange to the face of the retention head. Mount the oil burner on the lugs of the burner plate
carefully centering it in the combustion chamber port. Use TABLES 1 (NH3) or 3 (LFR), GENERAL
INSTRUCTIONS for preliminary air settings for the burner.
BURNER SET-UP AND ADJUSTMENT
The installer must use a suitable draft gauge, smoke tester, carbon dioxide tester, 0-750°F stack
thermometer, 0-200 psi oil pressure gauge, 0-30 in. Hg. vacuum gauge, and 0-220°F thermometer to
properly set-up the burner.
1. Turn on supply power and set the thermostat above room temperature.
2. Open all oil lines and valves.
3. Make sure the oil pump by-pass plug is correctly installed for a one or two pipe system. Bleed any air
from the oil pump (refer to pump manufacture's instructions).
4. Adjust the burner air until a #1 smoke or less is reached using a smoke tester. If a smoke
tester is unavailable, slowly close the air band until the fire becomes smoky. Slowly increase the air
until a small amount of smoke is observed at the flame tips.
If the burner fails to start, check (a) oil supply, (b) ignition electrodes and transformer, (c) cad cell.
If the burner goes off on safety, do not push the reset button on the primary control for at least 10
minutes.
Do not push the reset button more than once before correcting the cause.
If the burner still does
not start, press the reset on the burner motor.
5. Using a suitable draft meter, adjust the barometric draft regulator to measure the specified flue
pressure. This requires that a 5/16" diameter sampling hole be made between the flue collar and the
draft regulator.
EXTENDED SHUT DOWN PERIODS
When the appliance is not to be used for an extended period of time, set the thermostat at its lowest
value, turn off the main switch and close the oil burner supply valve. If the heating unit room is damp,
protect the burner against dirt and moisture with a light cover. To resume operation, remove the cover
and inspect the burner. Remove any dirt and debris gently to avoid the need to adjustment the air band.
Open the supply valve and turn on the main switch. If the burner fails to operate, see the
MAINTENANCE
& SERVICE
section of this manual.