?
OPRHT70 A0310
F-3
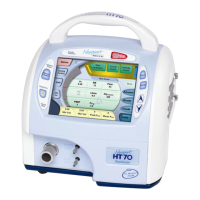
Figure F-3 HT70 Touch Screen (Hospital Domain)
1. Alarms settings / setup screen button. Touching this button brings up the Alarm Setup
screen with all alarm setting controls, including Alarm Loudness and Quickset Alarms.
2. Breath Type Selector. Touching this button toggles the breath type choice. The breath
type will not change until you press the Accept button.
3. Mode Selector. Touching this button scrolls through the mode choices. The mode will
not change until you press the Accept button.
4. NIV Selector. Touching this button toggles between NIV (NonInvasive) ‘On’ and ’Off’. To
accept this change, press the Accept button.
5. Pressure Bar. Indicates dynamic pressure in the patient circuit in green, the High and
Low Pressure Alarm settings in red and the peak pressure of the last breath in green.
6. Help button. Touching this enables a tutorial for each feature on the screen. Touch the
help button then touch any button for an explanation of that feature.
7. Monitored Data buttons. Touching any one of these four buttons opens a screen with a
list of monitored parameter choices to display in that button.
8. Patient Effort Indicator. Indicator flashes green to show a spontaneous patient effort
9. Battery Charge Level Indicator. Shows current “Power Pac” battery pack (blue icon) or
internal Backup Battery (red icon) charge level.
10. Message Display. This area shows all informational and alarm messages. During an
alarm violation this area will light red for High Priority, amber for Medium Priority and
yellow for Low Priority alarms and display the alarm message.
11. Screen Title. Indicates which screen is currently displayed and active.
12. Screen Selections. Touching any one of these buttons will take you to the new screen.
13. Parameter Setting buttons. Touching any one of these buttons will activate the
parameter to allow adjustments.
14. Domain button. The HT70 can be set up in one of three Domains: Basic, Transport and
Hospital. Touch to scroll through the Domain choices. Press Accept to confirm choice.
15. AutoLock/Unlock button. This button is only visible if Auto Lock is enabled and the
panel is locked. Touch and hold for 3 seconds to unlock touch screen buttons.
NOTE: While operating on battery power, when Power Save is enabled and all alarms are
cleared the touch screen will go to sleep after 2 minutes. Just touch the screen to bring it back
into view.
1.
8.
9.
10.
11.
12.
14./15.
13.
2.
3.
4.
6.
7.
5.
 Loading...