May 2023 19
VI. Installation
Note
Before any permanent installation, make sure all the components are planned and accounted
for, as well as any wiring, cabling, power, mounting, antenna placements, and portal system
access.
Overview
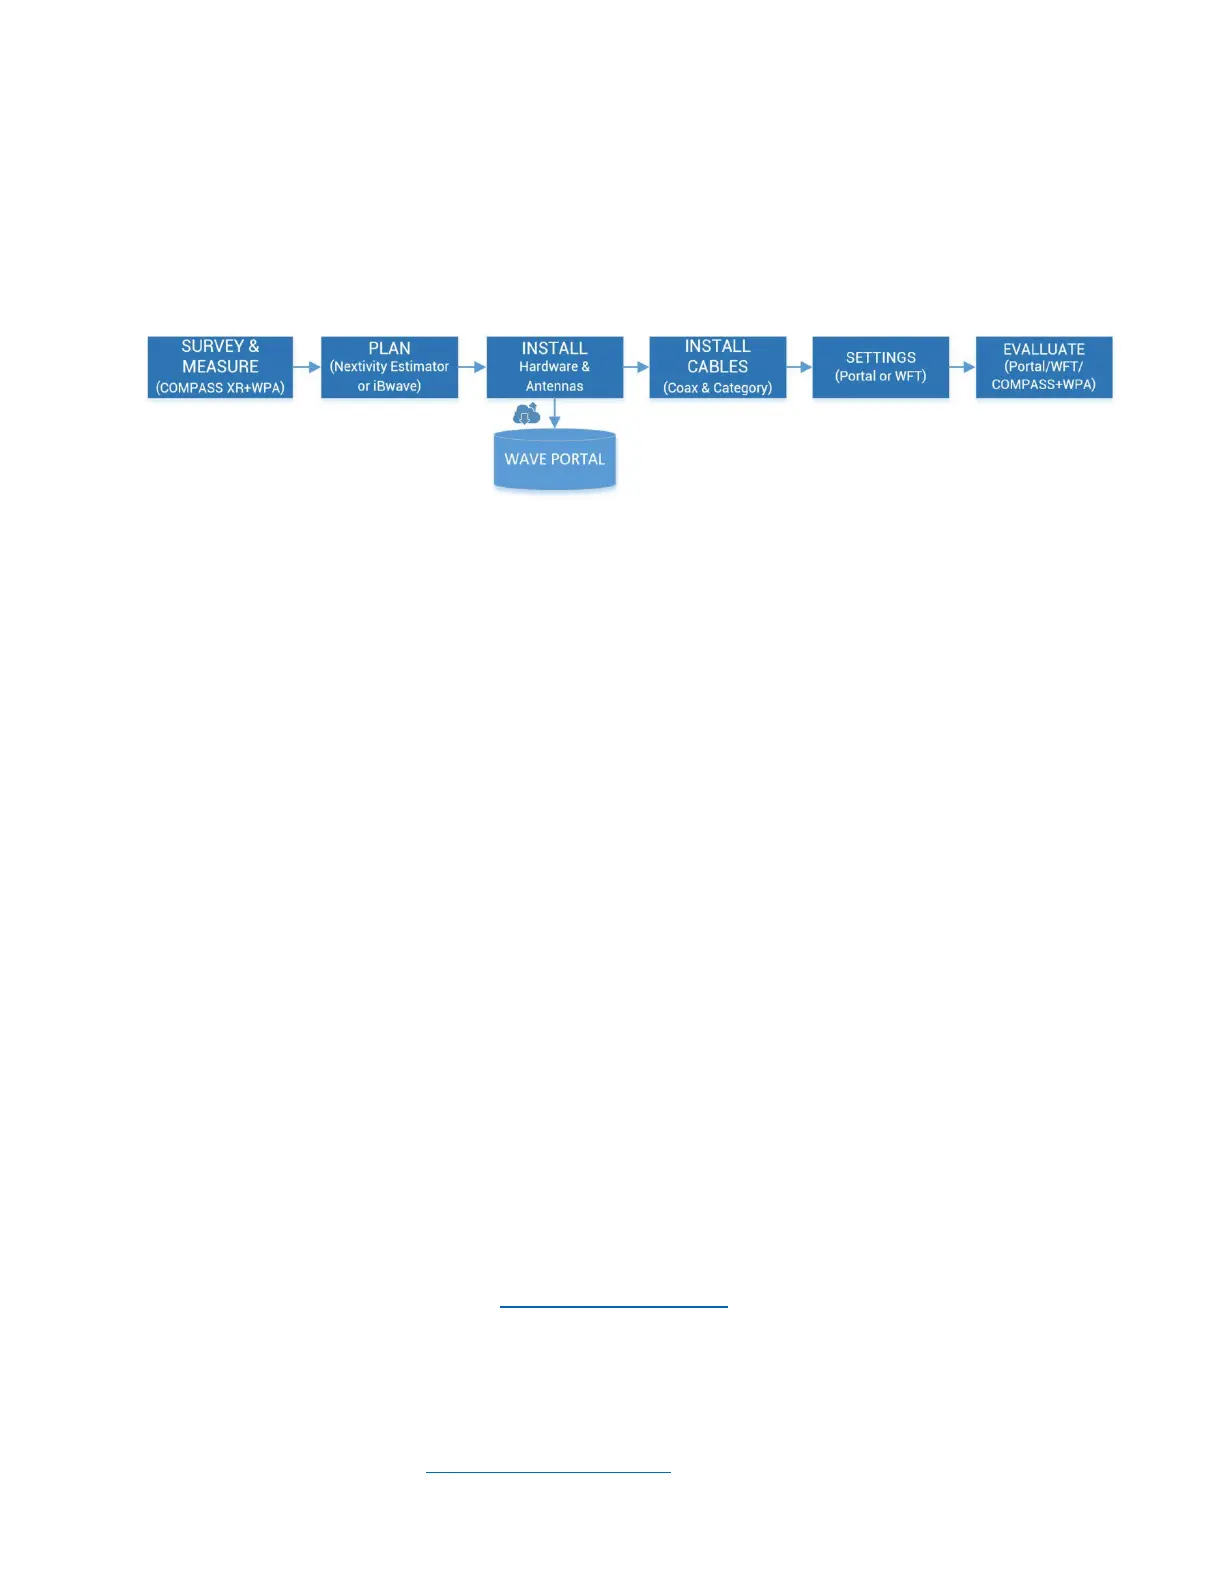
Several things need to be determined as part of installation planning and preparation.
• Perform a Site Survey with a measurement tool, such as the COMPASS XR and WAVE
PRO app, to determine current cellular service issues, candidate donor antenna locations,
and where hardware and cabling may be installed. See COMPASS XR product
documentation for more information.
• Plan the system using the CEL-FI online BOM Estimator or a tool such as iBwave, and your
knowledge of the building floorplan and cable routing options. Where will CEL-FI hardware
be mounted (NU, CUs, antennas, and optional HUBs or Extenders)? This includes a
suitable power outlet for the NUs or HUBs. Visit the Nextivity Partner Portal or CEL-FI
University for more information.
• Install all system hardware according to the plan.
• Cable the system, including NU-CU category cables, and donor and service antennas and
cables.
• Connect the system to the cloud and commission it on the WAVE Portal (New Systems
page) or use the many features in the WAVE Field Tool (WFT) Windows PC program.
• Use the hardware LEDs, troubleshooting table in this guide, and the WAVE Portal to
resolve any issues.
• Monitor and manage your system remotely using the WAVE Portal.
Note
For signal surveys, or to find candidate locations for donor antennas, or aim donor antennas,
we recommend Nextivity’s COMPASS XR tool and WAVE Pro app (WPA). Ask your distributor
for more information or visit us at www.nextivityinc.com
Note
IBWAVE or the Nextivity BOM Estimator design tool (or other RF planning tools) are not
required but are a good way to ensure the best performance outcomes. iBwave vex and
template files may be found on the Nextivity Partner Portal pages. There BOM Estimator tool
may be accessed through Nextivity Partner Portal.
 Loading...