Menu 1.3.1 - heating
Increases or decreases in the accommodation temper-
ature can be scheduled here for up to three time peri-
ods per day. If a room sensor is installed and activated
the desired room temperature (°C) is set during the
time period. Without an activated room sensor the
desired change is set (of setting in menu 1.1). One step
is usually enough to change the room temperature by
one degree, but in some cases several steps may be
required.
6&+('8/,1* +($7,1*
DFWLYDWHG
VFKHGXOH
V\VWHP
VFKHGXOH VFKHGXOH
DOO
PRQ
WXHV
ZH
WKXU
IUL
VDW
VXQ
r
7LPH SHULRG $GMXVWLQJ'D\
$FWLYDWHG 6FKHGXOH 6\VWHP
&RQIOLFW
Schedule: The schedule to be changed is selected here.
Activated: Scheduling for the selected period is activ-
ated here. Set times are not affected at deactivation.
System: Which climate system the schedule is for is
selected here. This alternative is only displayed if more
than one climate system is present.
Day: Select which day or days of the week the schedule
is to apply to here. To remove the scheduling for a
particular day, the time for that day must be reset by
setting the start time to the same as the stop time. If
the line "all" is used, all days in the period are set for
these times.
Time period: The start and stop time for the selected
day for scheduling are selected here.
Adjusting: How much the heating curve is to be offset
in relation to menu 1.1 during scheduling is set here.
If the rooms sensor is installed the desired room tem-
perature is set in °C.
Conflict: If two settings conflict with each other a red
exclamation mark is displayed.
TIP
If you wish to set similar scheduling for every
day of the week start by filling in “all” and then
changing the desired days.
Caution
If the stop time is before the start time it
means that the period extends past midnight.
Scheduling always starts on the date that the
start time is set for.
Changes of temperature in accommodation
take time. For example, short time periods in
combination with underfloor heating will not
give a noticeable difference in room temperat-
ure.
Menu 1.9 - advanced
Menu advanced has orange text and is intended for
the advanced user. This menu has several sub-menus.
heating curve Setting the heating curve slope.
external adjustment Setting the heat curve offset
when the external contact is connected.
min. flow line temp. Setting minimum permitted flow
line temperature.
room sensor settings Settings regarding the room
sensor.
own curve Setting own heat curve.
point offset Setting the offset of the heating curve at
a specific outdoor temperature.
Menu 1.9.1 - heating curve
KHDWLQJ FXUYH
V\VWHP
RXWGRRU WHPS r&
IORZ WHPSHUDWXUH r&
heating curve
Setting range: 0 - 15
Default value: 9
In the menu heating curve the so-called heating curve
for your house can be viewed. The task of the heating
curve is to give an even indoor temperature, regardless
of the outdoor temperature, and thereby energy effi-
cient operation. It is from this heating curve that the
indoor module’s control computer determines the
temperature of the water to the heating system, flow
line temperature, and therefore the indoor temperat-
ure. You can select heating curve and read off how the
flow line temperature changes at different outdoor
temperatures here.
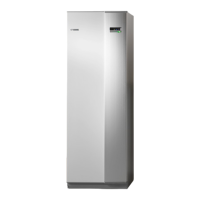
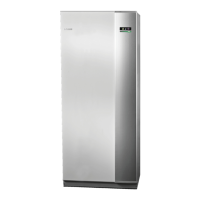
NIBE™ VVM 310Chapter 8 | Control - Menus38