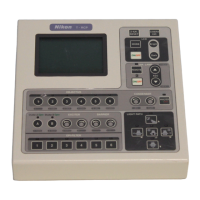
VI Maintenance Menu
3 Testing Hardware of Remote Control Pad
- 62 -
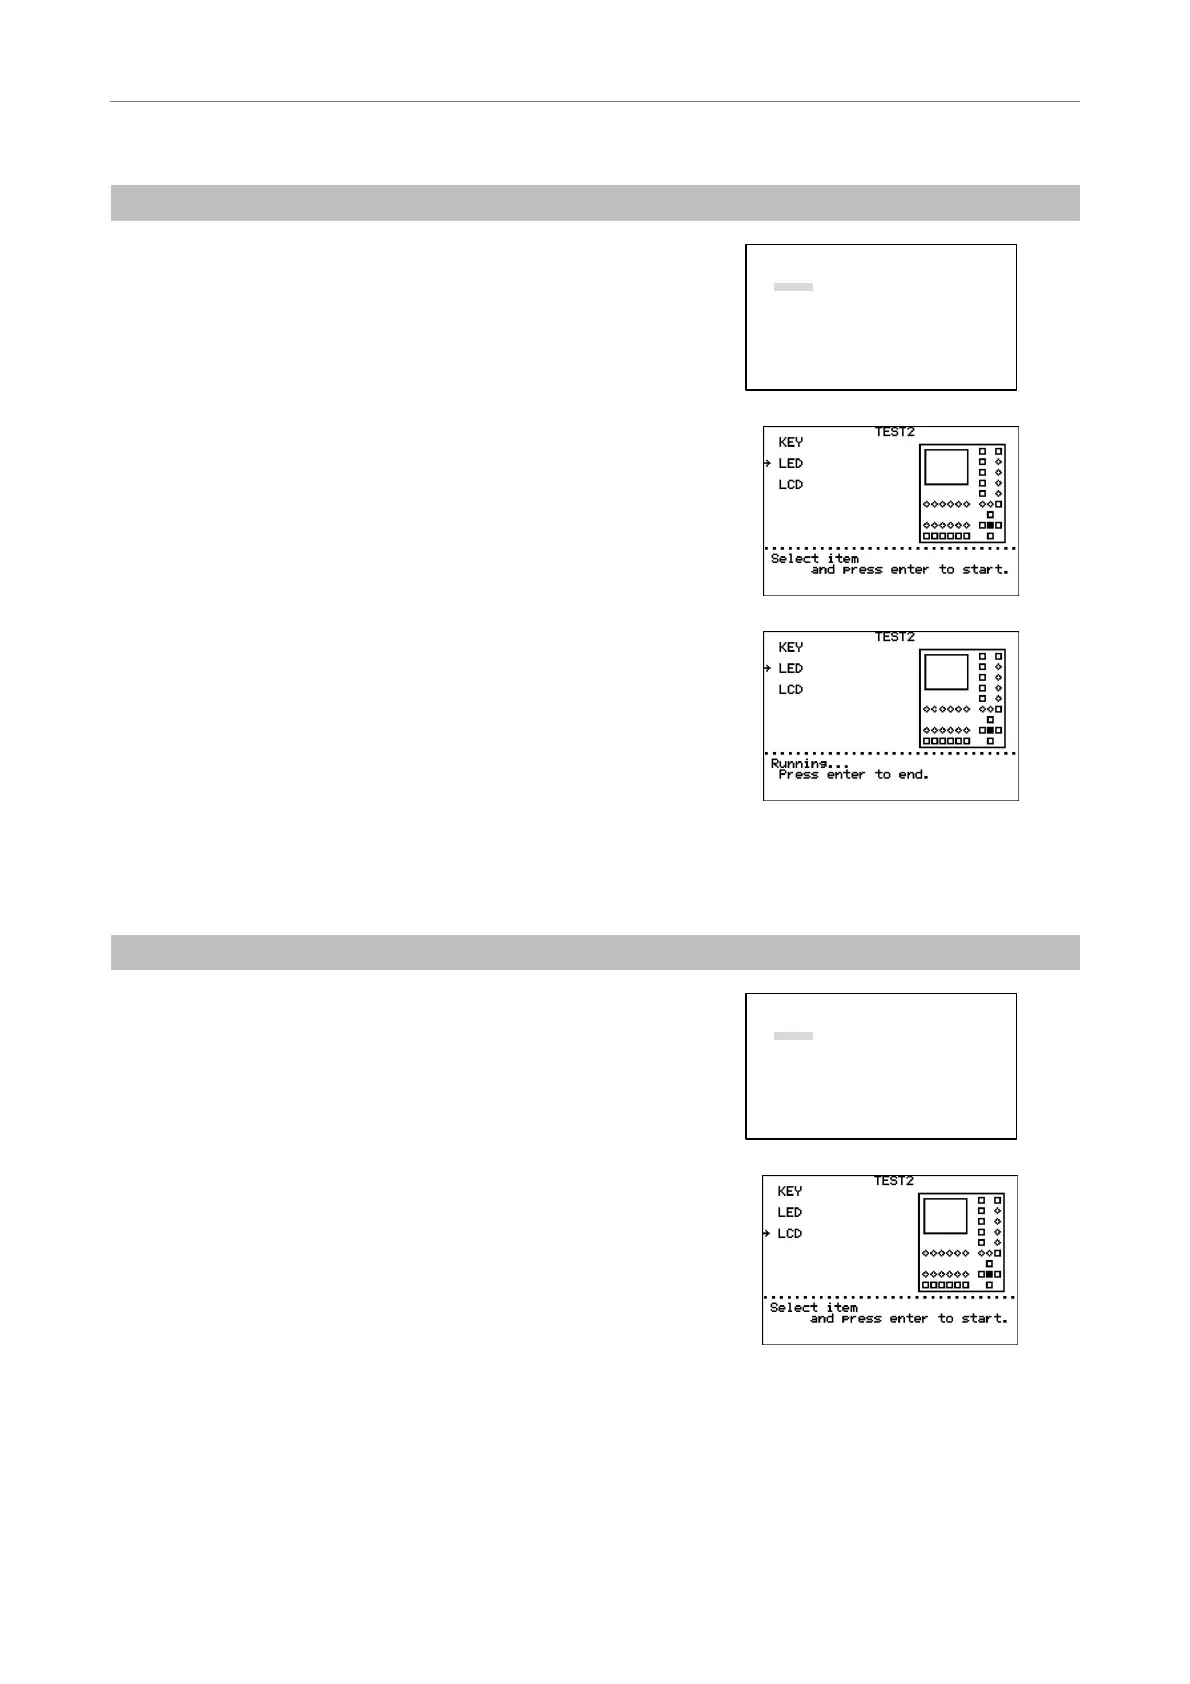
(2) LED ON/OFF Test
1
Turn on the power to the HUB controller while holding
down the MODE key.
After the MAINTENANCE MENU screen appears, release
the MODE key.
Select “TEST 2” using the
S key or the T key and press
the [
] key.
MAINTENANCE MENU
1.Version
2.TEST1
3.
TEST2
4.PAD Data
5.HUB Data
6.Control Data
a.All Control Data
b.Revoiving Nosepiece
c.Condenser Cassette
d.Light Path
e.Filter Block
f.Exciter Filter
g.Barrier Filter
h.AUX Filter
2
Move “→” using the S key or the T key to select “LED.”
Press the [
] key. The LED ON/OFF test will begin.
All the LEDs light green and then go out one by one in
intervals of about 0.5 seconds, except that the ANALYZER
IN/OUT key and LCD ON/OFF key light green, turn to
orange, and then go out.
3
Press the [
] key to end the LED ON/OFF test.
4
Press the MODE key to return to OPERATION screen.
(3) LCD Indication Test
1
Turn on the power to the HUB controller while holding
down the MODE key.
After the MAINTENANCE MENU screen appears, release
the MODE key.
Select “TEST 2” using the
S key or the T key and press
the [
] key.
MAINTENANCE MENU
1.Version
2.TEST1
3.
TEST2
4.PAD Data
5.HUB Data
6.Control Data
a.All Control Data
b.Revoiving Nosepiece
c.Condenser Cassette
d.Light Path
e.Filter Block
f.Exciter Filter
g.Barrier Filter
h.AUX Filter
2
Move “→” using the S key or the T key to select “LCD.”
Press the [
] key. The LCD indication test will begin.
The whole screen turns black and then white repeatedly at
intervals of about 3 seconds.
3
Press the [
] key to end the LCD indication test.
4
Press the MODE key to return to OPERATION screen.