3-6
BioProfile FLEX2 ESM Instructions for Use Manual
3.2.3.1 Biosafety Cabinet Preparation (ambr® 15)
An existing sterile hood or biosafety cabinet may need preparation prior to installation
of ambr® 15 and subsequent integration with FLEX2 + ESM, unlike ambr® 250 which is
installed as a standalone biosafety cabinet. If an access opening on the left-side wall of
the hood does not already exist, one must be drilled in order to route the ESM External
Tubing Set (CF, CW, and PC lines) from the sample cup mounted on the ambr® 15 deck
out to the FLEX2 + ESM.
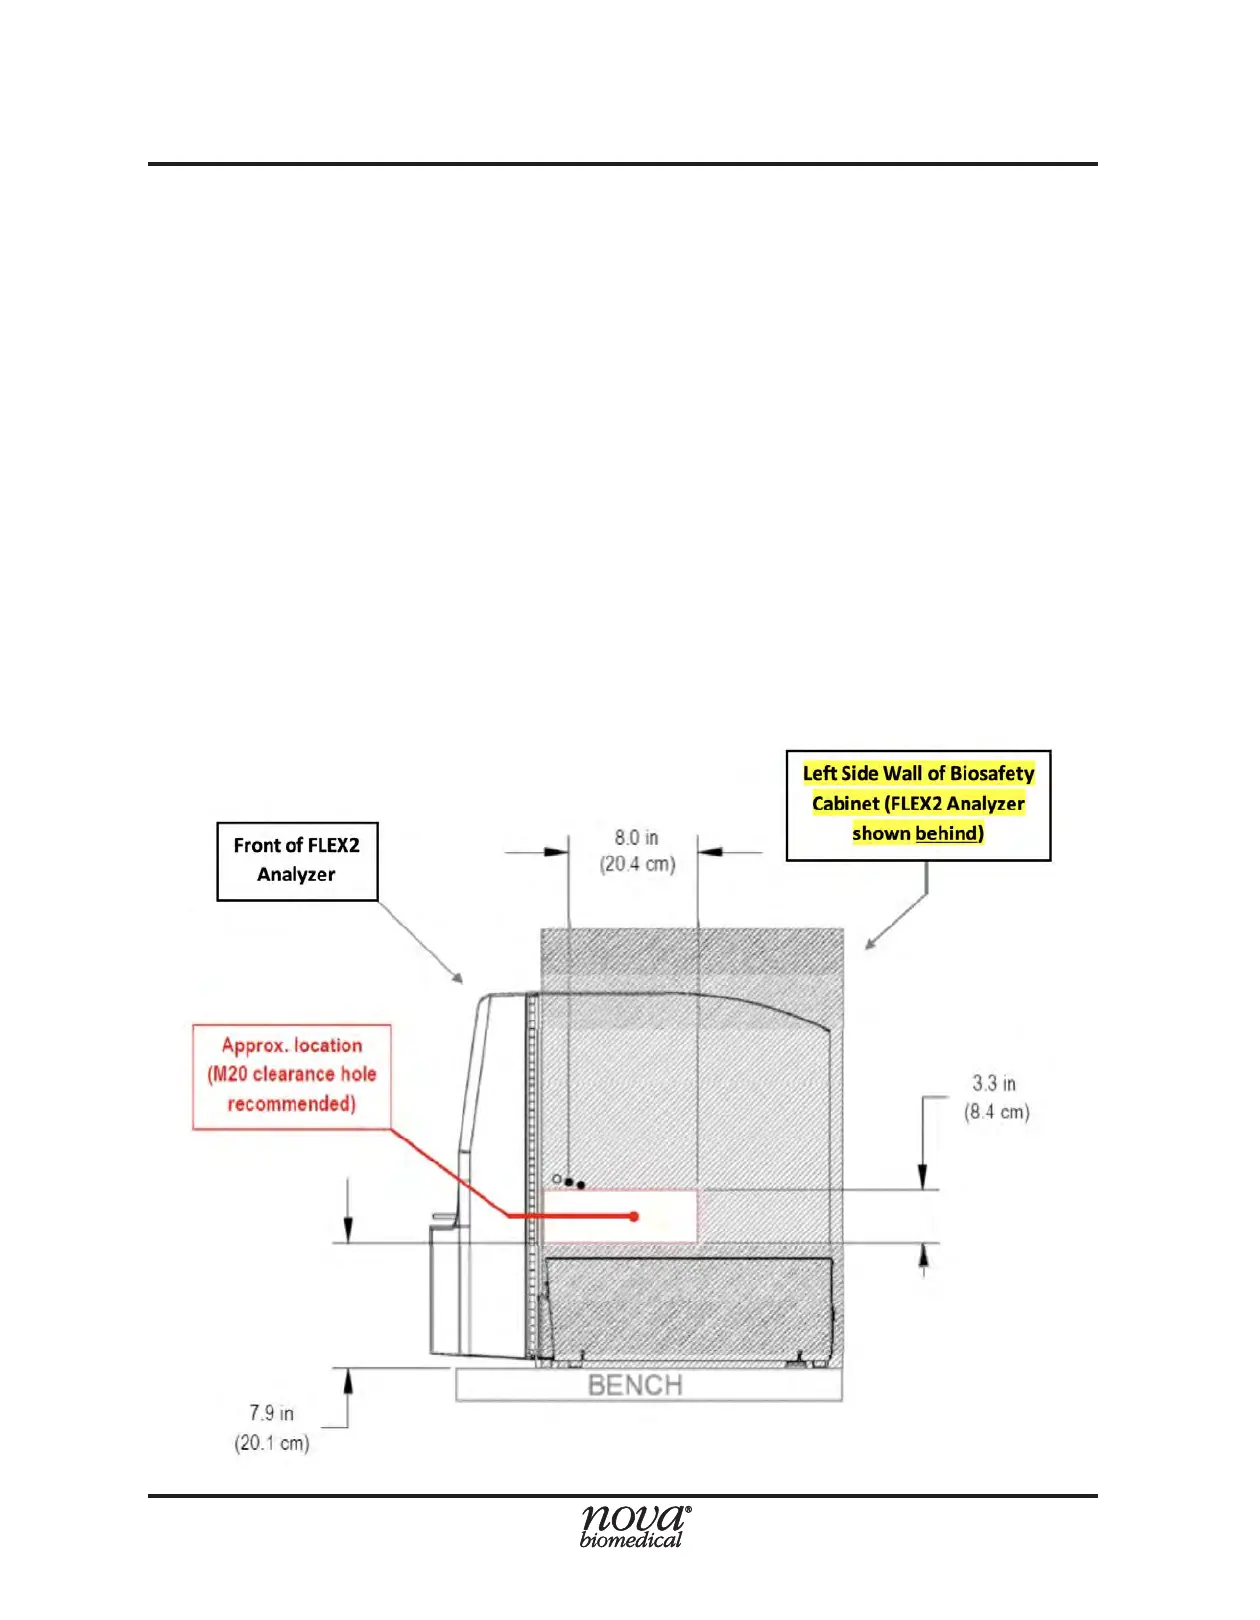
Care should be taken to position the access hole so that it creates the shortest distance
for the Sample (CF) line. As a general guideline, both the height and the depth of the
access hole should be halfway between the inlet port on the right side of the FLEX2 and
the sample cup on the ambr® 15 deck. Use the diagram below as an additional reference.
If desired, a split gland-nut assembly supplied by Nova (PN 60251) may be purchased
separately to seal the access hole. The CF, CW, and PC lines can be routed together
through a single gland-nut assembly.
NOTE: It is the responsibility of the End User to prepare the FLEX2 + ESM bench
space and Biosafety Cabinet access hole(s) prior to ESM installation.
Figure 3.6 Left Side Wall of BioSafety Cabinet