4-6
BioProfile FLEX2 ESM Instructions for Use Manual
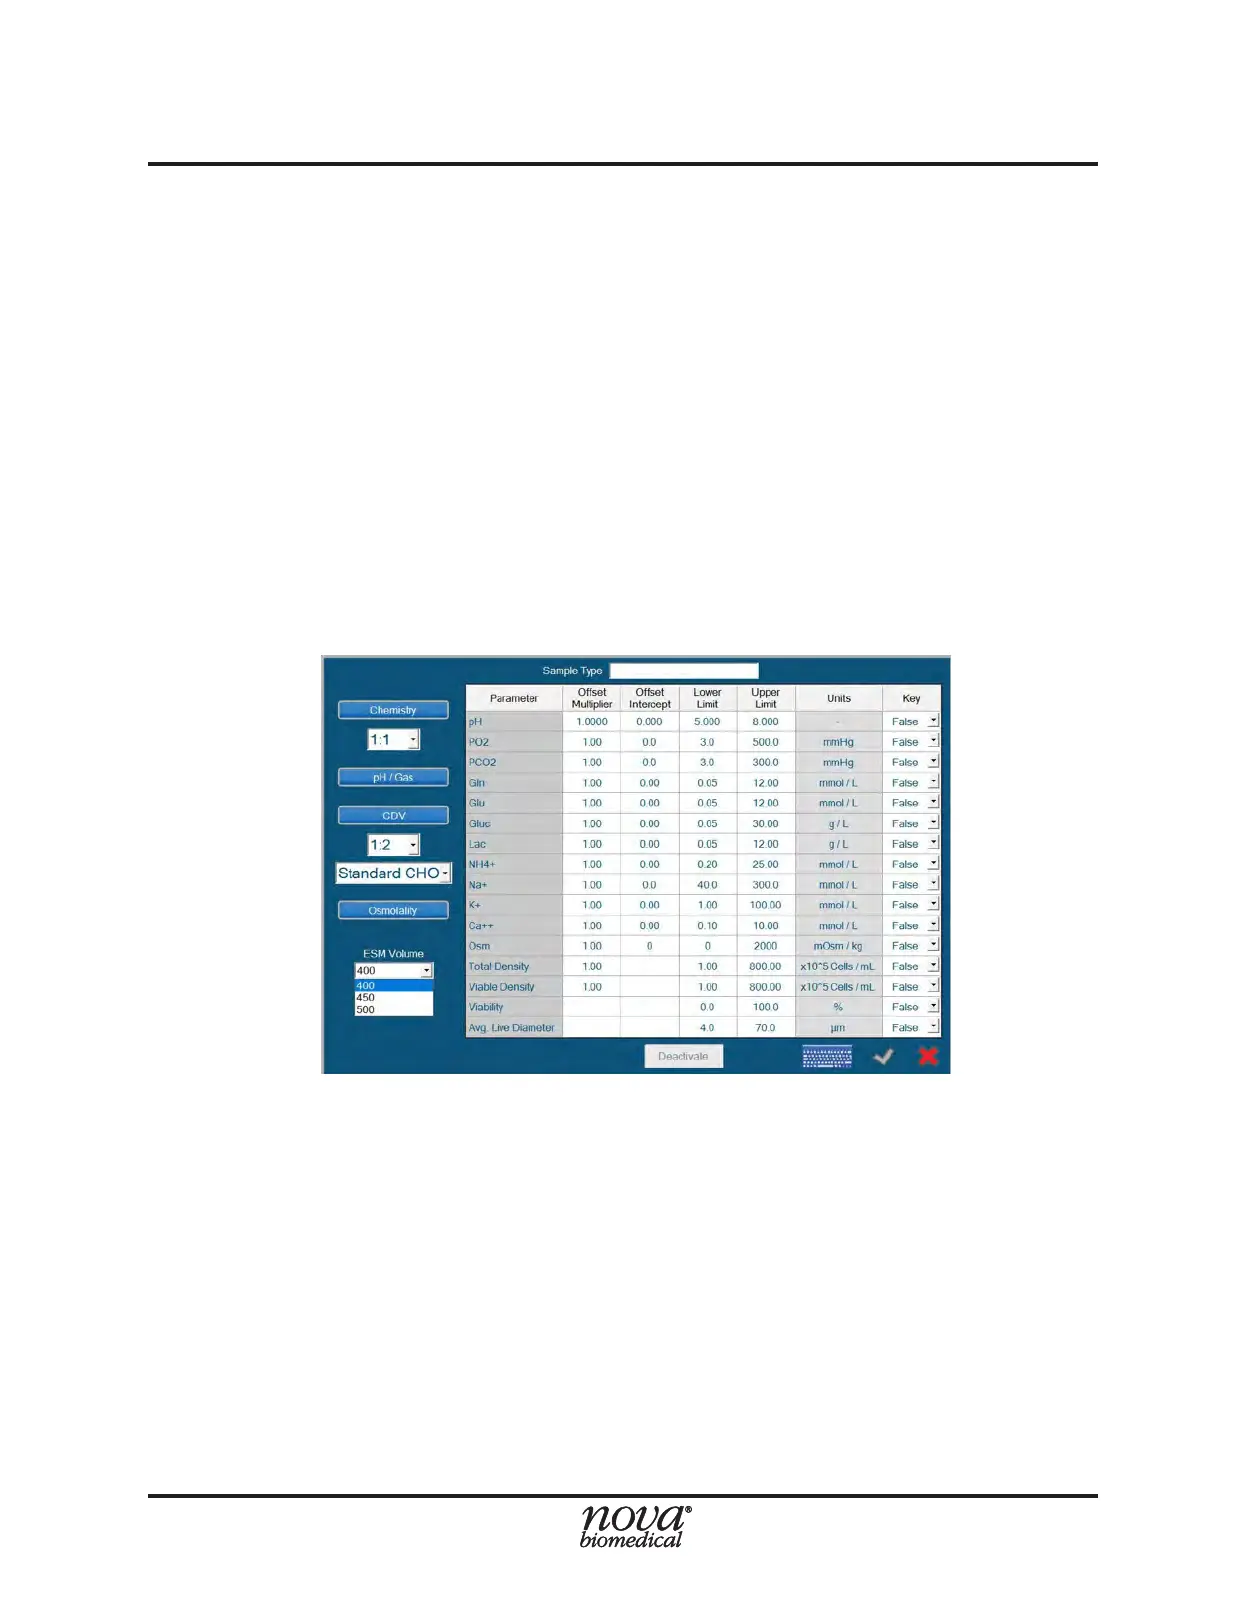
7. To congure a specied process range for each parameter, set the Lower Limit and
Upper Limit to the desired values. The process ranges established in any given
Sample Type function independently of the analytical range limits of the system.
• If a parameter’s value is outside of the analytical range, an error will be
logged in the error log indicating [Parameter] Analytical Range High/Low.
• If a parameter’s value is outside the process range established in the
Sample Type used for that analysis, no error will be logged in the error
log. Instead, the status column for that parameter will be marked as Low
or High on the sample results screen.
NOTE: When dening process limits or interpreting results agged as Low/High, it
is important to consider how each parameter’s analytical range changes
depending on the dilution ratio selected for that analysis.
8. Congure Key Parameters (see Section 4.3.1.2 for more information).
9. Save the Sample Type by selecting the green checkmark at the bottom right or
select the red X to cancel the setup.
To modify or to deactivate an existing Sample Type:
1. From within the Sample Analysis screen, select the desired Sample Type from
the dropdown window (Fig. 4.7), then select Modify to open the Modify Sample
Type Window (Fig. 4.9).
2. Modify the Sample Type to the desired conguration or select the Deactivate button,
then save the modications by selecting the green checkmark at the bottom right
or cancel the modication by selecting the red X.
NOTE: A deactivated Sample Type cannot be re-activated and no two Sample Types
can have the same name, even if one is deactivated.
Figure 4.9 Sample Type Conguration Menu