EDITING & WRITING ARPEGGIATOR PATTERNS
As can be seen the sequence of notes played is 1,2,2,2,2,2,2,1 etc. etc. This is why the “Fill In” parameter is there. It should be
currently in the “Off” position. In this position you can program your patterns more efficiently but for the best results when played, it
should be set to”On”. In this position the missing notes are inserted by the Arpeggiator so that larger or less numbers of notes than
are programmed into the pattern are used.
In Monophonic patterns there is a limit of 12 note values that can be programmed into a pattern.
Of course much more interesting sequences are possible. i.e.
Step 1 = Note 4, Step 2 = Note 1, Step 3 = Note 3, Step 4 = Note 2, Step 5 = Note 3, Step 6 = Note 2, Step 7 = Note 1, Step 8 =
Note 4.
This produces the sequence of notes 4, 1, 3, 2, 3, 2, 1, 4 etc. etc. A kind of inside-out Up/Down sequence of notes. When you con-
sider that there are 64 steps available it can be seen that there are many things possible. There are 2 other parameters associated
with programming Monophonic patterns. On page 18 of Global you can assign velocity values for each of the steps & the Gate
type can be assigned for each step of the pattern. When the “Gate” parameter is set to “Normal” the setting of the “Gate type”
parameter in page 6 of the Arpeggiator Menu applies. When the “Gate” parameter is set to “Tie” the note is “Tied” to the note in the
previous step. This allows syncopated rhythms to be created & can be used to great effect if the pattern is set to have many steps.
When the “Gate” parameter is set to “Rest” no note is played on the selected step & finally when the “Gate” parameter is set to
“Glide” the Portamento is engaged when the selected step switches to the next step & then the Portamento is switched off. This is
great for creating those TB303 type patterns with slides.
Glide will only work when the polyphony of the Program / Part is set to Mono.
Patterns do not have to be entered in step time. Patterns can be entered in via a MIDI keyboard Note & Velocity settings for each
step can be easily entered & using a sustain pedal also allows gate characteristics to be entered. Refer to the “Arp pattern editing”
Parameter on page 44 for details.
The Constant pitch parameter does not apply to Monophonic patterns & in this mode will do nothing if set to On or Off.
Polyphonic patterns
To make a Polyphonic pattern select a “User” pattern on page 2 of the Arpeggiator Menu button pages Select a pattern between
064 & 127 ( these are Polyphonic ) & make a note of the pattern number you have selected. Polyphonic patterns differ in the sense
that all the notes played sound at once. Initially this can be thought of as a kind of “Gater”. Instead of assigning which “Note” out of
the ones you are playing will be played at each step in the pattern, in a Polyphonic pattern all the notes may be transposed at each
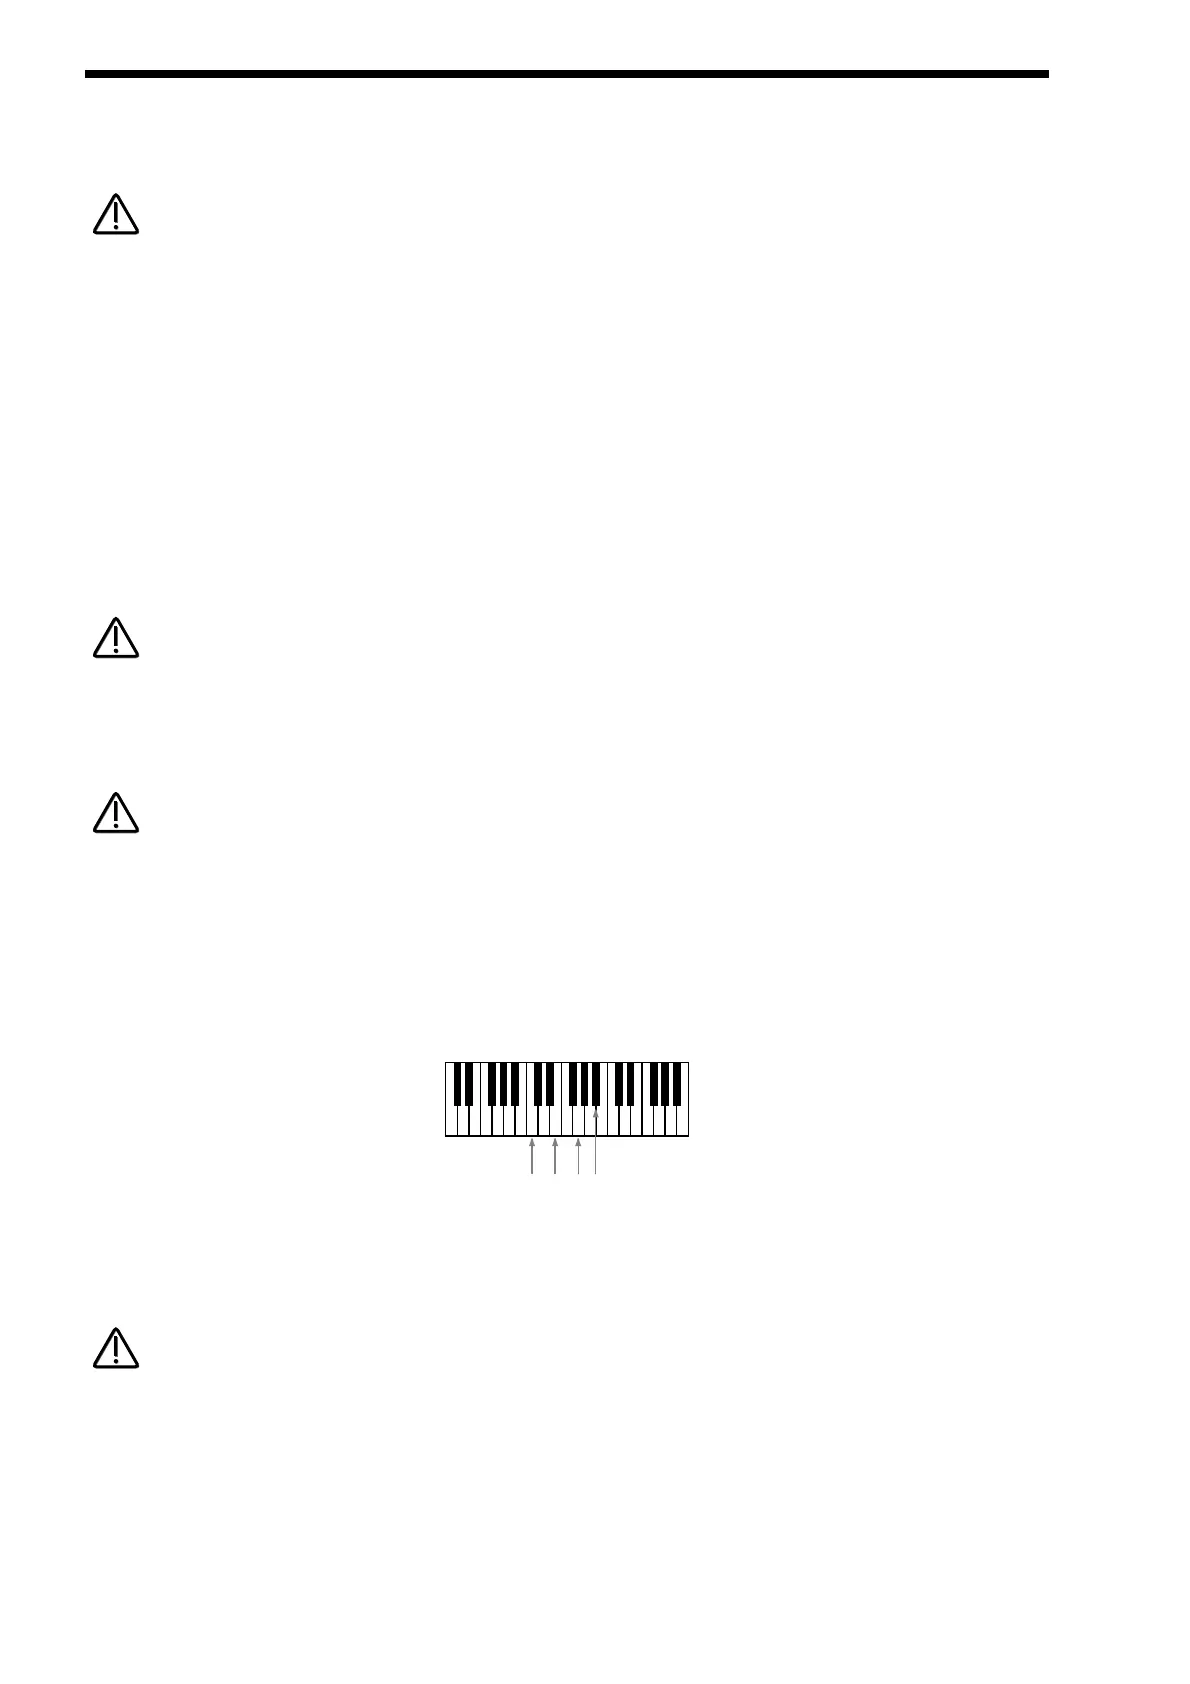
step by a definable amount. Here is an example, the notes being played are shown below:
As can be seen this is a C7 chord. Below is an example Polyphonic Pattern, again of 8 steps in length:
Step 1 = Note 0, Step 2 = Note 2, Step 3 = Note -2, Step 4 = Note 0, Step 5 = Note 0, Step 6 = Note 12, Step 7 = Note -12, Step 8 =
Note 0.
This results in a chord sequence of C7, D7, A#7, C7,C7, C7 ( one octave up ), C7 ( one octave below ), C7. etc. etc.
In Polyphonic patterns there is a limit of -36 to +36 semitones range that can be programmed into a pattern.
As can be seen, negative as well as positive values can be entered into the “Note” parameter in polyphonic patterns. Again when
you consider that there are 64 steps available in a pattern there are many things possible. Like the Monophonic patterns there are
2 other parameters associated with programming Polyphonic patterns. They perform the same functions in Polyphonic patterns or
Monophonic patterns. On page 18 of Global you can assign velocity values for each of the steps & the gate time can be assigned
for each step of the pattern. When the “Gate” parameter is set to “Normal” the setting of the “Gate Time” parameter in page 6 of
the Arpeggiator Menu applies. When the “Gate” parameter is set to “Tie” the note is “Tied” to the note in the previous step. This
allows syncopated rhythms to be created & can be used to great effect if the pattern is set to have many steps. When the “Gate”