Revision 1.03
Operation 5-5
When a preset is saved, all system pa-
rameters are stored into memory with
the associated preset. These parame-
ters include:
• Modulation Parameters
• Input Type
• Power Mode
• Channel Number & Frequency
• Audio Settings
All presets represented by uppercase
letters have been programmed. All
presets represented by lowercase letters
have not been programmed.
Example:
• PA1 - has been programmed.
• pa1 - has not been programed.
Setting & Changing Preset Name
Each preset can be given a name up to
16 characters long. The name can
consist of alpha-numeric characters only
(characters A – Z & 1 – 9). The preset
must be saved before it can be assigned
a name.
To assign a preset name:
1. From any menu screen, toggle the
“PRE” Button to bring up the set
containing the desired preset.
2. Rotate the “Quick-Knob” to
highlight the preset to be named.
3. Press the “Quick-Knob” to select
the Preset.
4. Rotate the “Quick-Knob” until the
name area is hightlighted.
5. Press the “Quick-Knob” to begin
editing. (Refer to Section 5.1.1 for
Changing Characters.)
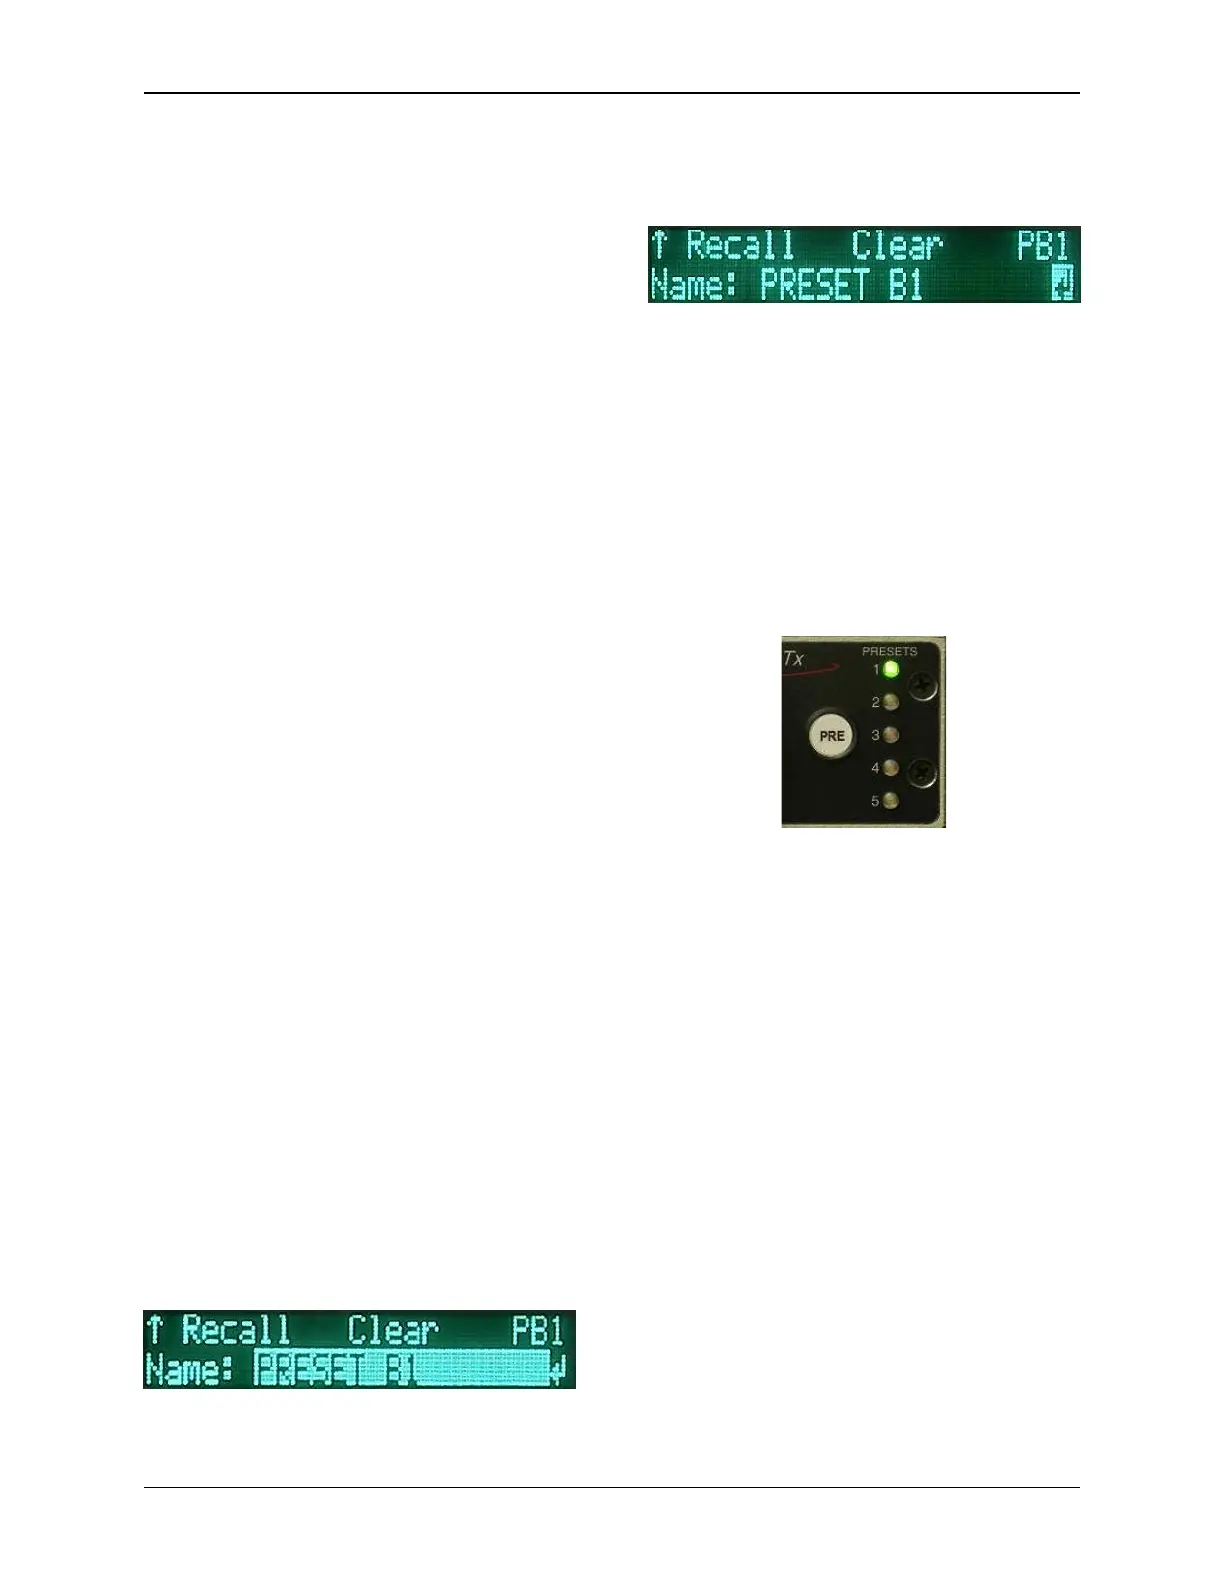
Highlighted Name Area
6. When finished, move the cursor
over the arrow at the bottom-right.
7. Press the “Quick-Knob” to select
the arrow. The name has now
been saved.
Recalling A Preset
Briefly press the desired Preset button to
recall settings.
When PA1-PA5 have been recalled, the
associated Preset LED will illuminate.
Preset 1 Active
NOTE: If the unit is enabled for Preset
Lock RF CHN, the frequency cannot be
changed by a preset and will remain the
current operating channel.
Clearing all Presets
Pressing and holding the “1” and “3”
buttons simultaneously brings up the
following dialog:
Clear All Presets?: Yes? No?
Caution: Selecting “YES” will clear all
presets in the radio.