BA_OCHSNER AIR EAGLE_414_717_V06_EN.docx Page 23 of 76
Transport and handling
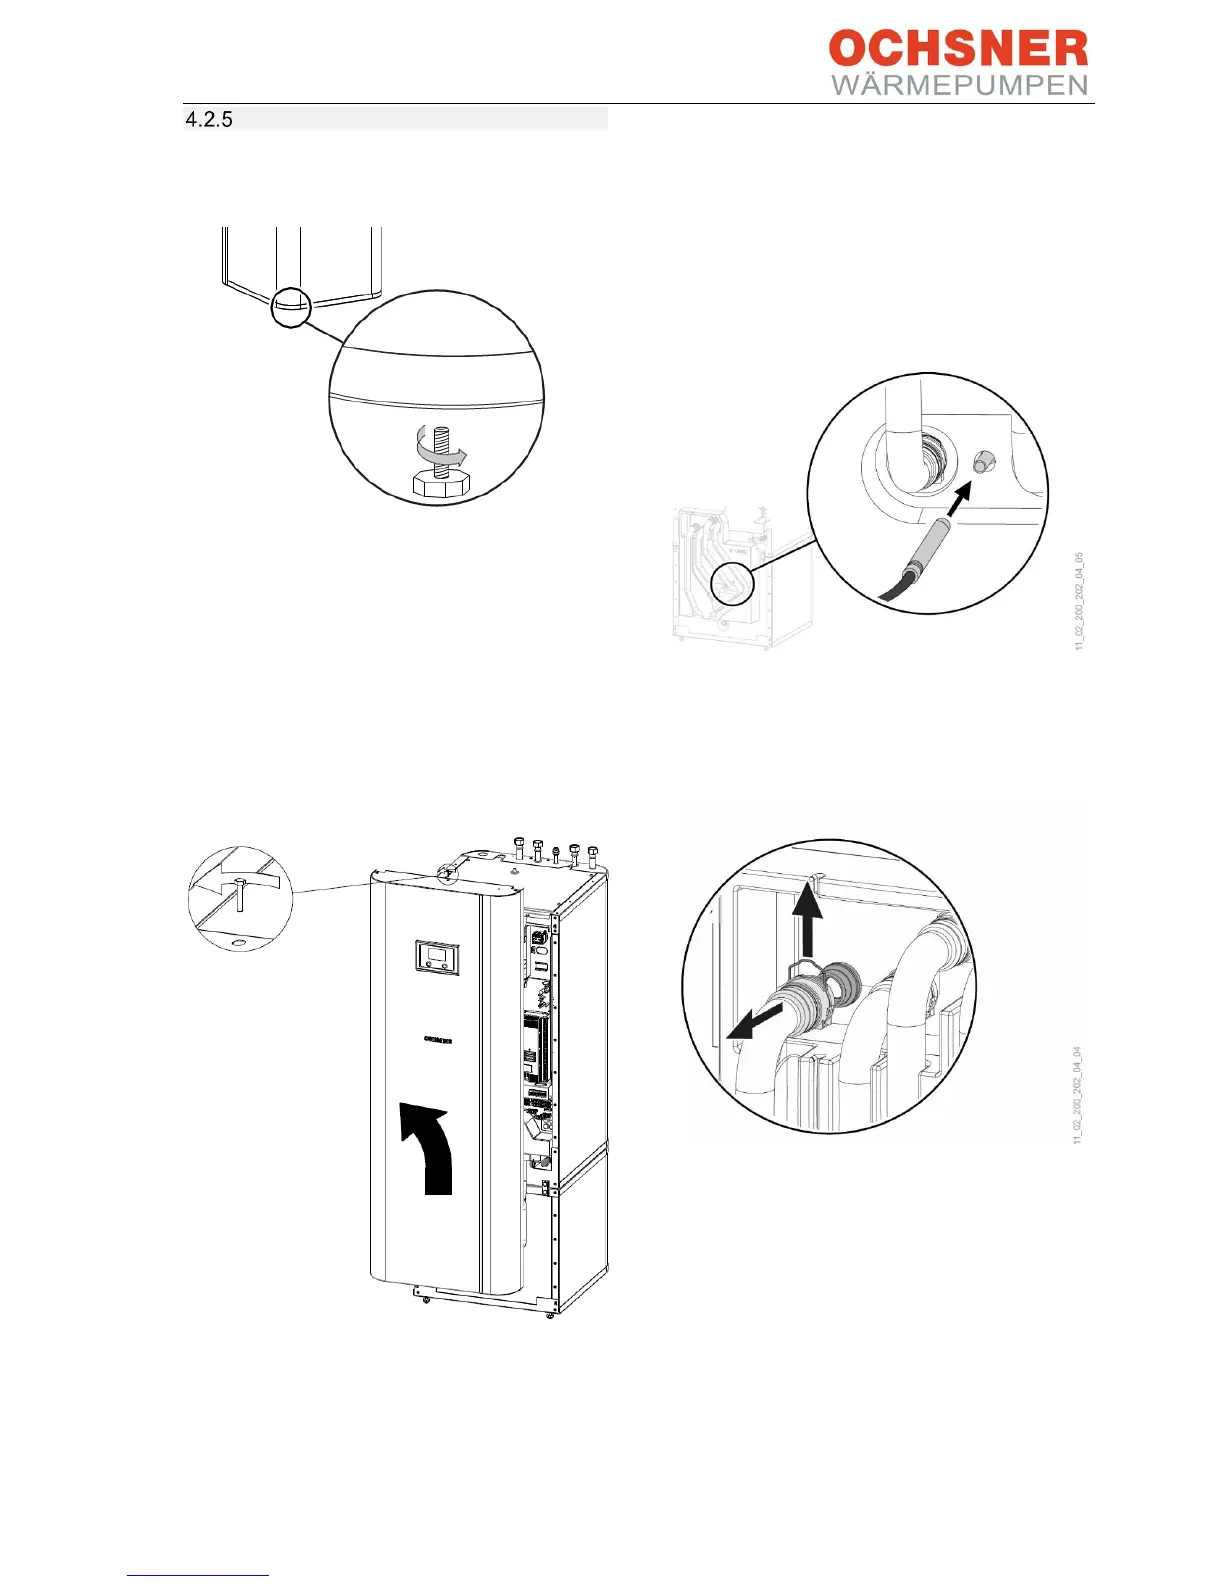
- Remove the 4 screws from the non-
returnable pallet.
Figure 26: Removing the fixing screw
- Slightly tilt the appliance and screw in the
4 adjustable feet supplied.
- Lift the appliance from the pallet.
Should narrow doors or corridors impede
handling, the top and bottom sections of the
appliance can be separated as described in the
following sections.
Removing the front cladding:
- Remove the screw from the top centre of the
appliance.
- Unhook the front cladding towards the top.
- Disconnect the control panel plug and the
front panel earth wire.
Installing the front cladding
Install the front cladding in reverse order.
Separating the appliance sections:
Figure 27: Pull the sensor from the buffer tank.
- Pull out the sensor on the buffer tank.
- Remove the sensor cable from the guiding
groove in the insulation element.
Figure 28: Undoing the plug-in connectors
- Undo the plug-in connectors of the 4 hydraulic
connections. Pull out the spring clips fully
using a screwdriver.
- Pull off the hydraulic connections towards the
front.