BA_OCHSNER AIR EAGLE_414_717_V06_EN.docx Page 24 of 76
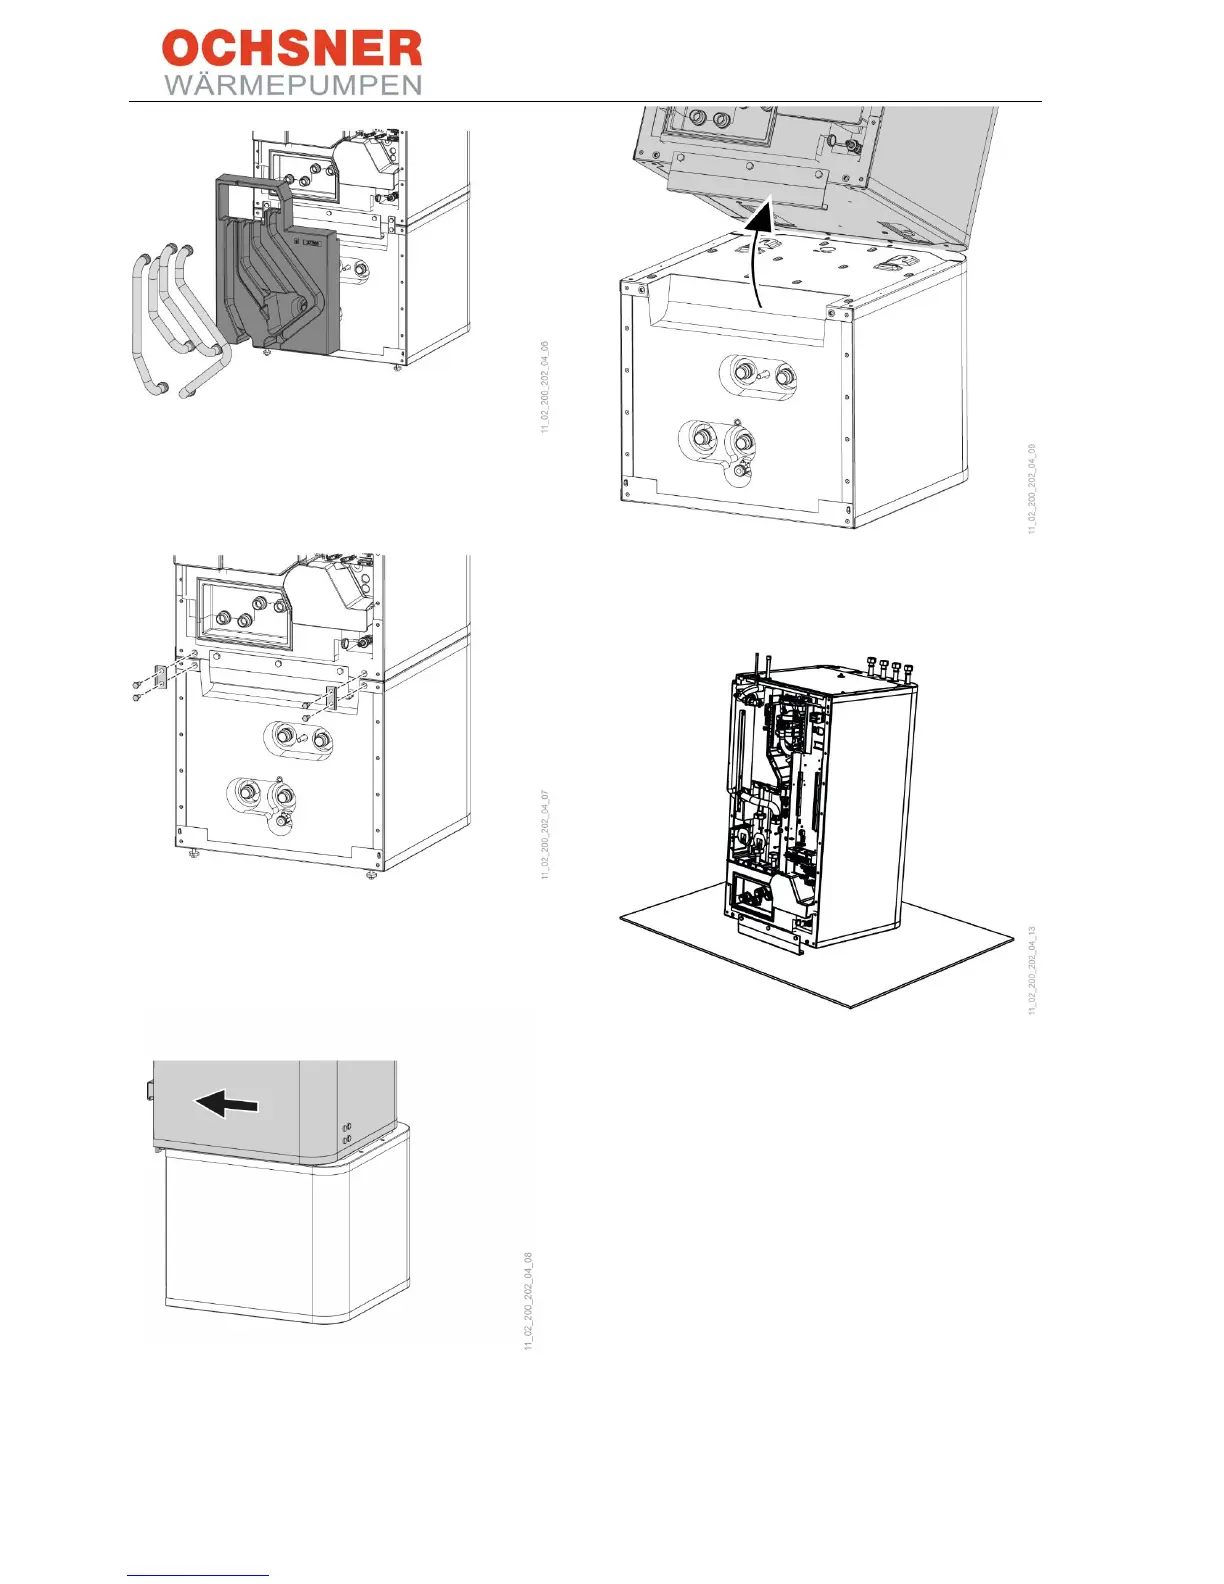
Figure 29: Removing the hydraulic hoses
- Remove the 4 hydraulic hoses and the thermal
insulation element.
Figure 30: Undoing the connecting screws
- Undo the 4 screws on the tabs at the front of
the appliance.
Figure 31: Separating the appliance sections 1
- Pull the top section towards the front.
Figure 32: Separating the appliance sections 2
- Tilt the top section towards the back. Use the
grip rail for better grip during transport.
Figure 33: Setting down the T200 top section
- Set the top appliance section on a pad or mat
to avoid damage.
Assembling the appliance sections:
Assemble the appliance sections in reverse order.
The positioning aids and dotted line markings
facilitate sliding the top appliance section into the
guide on the lower section.