44015503TH Rev. 1
49 /
Oki Data CONFIDENTIAL
3. INSTALLATION
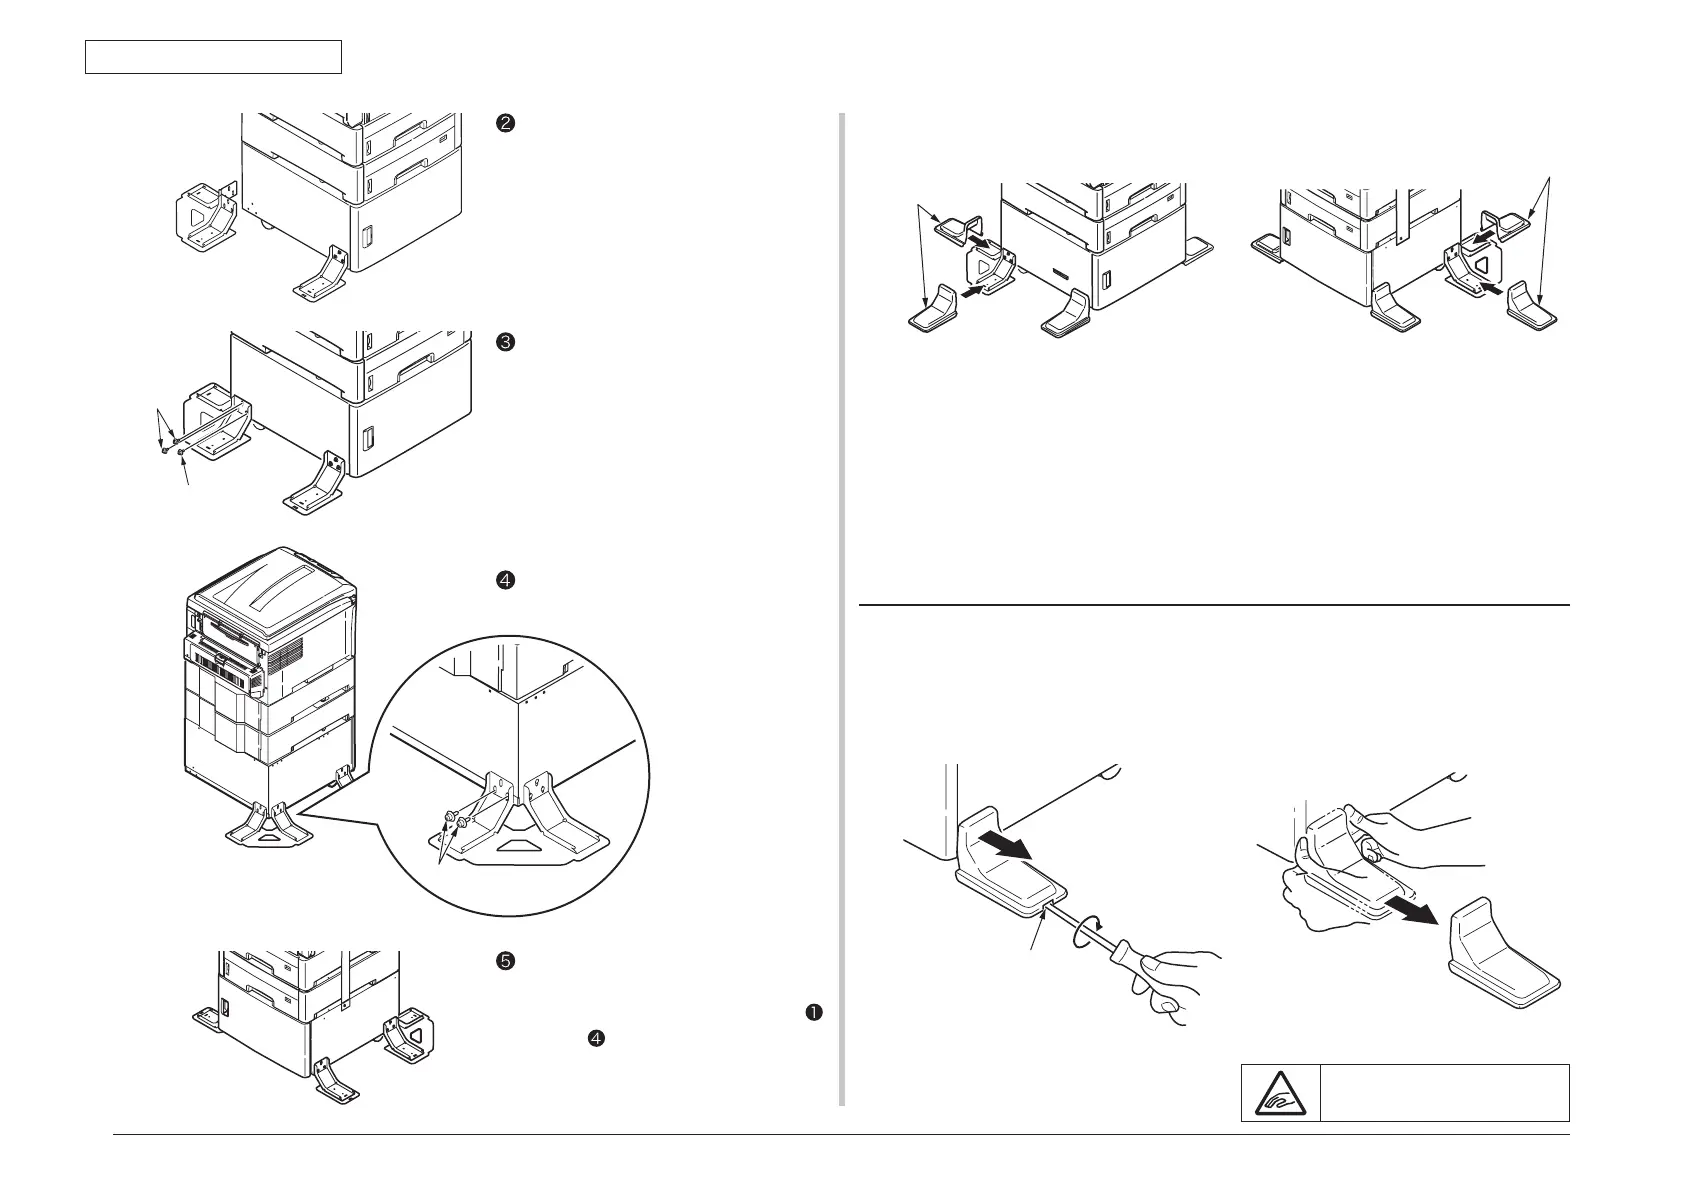
Fit an anti-tip bracket (for the rear side)
to the left back corner of the cabinet.
Attach it to the rear side with two
screws.
Attach the rest of anti-tip brackets (for
each of the front side and the rear side)
to the right side with the same steps
through
.
Attach it to the left side with three
screws.
6. Attach the anti-tip bracket covers.
Attach covers to the anti-tip brackets by sliding the covers (six places).
7. Attach the power cord and cables to the printer and turn on the power.
8. Check that the additional trays are correctly attached, and set up the
additional trays in the computer.
Memo For the procedure to check for installation of additional trays, see “(1)
Installation of an additional tray unit”.
How to remove the anti-tip bracket covers
Insert a flat-blade screwdriver into the opening of an anti-tip bracket cover, move the
cover upward by turning the screwdriver to disengage the cover, and pull the cover to
remove (Figure 1). Do not remove the cover by force; otherwise, the cover may be broken.
If the cover is not removed easily, pull the over with hands hardly to remove (Figure 2).
Personal injury may occur.
Figure 1 Figure 2
 Loading...