44015503TH Rev. 1
54 /
Oki Data CONFIDENTIAL
3. INSTALLATION
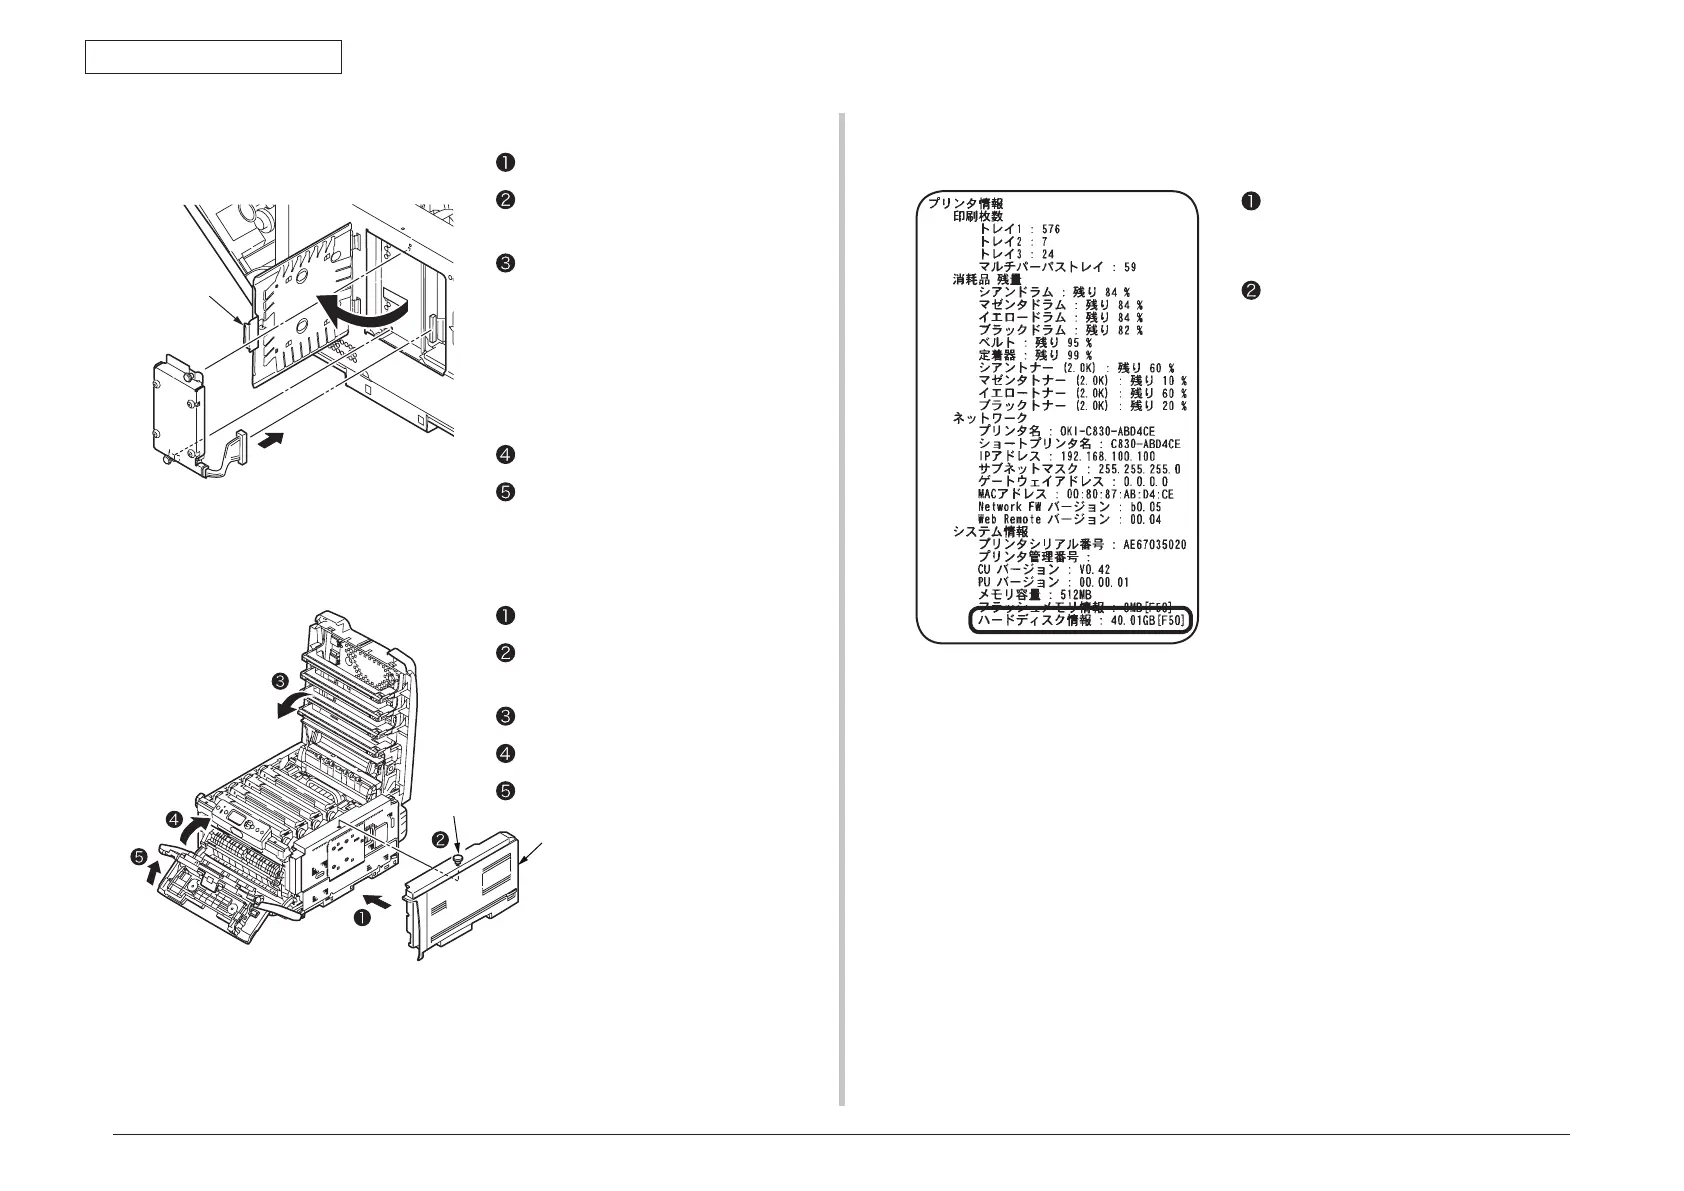
Open the metal cover plate.
Fit the protrusions of the internal hard
disk into the holes on the printer.
Secure the internal hard disk with two
screws.
4. Install an internal hard disk.
Push the connector until it clicks.
Close the metal cover plate.
6. Connect the power cord and the printer cable to the printer and turn on
the printer.
5. Attach the side cover.
Note! If an internal hard disk for IC card authentication has been installed, be sure to
read the manual supplied with the hard disk.
Subsequently, it is required to make settings in the printer driver to have the internal hard disk
recognized by the printer recognize.
If the printer driver hasn’t been set up, set up the printer driver by referring to the relevant
user’s manual (Setup) and then perform the following setup by taking steps described on the
following pages.
7. Print the configuration report and check the printout for successful
installation of the internal hard disk.
Attach the side cover.
Fix the side cover with the screw (one
place).
Close the top cover.
Close the front cover.
Close the multi-purpose tray.
Print the configuration report by
following the steps instructed in section
3.6.
Check the internal hard disk space
shown at “Hard Disk Information”
in [System Information] of [Printer
Information].
Memo T
he internal hard disk space may
be different from the example on
the left.
Note! R
emove the internal hard
disk and reinstall it when [Not
Installed] is shown at [Hard Disk
Information].
 Loading...