Do you have a question about the Olympus C Series and is the answer not in the manual?
Defines the instrument's purpose for inspection and observation of objects without damage.
Provides information for safe and correct instrument operation and handling.
Details required and compatible devices that can be used with the product.
Explains signal words like DANGER, WARNING, CAUTION, and NOTE used throughout the manual.
Outlines general precautions for handling the instrument safely and avoiding hazards.
Covers safe use of AC adapter, handling, visual safety, media precautions, and foreign objects.
Addresses condensation, liquid exposure, ventilation, carrying case use, storage, and disposal safety.
Details critical hazards associated with battery use, handling, and modification.
Lists important warnings regarding battery charging, usage, and potential damage.
Provides specific cautionary advice for battery loading, removal, and compartment care.
Offers notes on battery performance, cleaning, temperature ranges, and lifespan.
Describes the information found on the instrument's rating and caution labels for user reference.
Steps to unpack the instrument and verify all included items are present and undamaged.
Information regarding optional accessories available for purchase and use with the instrument.
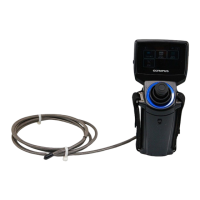
Identifies and labels the various parts of the main unit and insertion tube with diagrams.
Details the components and indicators of the Live, Thumbnail, and View screens on the LCD monitor.
Covers touch panel usage, calibration, and important cautions for accurate operation.
Steps to prepare the instrument before the first observation or use.
Instructions for connecting the battery or AC adapter to power the instrument.
Guides on inserting and detaching the instrument's battery correctly.
Details on connecting the AC adapter and the process of charging the battery.
Explains the meaning of different power indicator light patterns during the charging process.
Inspects the tip protection hood, power status, and illumination of the distal end.
Procedures for turning the instrument's power on and off using the power button.
Verifies the remaining battery level and the insertion tube angulation operation.
Confirms the proper function and brightness of the distal end illumination.
Instructions for mounting a tripod and adjusting the instrument's hand strap.
Guides on safely securing the insertion tube for moving the instrument to another location.
A detailed list of items to inspect on the instrument before and after operation.
Steps for inserting the insertion tube and observing the target object using the instrument.
Important warnings and tips for operating the instrument safely and effectively.
How to freeze a live image for detailed viewing or analysis.
Adjusting image magnification (zoom) and brightness levels for optimal viewing.
Switching between image folders using the controls available on the live screen.
Instructions for inserting and preparing the SD card for image recording.
Warnings related to SD card handling during the recording process.
Setting options for including date, time, title, and logo in recorded images.
Explains the automatic file naming convention used by the instrument for stored images.
Procedure for capturing and saving still images using the FRZ/REC button.
Steps for starting, confirming, and ending movie recording sessions.
Important notes on SD card management, file size limits, and playback during movie recording.
How to view recorded images in full-screen mode after selecting them.
Viewing multiple recorded images in a thumbnail grid for easy selection.
Transferring and using recorded images on a personal computer with provided software.
Connecting the instrument to an external display via HDMI for larger viewing.
General steps for navigating and using the instrument's menu system.
Tips for navigating the menu hierarchy and exiting menus using the provided buttons.
Details available settings on live and freeze screens, like Title Input and White Balance adjustment.
Configuring date/time display, image inversion, color mode, and file naming.
Procedures for formatting SD cards and setting the system date and time.
Calibrating the touch screen and entering titles via the on-screen keyboard.
Using predefined character strings as titles for images or recordings.
Process for registering frequently used text strings as preset titles for quick access.
Settings for displaying scale patterns on the live or freeze screen.
Steps to create custom free-drawing patterns for display on the screen.
Procedure to select the user interface language for menus and error messages.
Configuring the instrument's date and time settings for accurate recording.
Options for deleting, moving, renaming files, and managing folders via thumbnail/view screens.
Guidance on when and how to replace the instrument's battery for optimal performance.
Steps for detaching and attaching the tip protection hood for the insertion tube.
Procedures for cleaning the insertion tube and its distal end, including cautions.
Instructions for cleaning the LCD screen and the main body of the instrument, with cautions.
Recommendations for storing the instrument under normal room temperature and humidity.
A guide to diagnosing and resolving common instrument issues, including error messages.
Addresses frequently encountered problems like fitting the tip hood, power, illumination, and image quality.
Procedures for requesting repairs, warranty terms, and limitations on service.
Details the temperature, pressure, humidity, and liquid resistance requirements for operation.
Cautions related to meeting operating environment specifications and adapter use.
Specifications for the optical system, field of view, illumination, and distal end dimensions.
Specifications for the flexible insertion tube's outer diameter and the instrument's total length.
Details on main unit dimensions, LCD panel, and input/output connectors.
Specifications for battery, AC adapter, power consumption, and supported recording media.
Dimensions of the carrying case, weight, and manufacturer details.
Information on electromagnetic compatibility, FCC, WEEE, and RoHS regulations.
Details of software licenses, including AVC patent and open source agreements.
A visual representation of the instrument's system components and their connections.
| Brand | Olympus |
|---|---|
| Model | C Series |
| Category | Industrial Equipment |
| Language | English |