EasyManua.ls Logo

Olympus C-150 User Manual

Olympus C-150
216 pages
To Next Page IconTo Next Page
Page #1 background imageLoading...
Page #1 background image
LR6X2 or CR-V3X1
VIDEO OUT
DC IN 3.4V
USB
Confirm you have installed the batteries and xD-Picture Card properly by
pressing . The "No Picture" message should be displayed in the monitor.
Turn the camera off by pressing again.
START HERE
It is strongly recommended that you follow these
step-by-step numbered instructions to set up and
quickly begin using your new Digital Camera.
For more detailed instructions on advanced features, please refer
to the printed Basic Manual included in your package, or the
Reference Manual on the CD-ROM.
UNPACKING THE BOX CONTENTS
Gather your digital camera and the parts as shown in the illustration. You’ll need these to complete the steps for the
camera set-up procedures that follow.
The following items are also included in this package: Basic Manual, video cable, warranty card, registration card (not
pvovided in some areas), and safety precautions booklet.
Digital camera
Strap AA (R6) alkaline
batteries (x2)
CAMEDIA
Master CD-ROM
xD-Picture CardUSB cable
(grey color)
TIP: To
maximize battery life, this digital camera features a power saving mode in which the camera enters a sleep mode after
approximately three (3) minutes of non-use. Press the shutter button to wake up the camera.
Before you begin using your Olympus digital camera…
All you need to do is slide the lens barrier open or closed to turn the camera ON or OFF.
a.
Loading batteries
Slide the battery compartment cover in the direction of
(the direction indicated by the mark on the cover),
and lift it up in the direction of .
Attach the strap (OPTIONAL)
Attach the strap as illustrated to make the camera easier to handle.
Insert batteries in the direction shown in the illustration.
Close the battery compartment cover so that it pushes the batteries down inside. While pressing
the mark, slide the cover in the opposite direction of .
Insert the xD-Picture Card into the spring-loaded card slot as shown
in the illustration. Push the card fully into the slot. The card will lock
into place when fully inserted.
To remove, push down on the xD-Picture Card. The card will pop up.
Pull to remove.
Close the card cover.
c.
Insert the xD-Picture Card
The xD-Picture Card is where the camera stores your pictures and is available in a variety
of memory capacities. The pictures you take with the camera remain on the xD-Picture
Card even when the camera is turned off and/or the batteries are removed.
b.
a.
Set the Date and Time (OPTIONAL)
Although this is not required, it is recommended that you set the date and time. This affects the way image
file names are created, and will conveniently include this information with each picture. The date and time
can also be set when the camera is in the playback mode.
Open the lens barrier fully until it clicks.
Press to display the menu.
Press to select MODE MENU.
Press three times to select SETUP.
Press once, and then twice to highlight , and then press once.
Use to select the date format.
Adjust the date and time in the appropriate fields by using to select the field, and to set
the proper value. Repeat this step until all date/time fields have been set.
Press twice to set the date and time and exit the menu.
c.
TURNING ON THE CAMERA
Turn the camera ON (SHOOTING MODE)
Open the lens barrier.
Close the lens barrier to turn the camera off.
b.
Note: Time is entered using the 24-hour format.
Camera Diagram and Controls
Now take a moment to familiarize yourself with the key areas of camera controls by reviewing the illustrations.
Camera Settings in Shooting Mode as shown in Monitor
Camera Settings in Playback Mode as shown in Monitor
Print reserveation
Number of prints
Battery check
Battery check
Flash mode
Self-timer
(still pictures only)
Number of storable still pictures/
seconds remaining for movies
AF target mark
White balance
Spot metering mode
Record mode
Resolution (number of pixels)
TIP: An optional Olympus E-7AC AC adapter is available, and is recommended when downloading images to ensure a
consistent power supply. See the Basic Manual for more information.
PREPARE THE CAMERA FOR USE
Note:
Depending on the camera settings, not all indicators
will be displayed.
Power on Power off
USB connector
FlashShutter button
Self-timer lampLens barrier Lens
Shooting mode
Macro
Exposure compensation
VT450901
Printed in China
Strap eyelet Card cover
Connector coverDC-IN jack (3.4V)
VIDEO OUT jack
A
B
There is a mark on the bottom of the
camera showing the correct way to insert
batteries.
HQ
SIZE: 1600x1200
+
2.0
’03.09.12 12:30
FILE: 100–0020
x
10
Protect
Record mode
Number pixels
Exposure compensation
White balance
Date and time
File number, Frame number,
Playing time/
Total recording time
Lens barrier
Battery compartment cover
Orange lamp
Green lamp
AF target mark
Arrow pad
OK/Menu button
Viewfinder
Monitor
Tripod socket
Monitor button (QUICK VIEW )
Playback button ( )
B
A
P
HQ
1600 x 1200
+2.0
http://www.olympus.com/
QuickStart Guide
D-390 / C-150
OLYMPUS OPTICAL CO. (EUROPA) GMBH
Wendenstrasse 14-18,
20097 Hamburg, Germany
http://www.olympus-europa.com
OLYMPUS AMERICA INC.
Two Corporate Center Drive, Melville,
NY 11747-3157, U.S.A.
http://support.olympusamerica.com/
D390/C150QSG-EN 03.2.13 2:44 PM Page 1

Table of Contents

Question and Answer IconNeed help?

Do you have a question about the Olympus C-150 and is the answer not in the manual?

Olympus C-150 Specifications

General IconGeneral
BrandOlympus
ModelC-150
CategoryDigital Camera
LanguageEnglish

Summary

Prepare the Camera for Use

Loading Batteries

Instructions on how to insert batteries into the camera.

Insert the xD-Picture Card

Steps for inserting the xD-Picture Card into the camera.

Camera Diagram and Controls

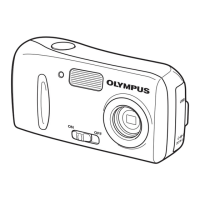
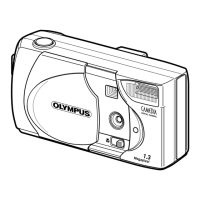
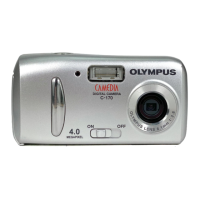
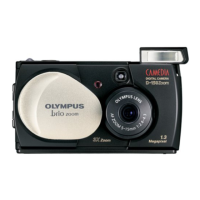
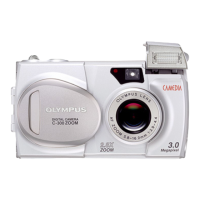
Overview of the camera's parts and controls.

Turning On the Camera

Turn the Camera ON (Shooting Mode)

How to turn the camera on and off using the lens barrier.

Taking Pictures

Taking a Picture with the Viewfinder

How to compose and take photos using the viewfinder.

Taking a Picture with the Monitor

How to compose and take photos using the camera's monitor.

Zooming

How to use the zoom function to magnify subjects.

Flash Modes

Explanation of different flash modes and their usage.

Viewing and Erasing Pictures

Viewing Pictures

How to view captured images on the camera's monitor.

Erasing Pictures

Steps for deleting unwanted pictures from the camera.

Connecting the Camera to a Computer

Installing the Camera Software

Getting Started

Names of Parts

Identification and description of the camera's physical components.

Arrow Pad

Explanation of the arrow pad's functions and navigation.

Viewfinder

Details about the camera's viewfinder.

Monitor Indications

Explanation of icons and information displayed on the camera's monitor.

Battery Check

Information on how to check the camera's battery status.

Attaching the Strap

Step-by-step guide on how to attach the camera strap.

Loading Batteries

Detailed instructions for loading batteries into the camera.

Inserting/Removing a Card

Procedures for inserting and removing the xD-Picture Card.

Power On/Off

How to turn the camera on and off.

Selecting a Language

How to choose the on-screen display language.

Setting the Date and Time

Guide to setting the camera's date and time.

Using the Menus

Menu Items

Overview of the different menu categories and their purpose.

How to Use the Mode Menu

Instructions on navigating and using the camera's mode menu.

Shortcut Menus

Accessing frequently used menus quickly.

Mode Menus

Detailed breakdown of the camera's mode menus.

CAMERA Tab

Settings related to camera functions and shooting modes.

PICTURE Tab

Settings related to picture quality and white balance.

CARD Tab

Settings related to the memory card.

SETUP Tab

General camera setup and configuration options.

Shooting

Shooting Modes

Overview of different shooting modes available on the camera.

Self Portrait Shooting

How to take self-portraits with the camera.

Selecting Shooting Modes

Step-by-step guide to selecting specific shooting modes.

Taking Still Pictures Using the Viewfinder

Instructions for taking still photos using the viewfinder.

Recording Movies

How to record video clips with the camera.

Zoom (Digital Zoom)

Using the digital zoom feature for magnification.

Using the Flash

Selecting and using different flash modes.

Self-Timer Shooting

Using the self-timer function for delayed shots.

Playback

Viewing Still Pictures

How to view still images stored on the camera.

Protecting Pictures

How to protect important images from accidental deletion.

Single-Frame Erase

Erasing individual pictures from the camera.

All-Frame Erase

Erasing all pictures from the memory card.

Formatting Cards (Card Setup)

How to format memory cards for use with the camera.

Editing Still Pictures

Basic editing operations for still images.

INDEX - Creating an Index

Creating an index of movie frames.

Miscellaneous

Error Codes

List of error messages and their possible causes and solutions.

Specifications

Technical details and specifications of the digital camera.

Troubleshooting

Common problems and their solutions for the camera.

Menu List

A comprehensive list of all camera menu functions.

Factory Default Settings

List of default settings for various camera functions.

List of Functions by Shooting Mode

Function availability across different shooting modes.

Camera Maintenance

Instructions for cleaning and maintaining the camera.

Related product manuals