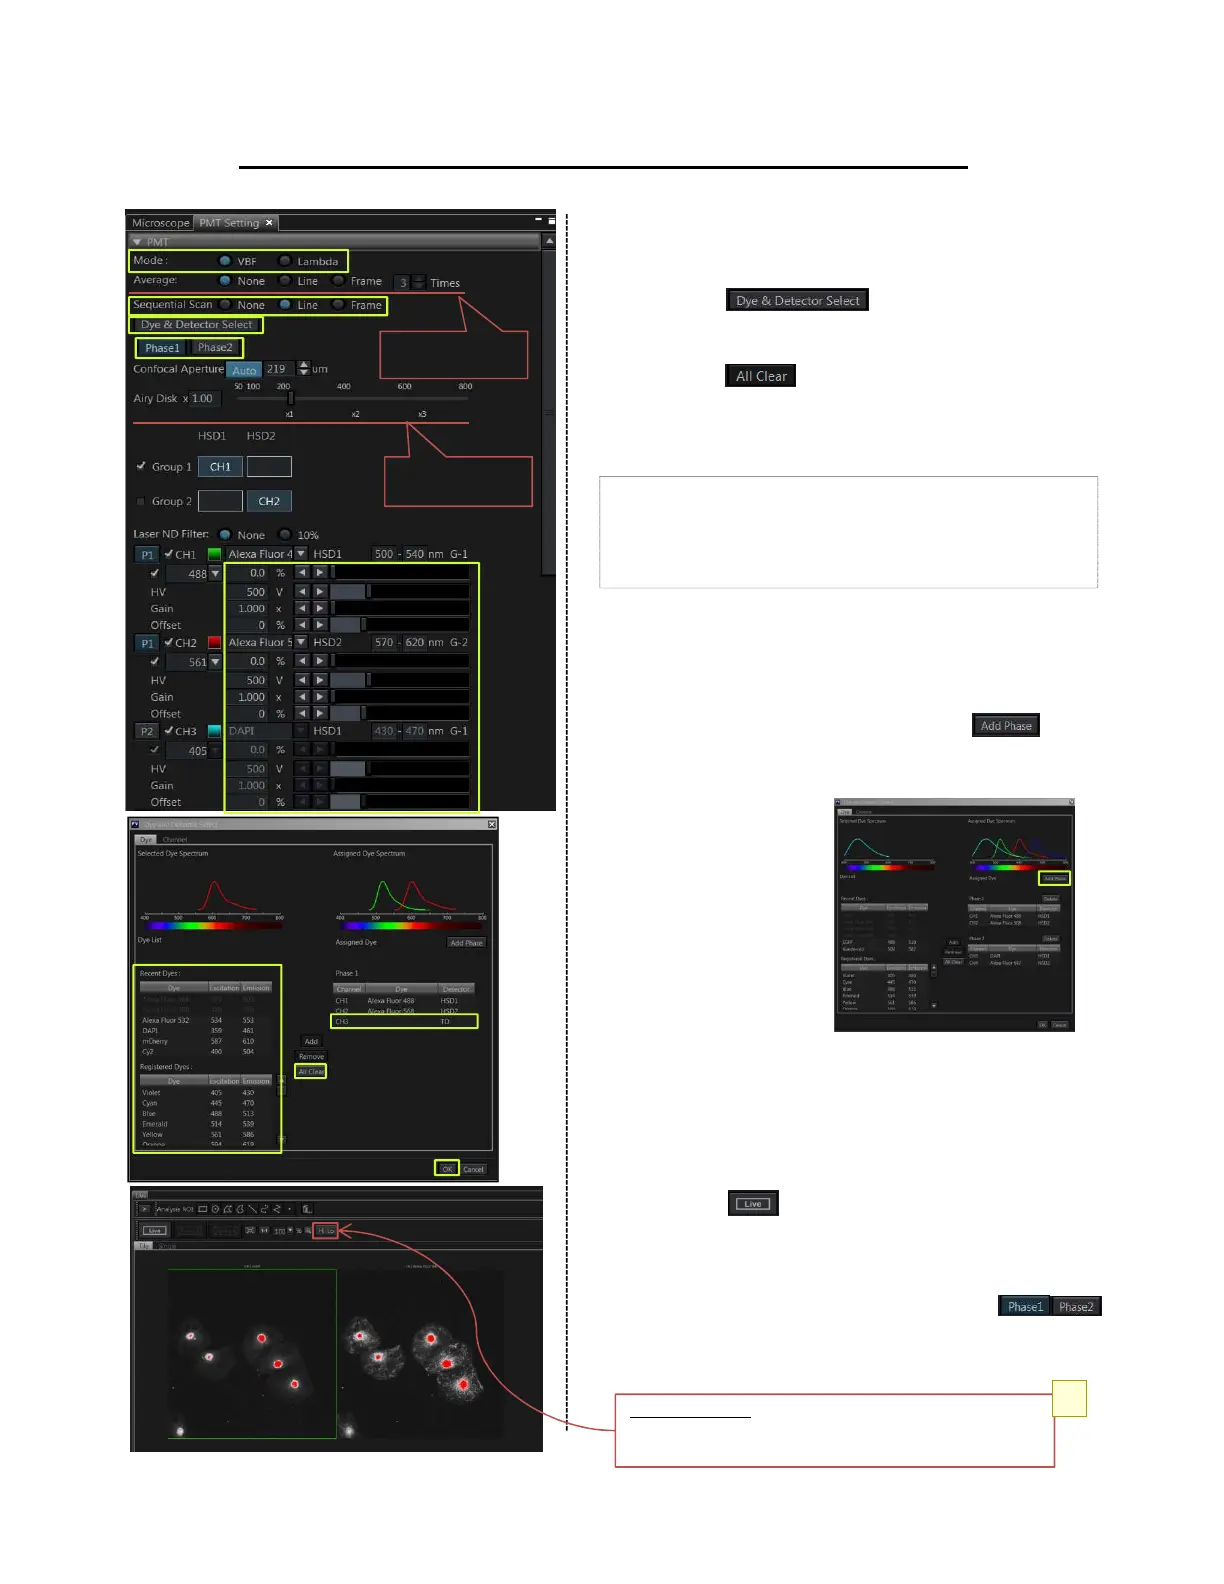
XY Image Acquisition(1)
① Select “VBF” in the [PMT Setting] Tool Window.
Assigning the detector to channel
② Press the button on [PMT Setting]
Tool Window to open the [Dye & Detector Select]
dialog box.
③ Press the button to reset the Assigned
Dye.
④ Double-click the name of the fluorescence dye to
observe.
⑤ When registering a fluorescence dye, TD channel
is registered automatically. If you don’t need,
double-click the TD channel to cancel it.
⑥ If you want to observe with multiple phases using
the virtual channel scan, press the button
to add the phase. And drag&drop the selected
“Dye” to the observation channel list of the phase
you want to add.
⑦ After setting all channels, press the [OK] button.
Adjusting the live image
⑧ If you want to acquire multiple channel image,
select Sequential scan “Line” in the [PMT Setting]
Tool Window.
⑨ Press the button on the [Live] window.
Adjust focus and set Laser Intensity(%),
Sensitivity(HV), Gain and Offset on [PMT setting]
Tool Window.
⑩ If you use virtual channel scan, press
to switch phases. On both phases, adjust focus
and set Laser Intensity(%), Sensitivity(HV), Gain
and Offset.
Virtual Channel Scan
This mode allows to acquire multiple CH image
whose channel number is larger than the
number of detector.
①
Adjusting Confocal
Aperture.
Reducing noises by
Averaging.
②
③
④
⑤
⑦
⑧
⑨
Laser Intensity
Sensitivity
4
⑩
【Hi-Lo Mode】
pixels of intensity 4095 are shown in red.
Pixels of intensity 0 are shown in red.
u5