58
Loosen the screws
d
(2 pcs.) of the Z-axis transport lock
c
using
the Allen wrench provided with the frame, and remove the Z-axis
transport lock
c
.
When removing the screw, be careful not to drop the
screw inside the frame.
Attach the screws
d
to the frame again.
Rotate the transport sticks
b
(4 pcs.) to remove them from the frame.
3
4
d
e
2
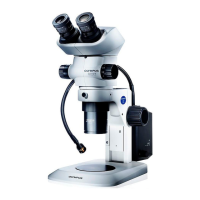
Mounting the digital indicator
Fit the screw holes
a
(2 pcs.) on the right of the column with the screw
holes
b
of the digital indicator STM7-DI, and secure the clamping
screws
b
(2 pcs.) provided with the digital indicator by using the Allen
screwdriver provided with the frame.
Hold the digital indicator until it is secured on the column.
1
a
b
c
} When using the digital indicator on the table, screw the shafts
d
(2 pcs.) provided with the digital indicator into the rear cover of the
digital indicator securely.
} If the digital indicator is shaky on the table, rotate the rubber area of
the shaft to adjust the shaft length.
} If the digital indicator is attached to the microscope, store the shafts
d
(2 pcs.) provided with the digital indicator on the rear of the
digital indicator.
} Rotate the rubber area of the shaft to tighten the screw of the rubber
area. Then, store the shafts.
d
d