SAA3 3-Position Remote Safety Switch
37 OMICRON
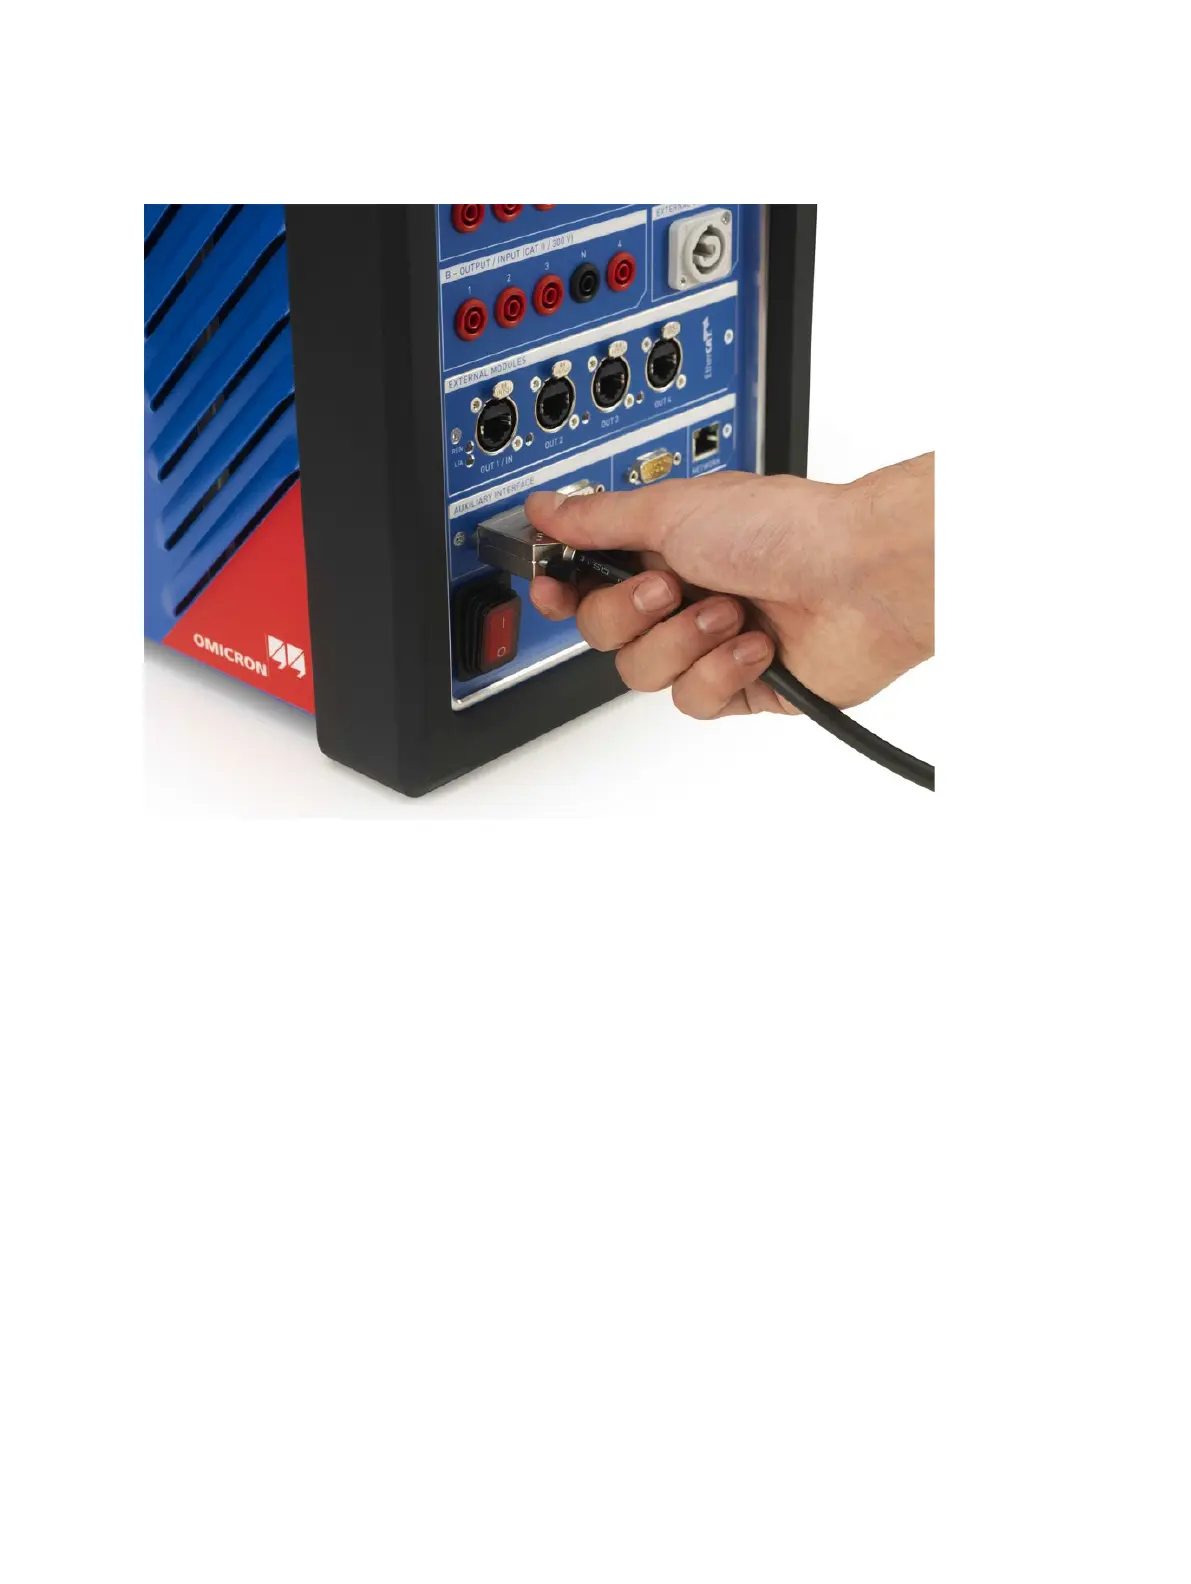
4. Plug the serial interface connector of the SAA3 switch into the SAFETY output connector of the
main device as shown in the following figure.
Figure 16: Connecting the SAA3 3-Position Remote Safety Switch (main unit in example CIBANO 500)
NOTE! Tighten the locking thumb screws of the connector firmly to ensure stable contact of the SAA3 with
the main device.
5. Unlock the Emergency Stop button on the main device or test system and unlock the main device
with the key or via screen (CIBANO 500 and COMPANO 100 do not have a lock). If all signal lamps
glow continuously green, the main device/test system is ready for operation.
6.4 Testing
1. Unlock the Emergency Stop button on the main device or test system and unlock the main device
with the key or via screen
NOTE! CIBANO 500 and COMPANO 100 do not have a separate physical key nor a
software lock function.
2. Test the functionality of the SAA3 3-Position Remote Safety Switch as follows:
a. Start by not pressing the SAA3 switch (Figure 15 part I).
The main device/test system signal lamps should glow continuously green indicating that
all outputs are switched off.