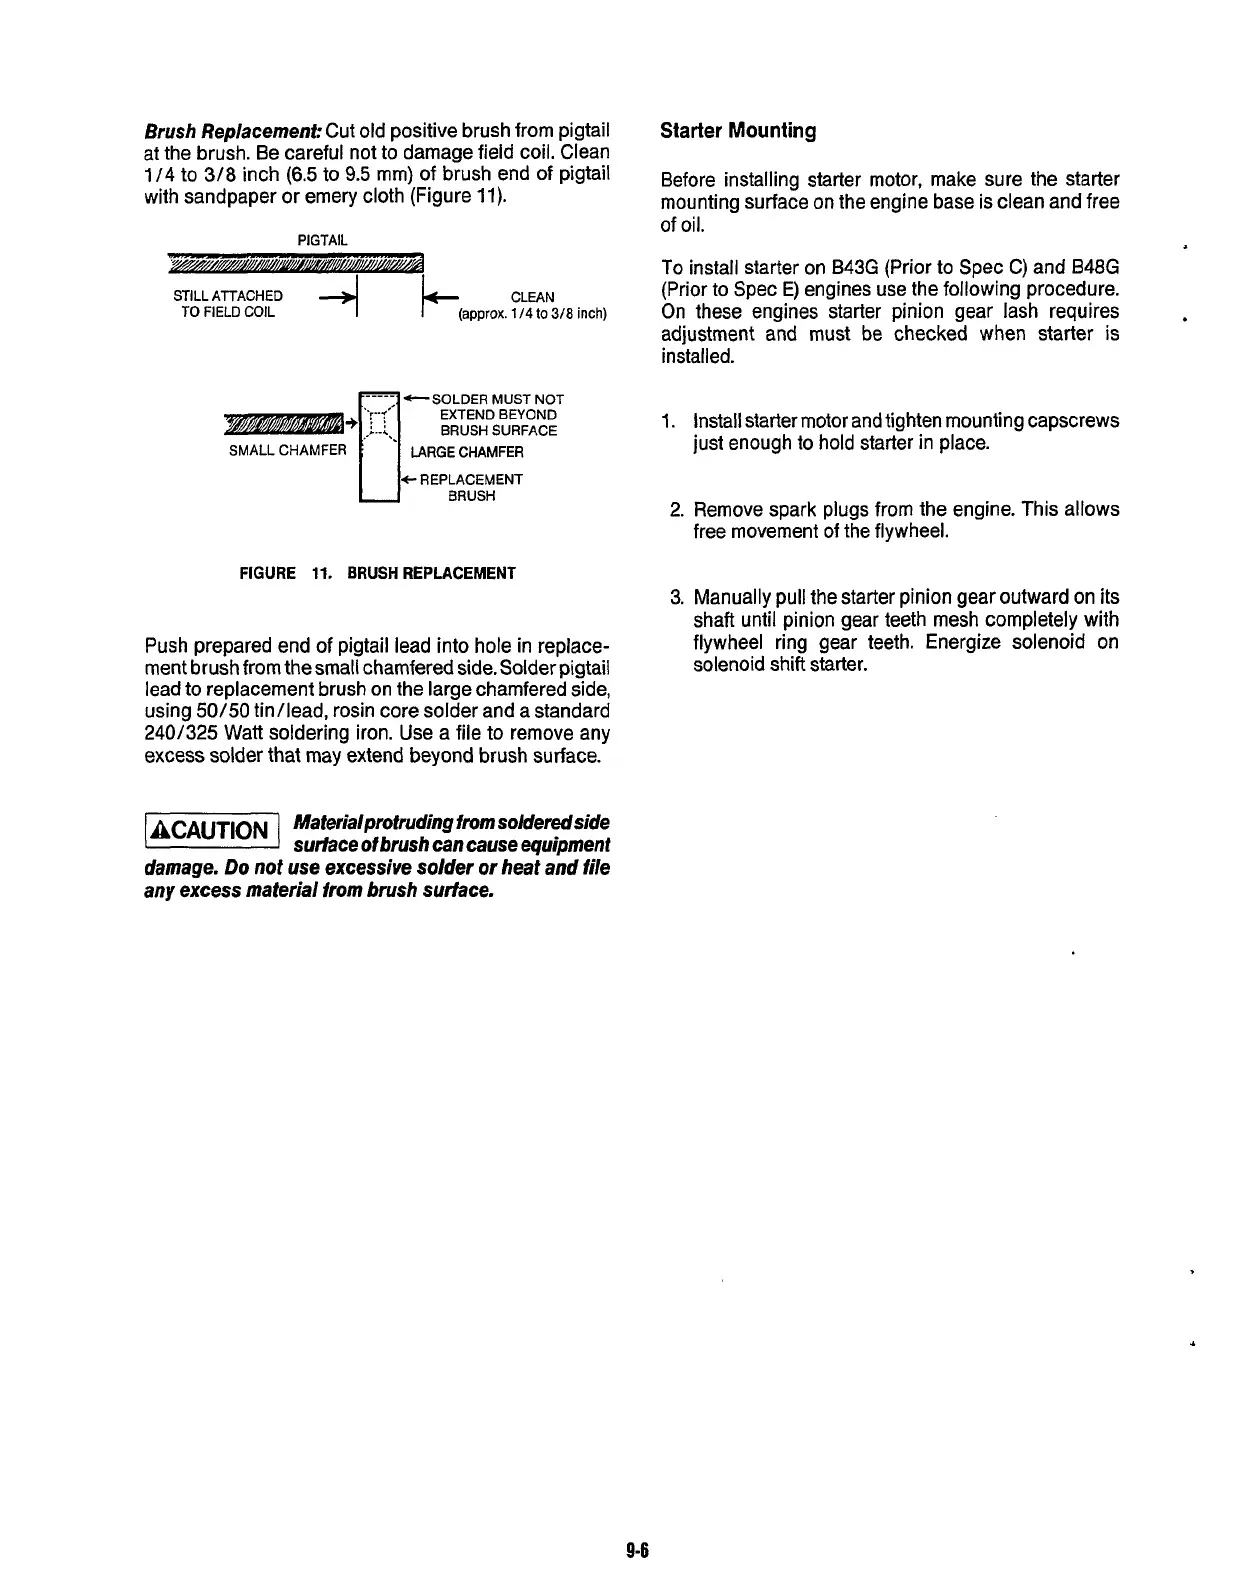
Brush Repkcement:
Cut old positive brush from pigtail
at the brush. Be careful not to damage field coil. Clean
1
/4
to
3/8
inch
(6.5
to
9.5
mm)
of
brush end
of
pigtail
with sandpaper or emery cloth (Figure
11).
PIGTAIL
Starter
Mounting
Before installing starter motor, make sure the starter
mounting surface on the engine base is clean and free
of oil.
STILL ATTACHED
4
CLEAN
TO FIELD COIL
(approx.
114
to
3/8
inch)
_____
EXTEND BEYOND
BRUSH SURFACE
*ncSoLDER
..,..:.’
MUST
LARGE CHAMFER
f
REPLACEMENT
U
BRUSH
SMALL CHAMFER
FIGURE
11.
BRUSH REPLACEMENT
Push prepared end
of
pigtail lead into hole in replace-
ment brush from the small chamfered side. Solder pigtail
lead to replacement brush on the large chamfered side,
using
50/50
tinllead, rosin core solder and a standard
240/325 Watt soldering iron. Use a file to remove any
excess solder that may extend beyond brush surface.
To
install starter on B43G (Prior to Spec
C)
and B48G
(Prior to Spec E) engines use the following procedure.
On these engines starter pinion gear lash requires
adjustment and must be checked when starter is
installed.
1.
Install starter
motor
and tighten mounting capscrews
just enough to hold starter in place.
2.
Remove spark plugs from the engine. This allows
free movement of the flywheel.
3. Manually pull the starter pinion gear outward
on
its
shaft until pinion gear teeth mesh completely with
flywheel ring gear teeth. Energize solenoid on
solenoid shift starter.
(BCAUTIONI
Ma ferial protruding
from
solderedside
sudace
of
brush can cause equipment
damage.
Do
not use excessive solder
or
heat
and
file
any excess material from brush surface.
9-6
Redistribution or publication of this document,
by any means, is strictly prohibited.
 Loading...

