PISTON
ASSEMBLY
Lubricate all parts with engine oil.
Position piston on its respective rod and install the
pin.
Install the rings on the pistons starting with the oil
control ring (Figure
26).
Use
a piston ring spreader
to
prevent twisting or excessive expansion of the
ring. Compression rings have a dot or the word
“top” on one side of the ring to indicate which side
faces the top
of
the piston. Unmarked piston rings
can be installed either way. The oil control ring has
an expander; install the expander first and then
close until the expander ends butt. The joint should
be
180
degrees from the gap
of
that ring.
CT-1047
FIGURE
26.
PISTON
RINGS
INSTALLATION
OF
PISTON
IN CYLINDER
1.
2.
3.
4.
Turn the crankshaft to position the number one rod
bearing journal
at
the bottom
of
its
stroke.
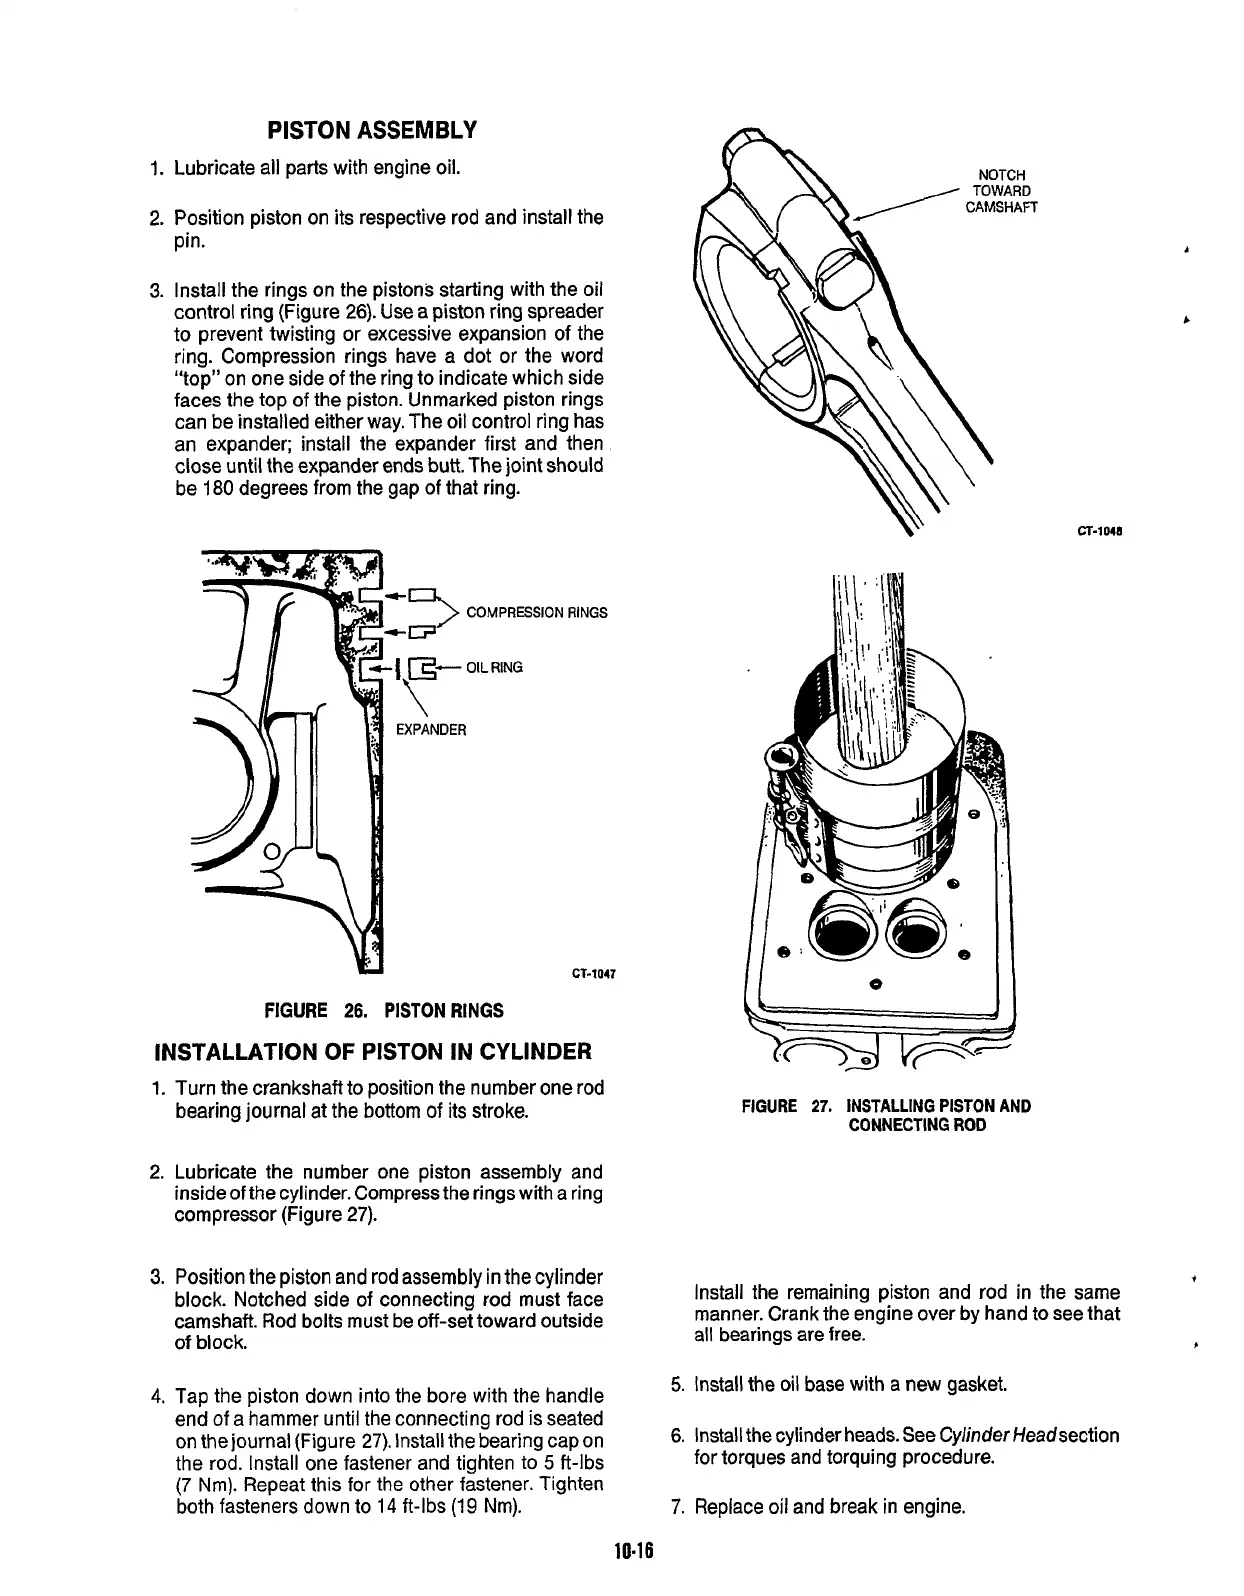
FIGURE
27.
INSTALLING PISTON
AND
CONNECTING
ROD
Lubricate the number one piston assembly and
inside
of
the cylinder. Compress the rings with a ring
compressor (Figure
27).
Position the piston and rod assembly in the cylinder
block. Notched side
of
connecting rod must face
camshaft. Rod bolts must be off-set toward outside
of
block.
P
t
Install the remaining piston and rod in the same
manner. Crank the engine over by hand to see that
all bearings are free.
5.
Install the oil base with a new gasket.
6.
Install the cylinder heads. See Cylinder Headsection
Tap the piston down into the bore with the handle
end of a hammer until the connecting rod is seated
on the journal (Figure
27).
Install the bearing cap on
the rod. Install one fastener and tighten to
5
ft-lbs
(7
Nm).
Repeat this for the other fastener. Tighten
both fasteners down to
14
ft-lbs
(1
9
Nm).
for torques and torquing procedure.
7.
Replace
oil
and break in engine.
10-1
6
Redistribution or publication of this document,
by any means, is strictly prohibited.
 Loading...

