1
WHEN GOVERNOR
IS
PROPERLY
ON
ORAWING WILL
BE
AS INDICATED
L.-
/’
RIGHT
v
WRONG
C-1107
INSTALLATION
OF
BALLSPACER
5
BALL
GOVERNOR
6
BALL GOVERNOR
8
BALL GOVERNOR
FLYBALL
LOCATIONS
CS-1238
FIGURE
10.
GOVERNOR
CUP
DETAILS
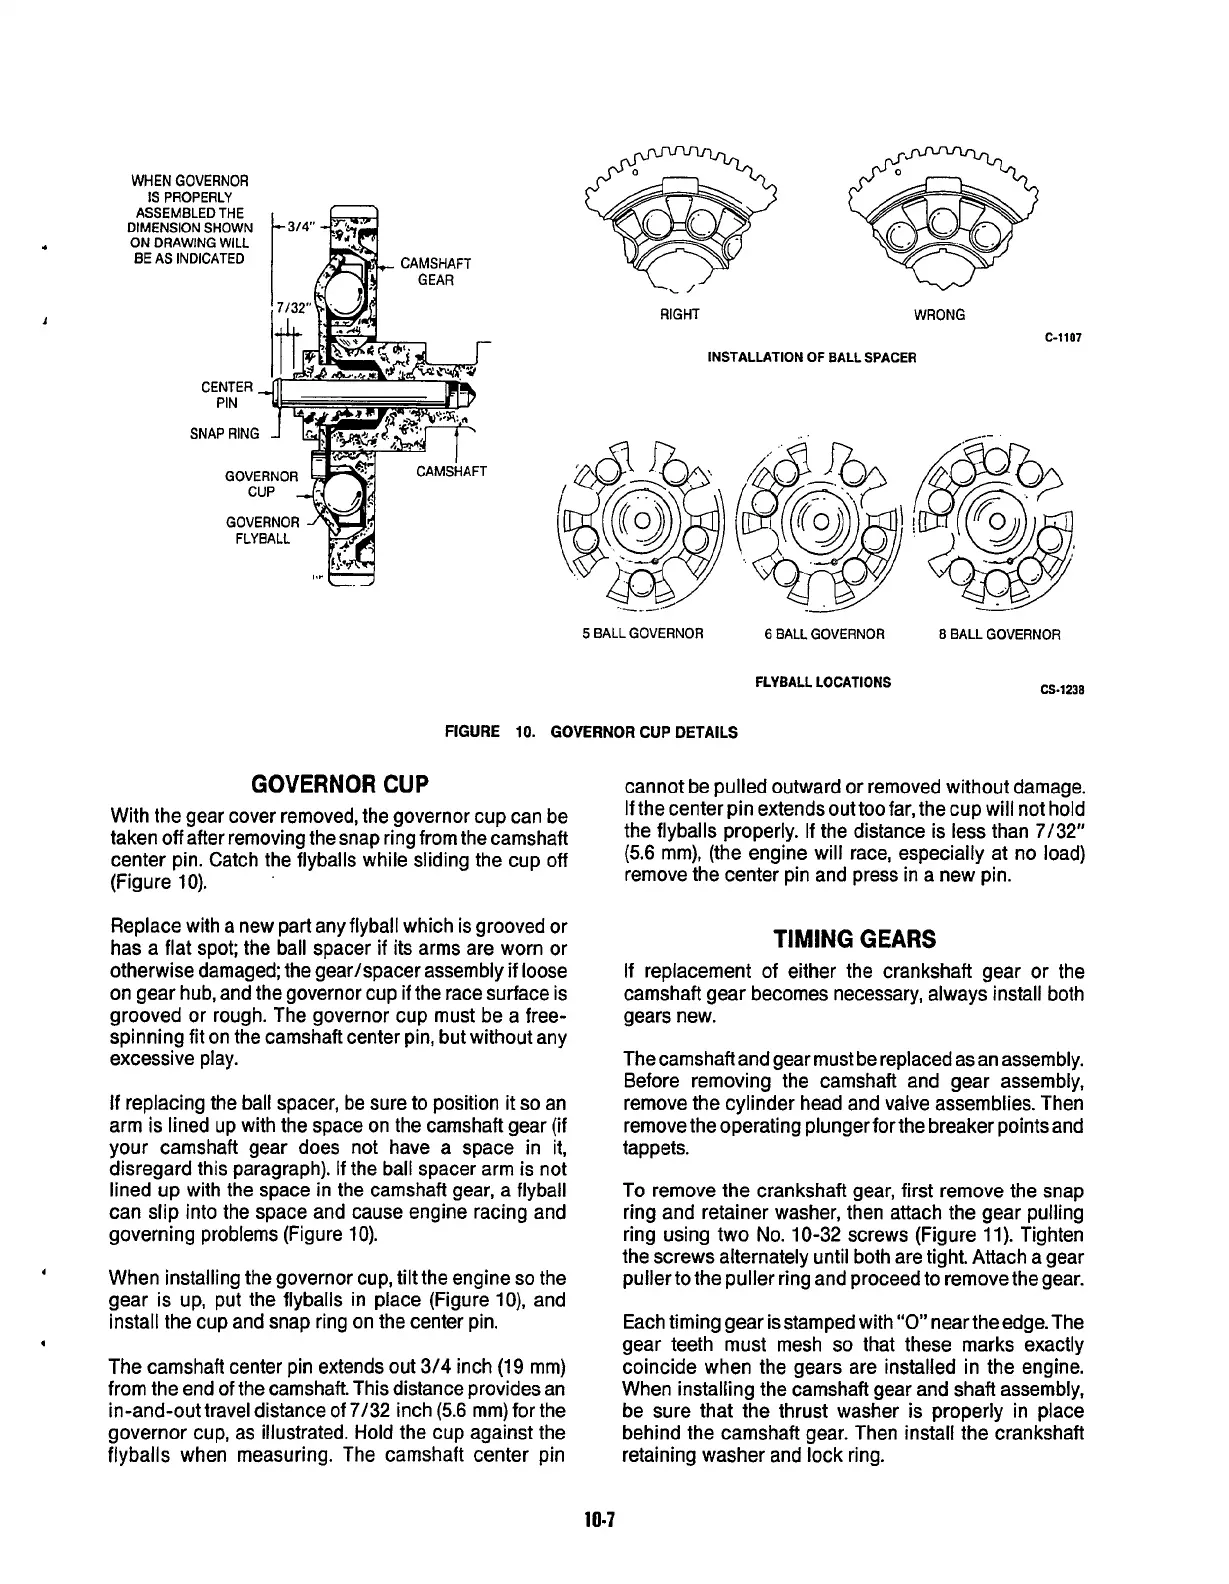
GOVERNOR
CUP
With the gear cover removed, the governor cup can be
taken
off
after removing the snap ring from the camshaft
center pin. Catch the flyballs while sliding the cup
off
(Figure
10).
Replace with a new part any flyball which is grooved or
has a flat spot; the ball spacer
if
its arms are worn or
otherwise damaged; the gear/spacer assembly if loose
on gear hub, and the governor cup
if
the race surface is
grooved or rough. The governor cup must be a free-
spinning
fit
on the camshaft center pin, but without any
excessive play.
If
replacing the ball spacer, be sure to position it
so
an
arm is lined up with the space on the camshaft gear (if
your camshaft gear does not have a space in it,
disregard this paragraph). If the ball spacer arm is not
lined up with the space in the camshaft gear, a flyball
can slip into the space and cause engine racing and
governing problems (Figure 10).
4
When installing the governor cup, tilt the engine
so
the
gear is up, put the flyballs in place (Figure
lo),
and
install the cup and snap ring on the center pin.
The camshaft center pin extends out
314
inch
(19
mm)
from the end
of
the camshaft. This distance provides an
in-and-out travel distance
of
7/32
inch
(5.6
mm) for the
governor cup, as illustrated. Hold the cup against the
flyballs when measuring. The camshaft center pin
4
cannot be pulled outward or removed without damage.
If
the center pin extends out too far, the cup will not hold
the flyballs properly.
If
the distance is less than
7/32”
(5.6
mm), (the engine will race, especially at no load)
remove the center pin and press in a new pin.
TIMING
GEARS
If replacement of either the crankshaft gear
or
the
camshaft gear becomes necessary, always install both
gears new.
The camshaft and gear must be replaced as an assembly.
Before removing the camshaft and gear assembly,
remove the cylinder head and valve assemblies. Then
remove the operating plunger for the breaker points and
tappets.
To remove the crankshaft gear, first remove the snap
ring and retainer washer, then attach the gear pulling
ring using two
No.
10-32
screws (Figure
11).
Tighten
the screws alternately until both are tight. Attach a gear
puller
to
the puller ring and proceed to remove the gear.
Each timing gear is stamped with
“0”
near the edge. The
gear teeth must mesh
so
that these marks exactly
coincide when the gears are installed in the engine.
When instalfing the camshaft gear and shaft assembly,
be sure that the thrust washer is properly in place
behind the camshaft gear. Then install the crankshaft
retaining washer and lock ring.
10-7
Redistribution or publication of this document,
by any means, is strictly prohibited.
 Loading...

