Chapter 6: Alerts, Auto-Response & Logging
142
6.3 Trigger Actions
To configure the sequence of actions to take in the event of the trigger condition:
1. For a nominated Auto-Response with a defined Check Condition, click on Add Trigger Action
to select the action type to take. Configure the selected action as detailed in the following
sections.
2. Action Delay Time specifies how many seconds after the Auto-Response trigger event to wait
before performing the action. You can add follow-on actions to create a sequence of actions
taken in the event of the trigger condition
3. To edit or delete an existing action, click the Modify (or Delete) icon in the Scheduled Trigger
Action table.
A message text can be sent with Email, SMS and Nagios actions. This configurable message can include
selected values:
$AR_TRIGGER_VAL: the trigger value for the check e.g. for UPS Status, it could be onbatt or battlow
$AR_VAL: the value returned by the check e.g. for ups status, it could be online/onbatt/battlow
$AR_CHECK_DEV: the device name of the device being checked e.g. for Alarm, the alarm name
$TIMESTAMP: the current timestamp
$HOSTNAME: the hostname of the console server
The default message text is: $TIMESTAMP: This action was run - Check details: value $AR_VAL vs trigger
value $AR_TRIGGER_VAL
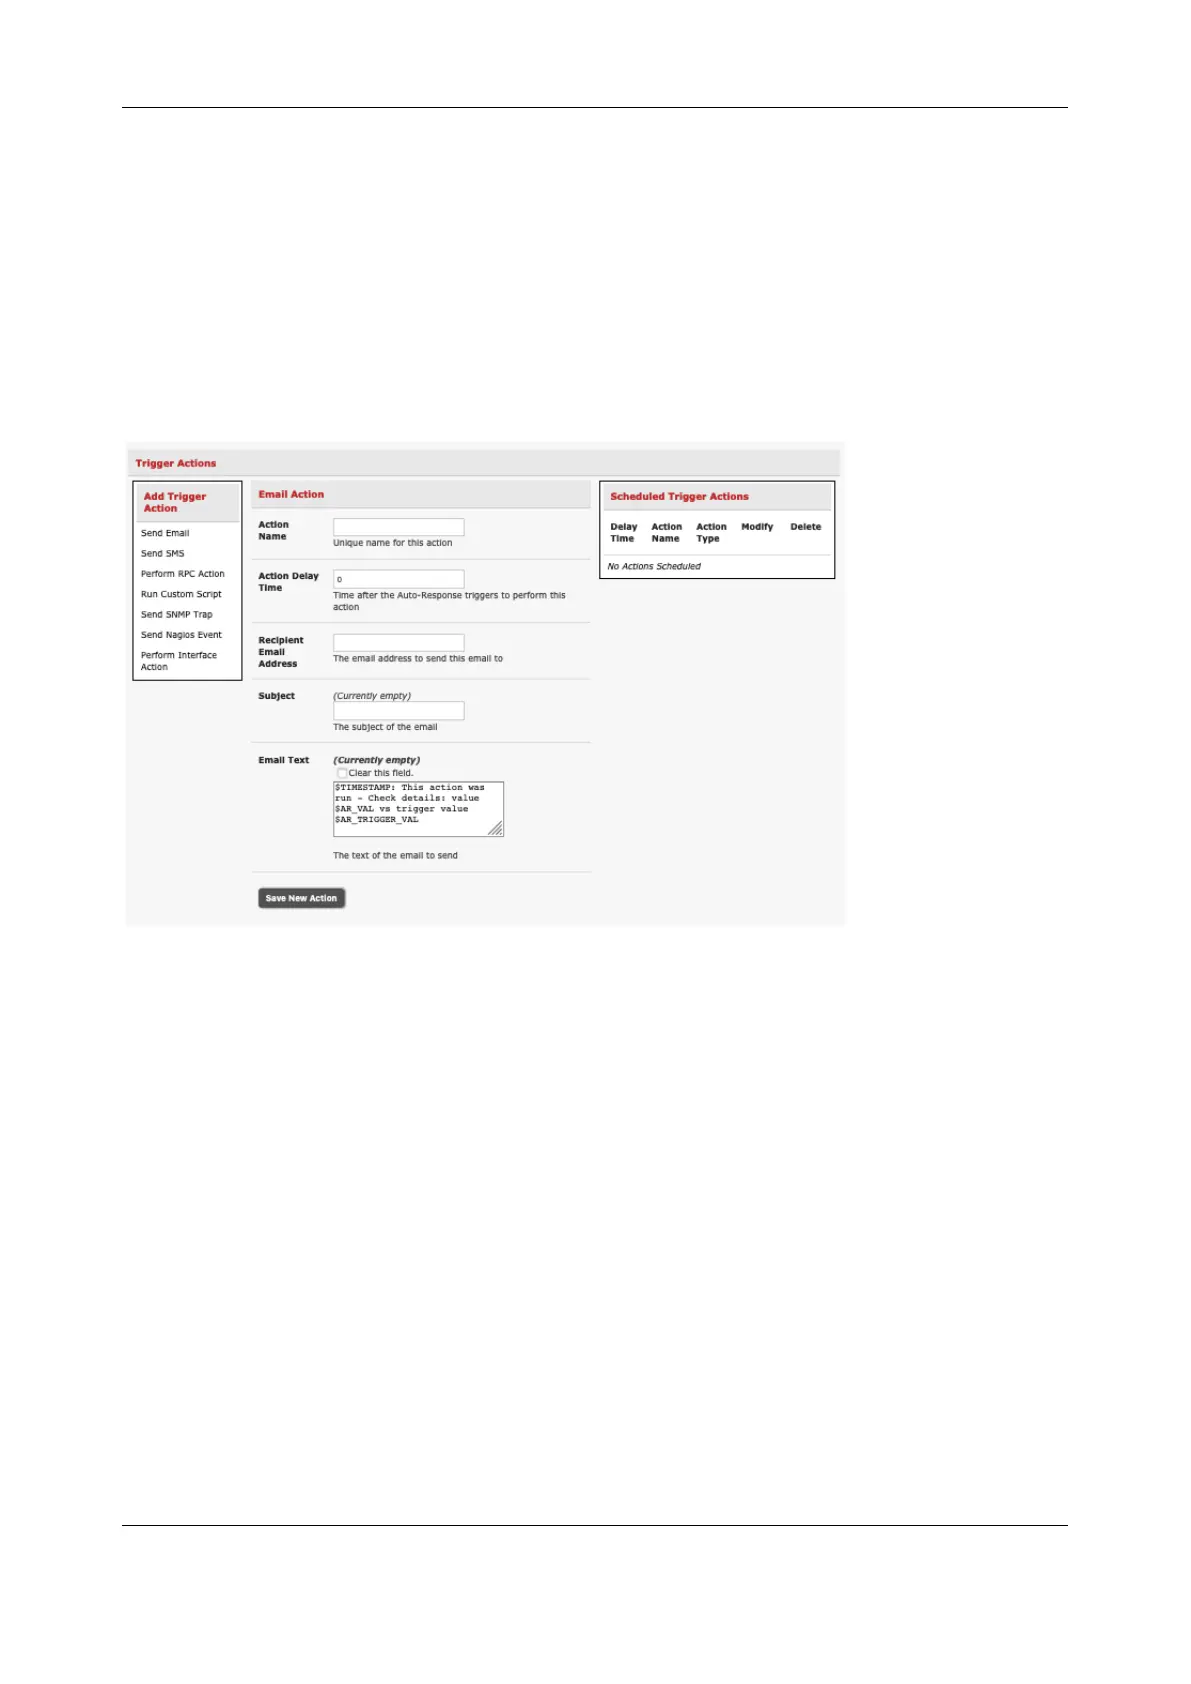
6.3.1 Send Email
1. Click on Send Email as the Add Trigger Action. Enter a unique Action Name and set the
Action Delay Time
 Loading...