Install Shipping Brackets
Chapter4 • Installing the System Into a Rack 111
Caution - Equipment damage. Do not remove the bottom screws unless you are certain that at
least one upper screw is in place; otherwise, the system might fall.
6.
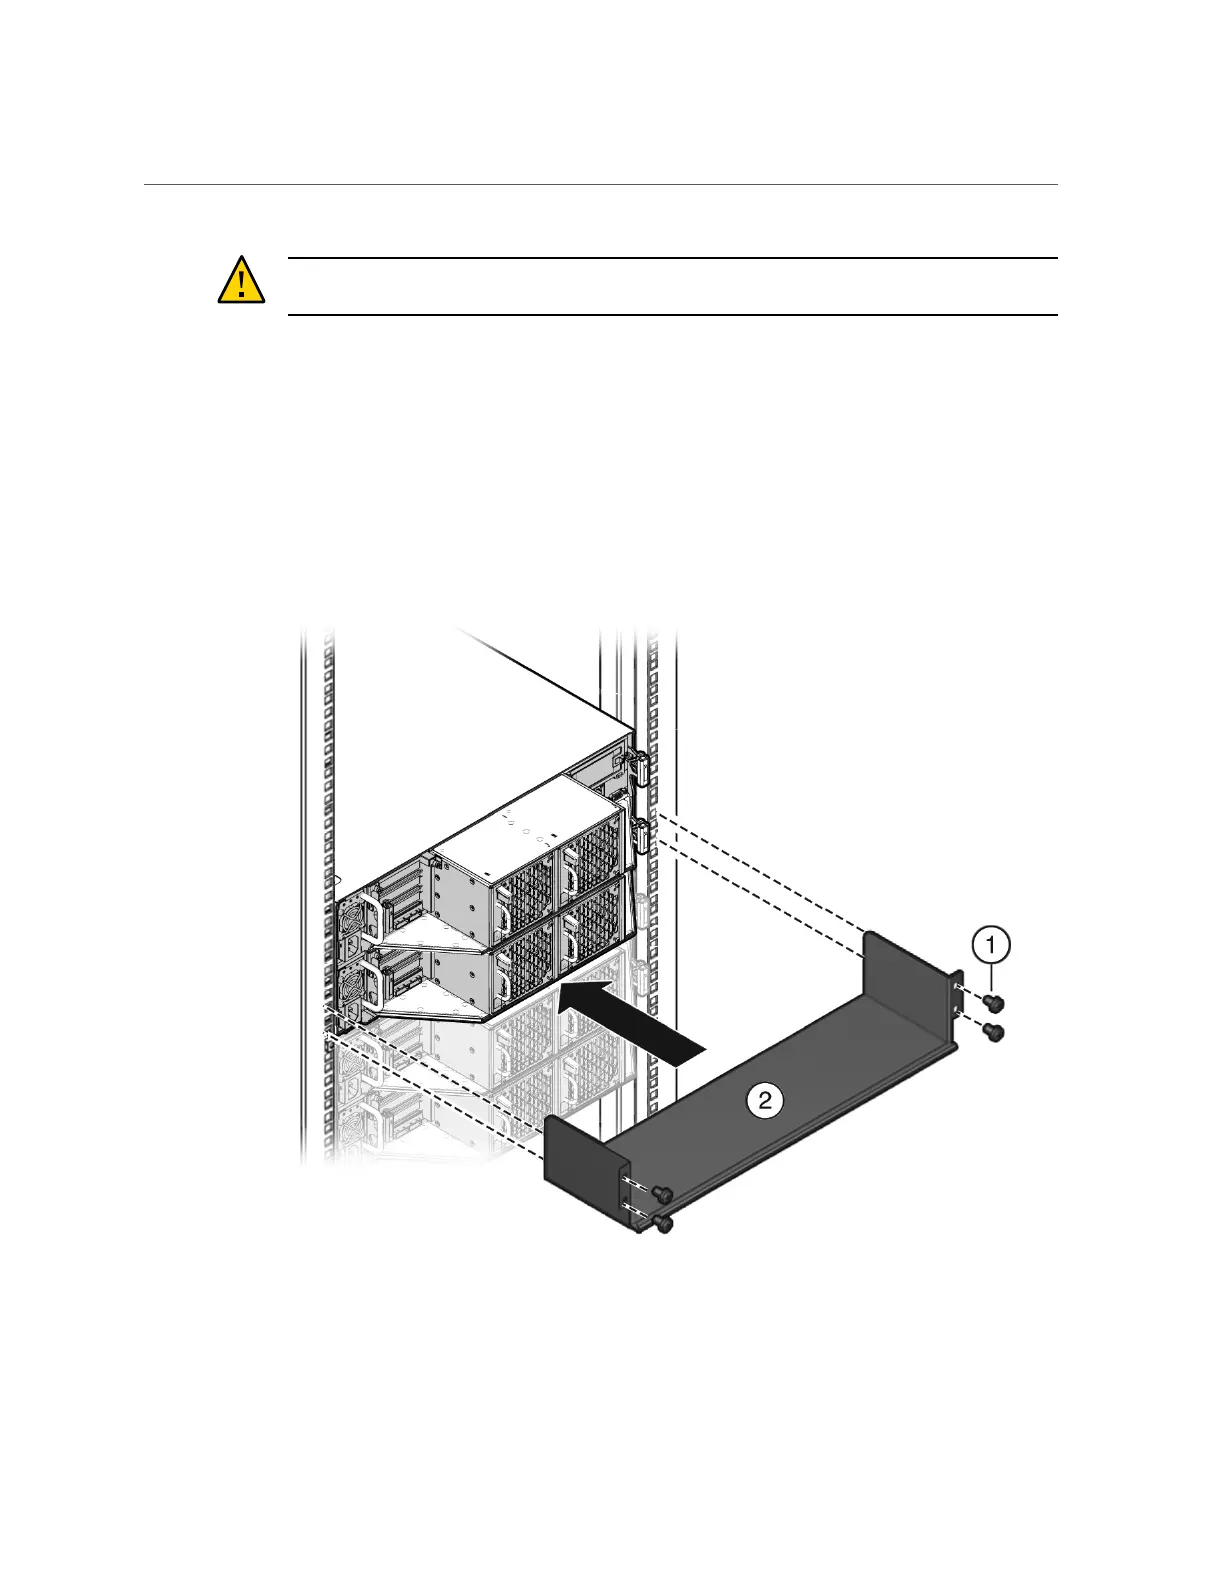
Insert the rear shipping bracket [2] under the back of the system with the side
panels facing up.
Use four screws [1] (either the M6 x 16 mm screws or the 10-32 x 10 mm screws) to fasten
the rear shipping bracket to the rack. Do not finish tightening these screws. The screws should
be tight enough to hold the bracket in place, but you should still be able to move the bracket
slightly.
The bracket should be fastened to the posts, but loose enough to move slightly.
7.
Lift the rear shipping bracket up so that it rests firmly against the bottom of the
system, then finish tightening the screws that hold the bracket in place.

 Loading...


