• When [Setup completed] is displayed, the addresses for accessing the camera over the LAN and over
the Internet are displayed.
5. Click [To Single Camera page].
Configuring the camera to use Viewnetcam.com from the [UPnP] page
1. Click the [Setup] tab.
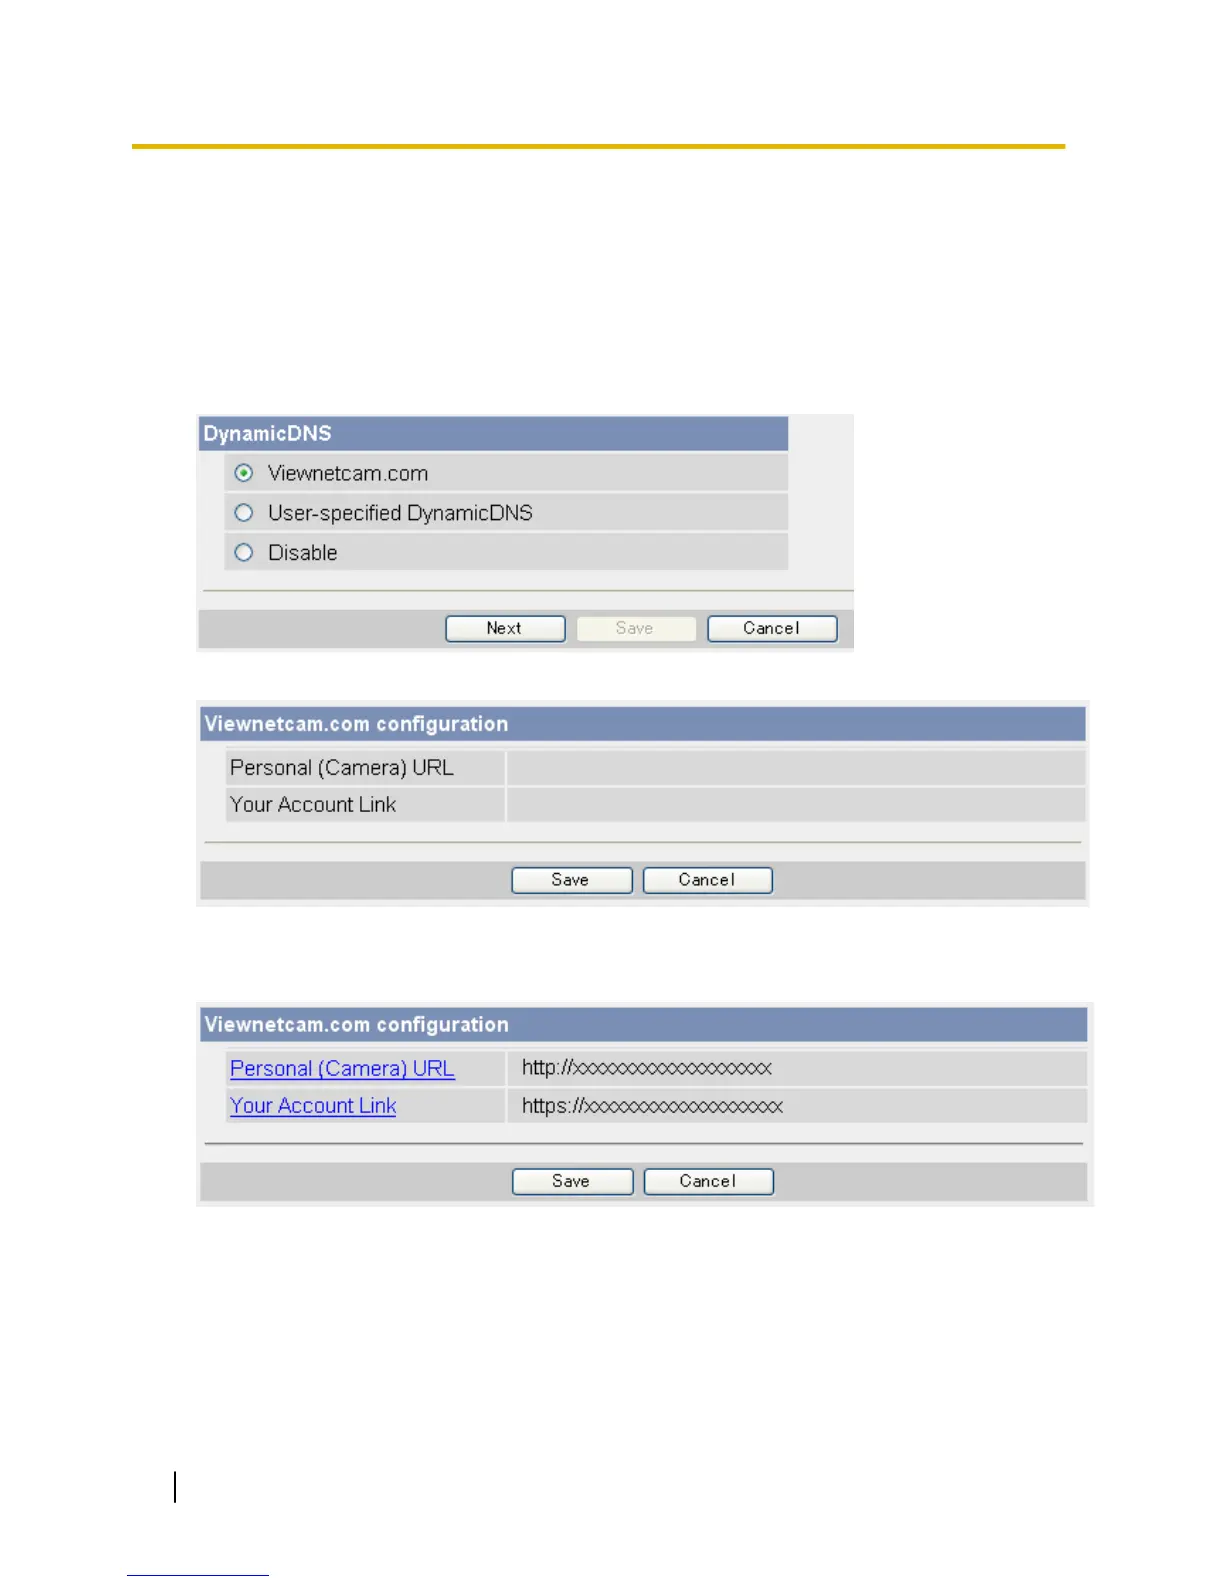
2. On the left side of the screen under [Basic], click [DynamicDNS].
3. Select [Viewnetcam.com], then click [Next].
4. Click [Save].
• When setup is complete, [Success!] is displayed.
5. Click [Go to Viewnetcam.com page].
6. Click [Your Account Link].
7. The Viewnetcam.com website is displayed. Follow the on-screen instructions to register with
Viewnetcam.com.
• If the Viewnetcam.com website is not displayed, confirm that your PC can access the Internet, then
click your web browser’s refresh button.
• When registration is complete, you can access the camera using the Viewnetcam.com URL you
selected during registration. Note that you can access the camera using this URL only from a PC that
is not connected to the same network (LAN) as the camera.
76 Operating Instructions
4.2.1 Configuring the Camera to Use Viewnetcam.com