Getting started
VQT3F56
11
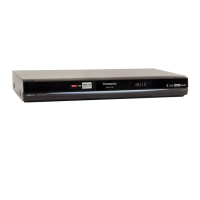
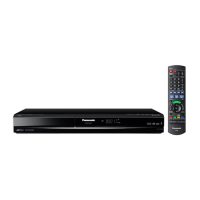
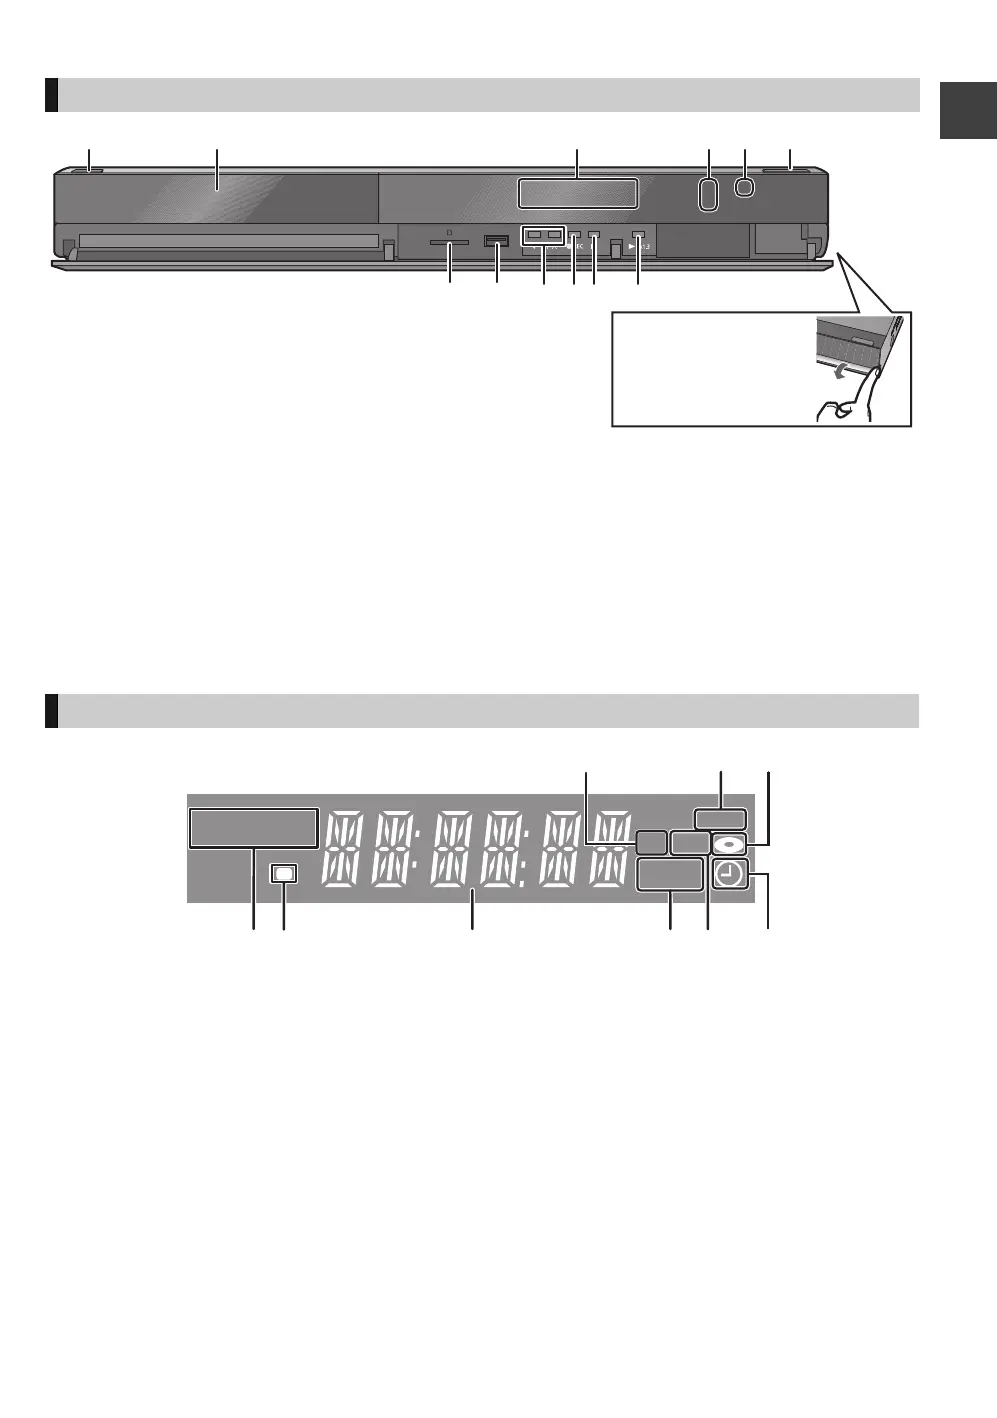
1 Standby/on switch (Í/I) (> 16, 18)
Press to switch the unit from on to standby mode or vice
versa. In standby mode, the unit is still consuming a
small amount of power.
2 Disc tray (> 16)
3 Display (> below)
4 Recording indicator
≥The indicater will light up while recording.
≥The indicator will blink while recording is paused.
5 Remote control signal sensor
Angle: Approx. 20° up and down, 30° left and right
Distance: Within approx. 7 m in front of the unit
6 Open/close disc tray (> 16)
7 SD card slot (> 16)
8 USB port (> 16)
9 Channel select
: Start recording/One Touch Recording (> 23)
; Stop
< Start play
Rear panel terminals (> 12, 13, 14, 15)
1 SD card slot indicator
2 Copying indicator
3 Disc indicator
4 Drive (HDD, DVD or SD) indicator
5 Remote control signal indicator
6 Main display section indicator
Current time/playback counter, various messages
7 Playback indicator
8 USB port indicator
9 Timer recording indicator
This indicator lights up when the timer recording standby
is activated.
Main unit
Pull to flip down the front
panel.
The unit’s display
PLAY
COPY
SD USB
HDDSDVD
DMRXW385GL-VQT3F56_eng.book 11 ページ 2011年2月8日 火曜日 午後4時38分
 Loading...