Convenient functions
VQT3F56
65
[-R] [-R]DL] [-RW‹V›] [+R] [+R]DL] [+RW]
You can select the background for DVD-Video Top Menu.
After performing steps 1–3 (> 64)
1 Select “Top Menu”, then press [OK].
2 Select the background, then press [OK].
≥ You can change thumbnails displayed in the top menu. (> 38,
Changing thumbnail)
[-R] [-R]DL] [-RW‹V›] [+R] [+R]DL] [+RW]
You can select whether to show the top menu after finalising
or creating Top Menu ([+RW]).
After performing steps 1–3 (> 64)
1 Select “Auto-Play Select”, then press
[OK].
2 Select “Top Menu” or “Title 1”, then press
[OK].
[-R] [-R]DL] [-RW‹V›] [+R] [+R]DL]
You can play these discs on compatible DVD players by
finalising it on the unit.
After performing steps 1–3 (> 64)
1 Select “Finalise”, then press [OK].
2 Select “Yes”, then press [OK].
3 Select “Start”, then press [OK].
4 Press [OK].
After finalising
≥[-R] [-R]DL] [+R] [+R]DL] The disc becomes play-only and
you can no longer record or edit.
≥[-RW‹V›] You can record and edit the disc after
formatting (> 64).
≥ You cannot cancel finalising.
≥ Finalising takes up to 15 minutes.
([-R]DL] [+R]DL] Finalising takes up to 60 minutes.)
≥ Do not disconnect the AC mains lead while finalising. This can
render the disc unusable.
≥ When finalising a high-speed recording compatible disc, it may take
longer than displayed on the confirmation screen (approximately four
times longer).
≥ You cannot finalise discs recorded on other manufacturer’s equipment.
≥ [-R] [-R]DL] [-RW‹V›] [+R] [+R]DL] If you finalise discs recorded on
Panasonic equipment other than this unit, the background selected as
“Top Menu” may not be displayed.
≥ Discs finalised on this unit may not be playable on other players due to
the condition of the recording.
[+RW]
You can create Top Menu for displaying on other equipment.
Make selections from “Top Menu” and “Auto-Play Select”
(> left) before creating top menu.
After performing steps 1–3 (> 64)
1 Select “Create Top Menu”, then press
[OK].
2 Select “Yes”, then press [OK].
3 Select “Start”, then press [OK].
≥Creating Top Menu starts. You cannot cancel creating.
≥Creating Top Menu can take a few minutes.
4 Press [OK].
≥ You cannot use the Top Menu for playing on this unit.
≥ The created menu is deleted when you record or edit disc.
Top M enu
Auto-Play Select
Top Menu: The top menu appears first.
Title 1: The disc content is played without
displaying the top menu.
1
4
7 8
5
2
9
6
3
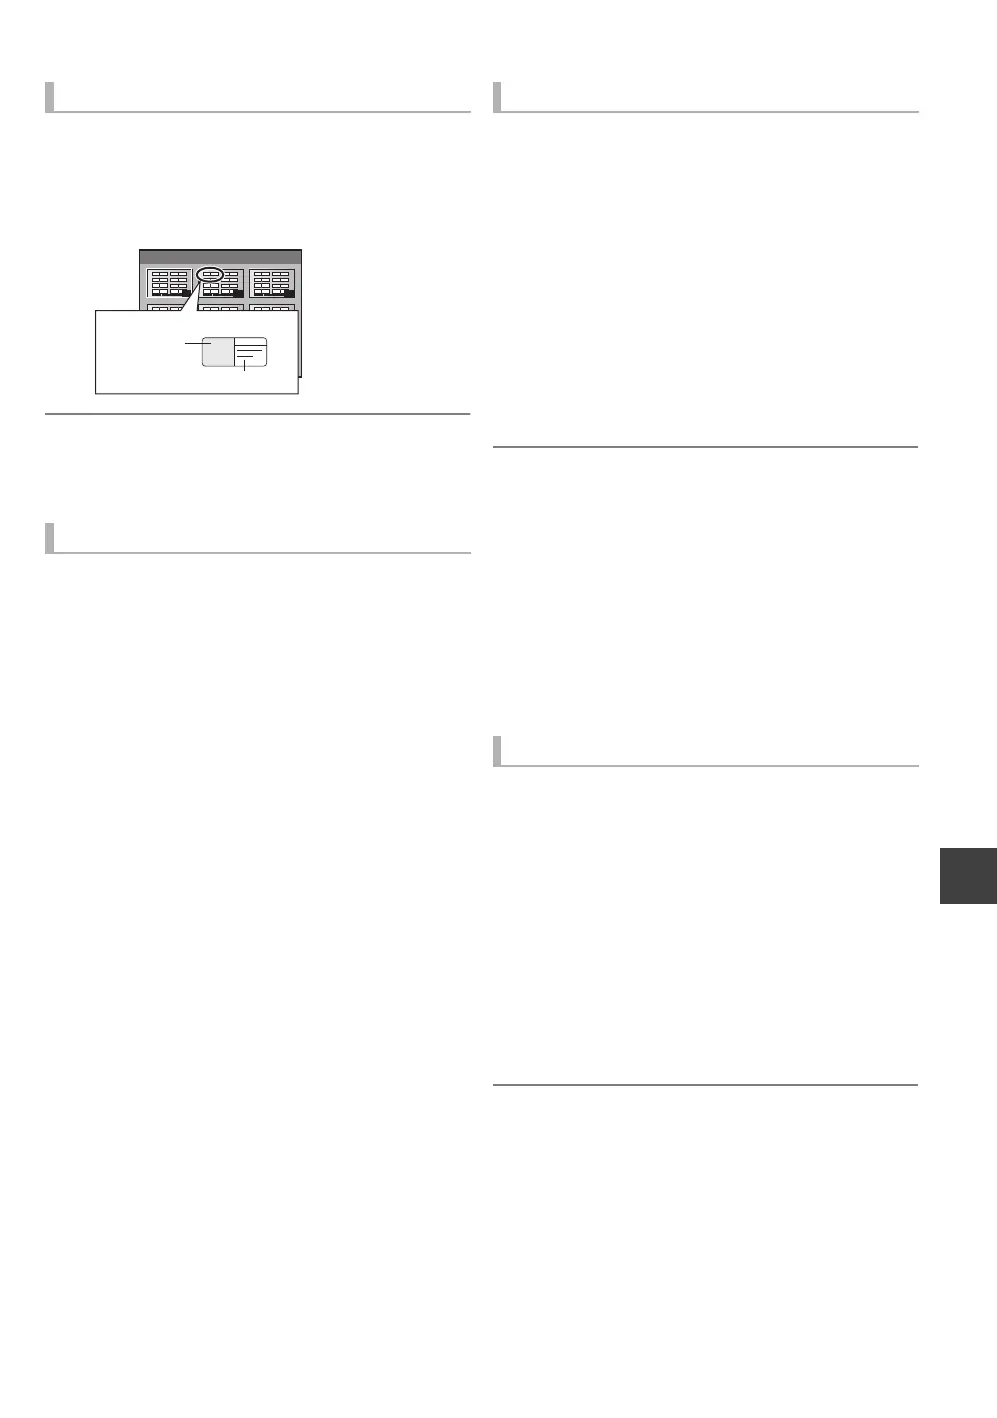
Top Menu List
01
Display after finalising
Title Name
Thumbnail
(Still picture)
Finalise
Create Top Menu
DMRXW385GL-VQT3F56_eng.book 65 ページ 2011年2月8日 火曜日 午後4時38分
 Loading...