Convenient functions
VQT3F56
68
Changing the unit’s settings
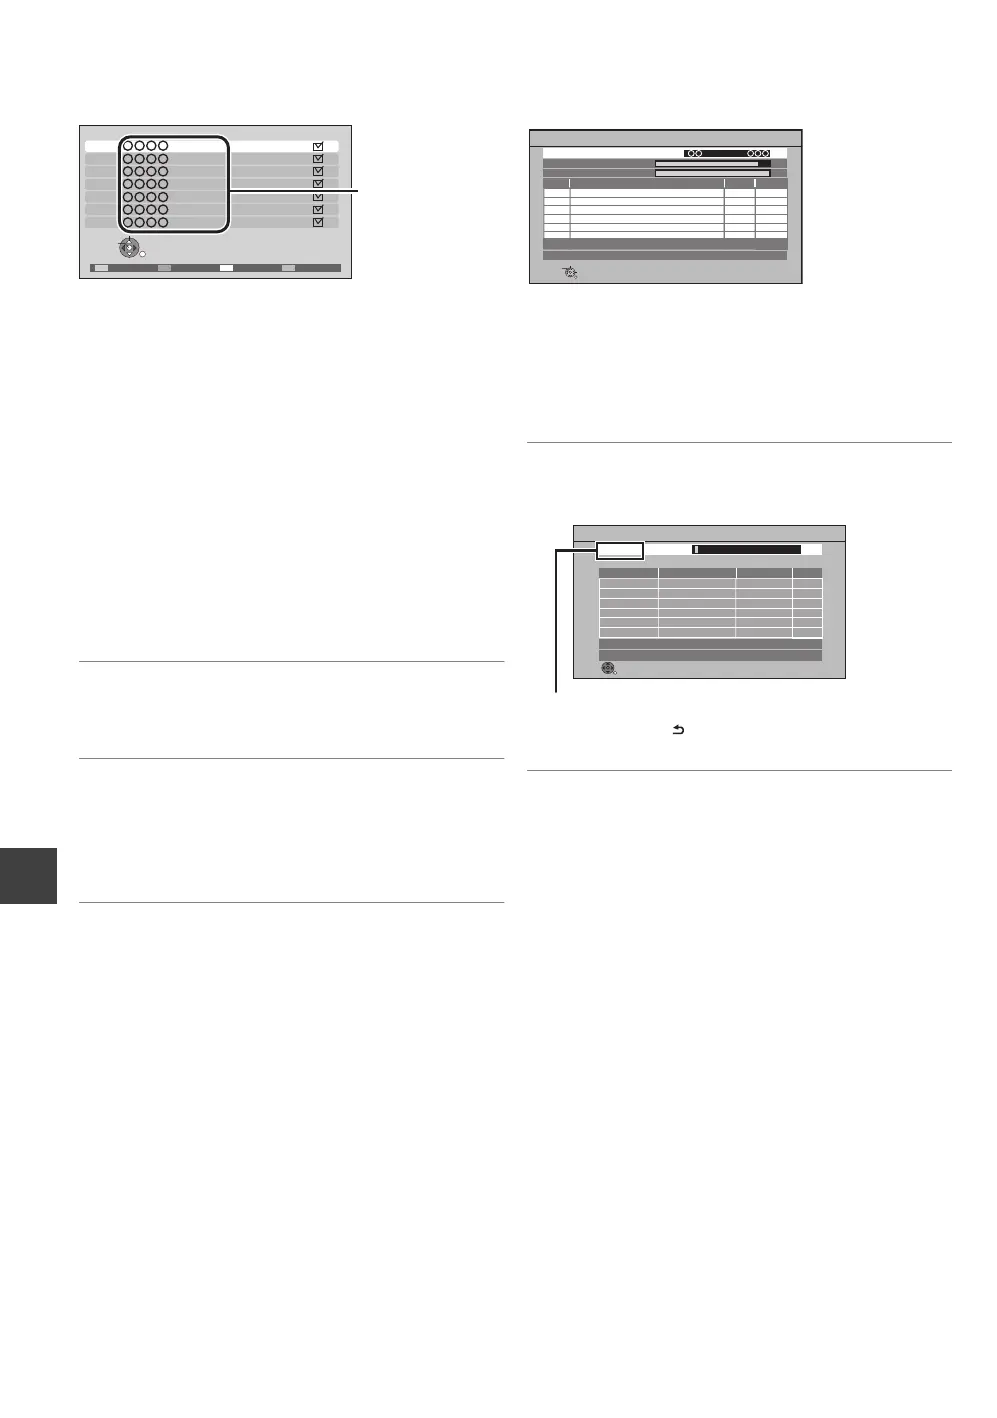
∫ Channel List
You can edit the Channel List.
¾ To skip unwanted channels
1 Select the channel.
2 Press [OK].
≥The check mark is removed.
≥“Yellow” : Clear the all skip setting.
¾ To change the channel number assignment
1 Select the channel, then press the “Green” button.
2 Enter the channel number you wish to reassign with the
number buttons.
3 Press [OK].
≥If another channel is already assigned to the channel
number you wish to use, the two channels will be
switched.
¾ To set the channel manually
Press the “Red” button.
“Digital TV Manual Tuning” screen appears. (> right)
∫ Auto Setup
You can restart the Auto Setup. (> 18)
Select “Yes”, then press [OK].
∫ Download from TV
Select “Download from TV” when you connect the unit to a
VIERA Link (HDAVI Control 3 or later) compatible TV with an
HDMI cable.
Select “Yes”, then press [OK].
∫ Manual Tuning
You can set each channel manually.
1 Select the channel.
2 Adjust the frequency.
≥Adjust the frequency by checking the signal strength
and signal quality displays.
3 Press [OK] to start scan.
The set channel is displayed in the table.
∫ Update Channel List
You can update channels to the latest one.
≥This takes about 3 minutes.
“Finished” is displayed when the search is finished.
Press [RETURN ].
Digital TV Channel List
1
2
3
4
5
6
7
RETURN
Hide
Select
Swap Reveal allTun e
Digital TV Manual Tuning
Physical Channel
No.
NewChannel Name Type
010
010
[ ]
Signal Quality
Signal Strength
RETURN
Select offset
Select physical channel
Start tuning
MHz
Digital TV:0
Scan
CH 6 69
RF Ch
Digital TV:0
Searching
QualityTypeChannel Name
RETURN
This will take about 3 minutes.
Digital TV Update Channel List
DMRXW385GL-VQT3F56_eng.book 68 ページ 2011年2月8日 火曜日 午後4時38分
 Loading...