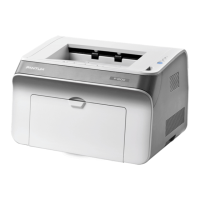
EasyManuals Logo

Pantum P1000 Series Service Manual

Pantum P1000 Series
93 pages
To Next Page IconTo Next Page
To Previous Page IconTo Previous Page
Page #55 background imageLoading...
Page #55 background image
- -
47
4.3.4 Rear cover
Unscrew the two screws in the rear cover, disengage four claws in total , remove the rear
cover .
Note: avoid damage to the tabs, and don’t use hard tools. Please use a smooth, rounded tool
with a thickness of about 1 mm to 1.5mm.
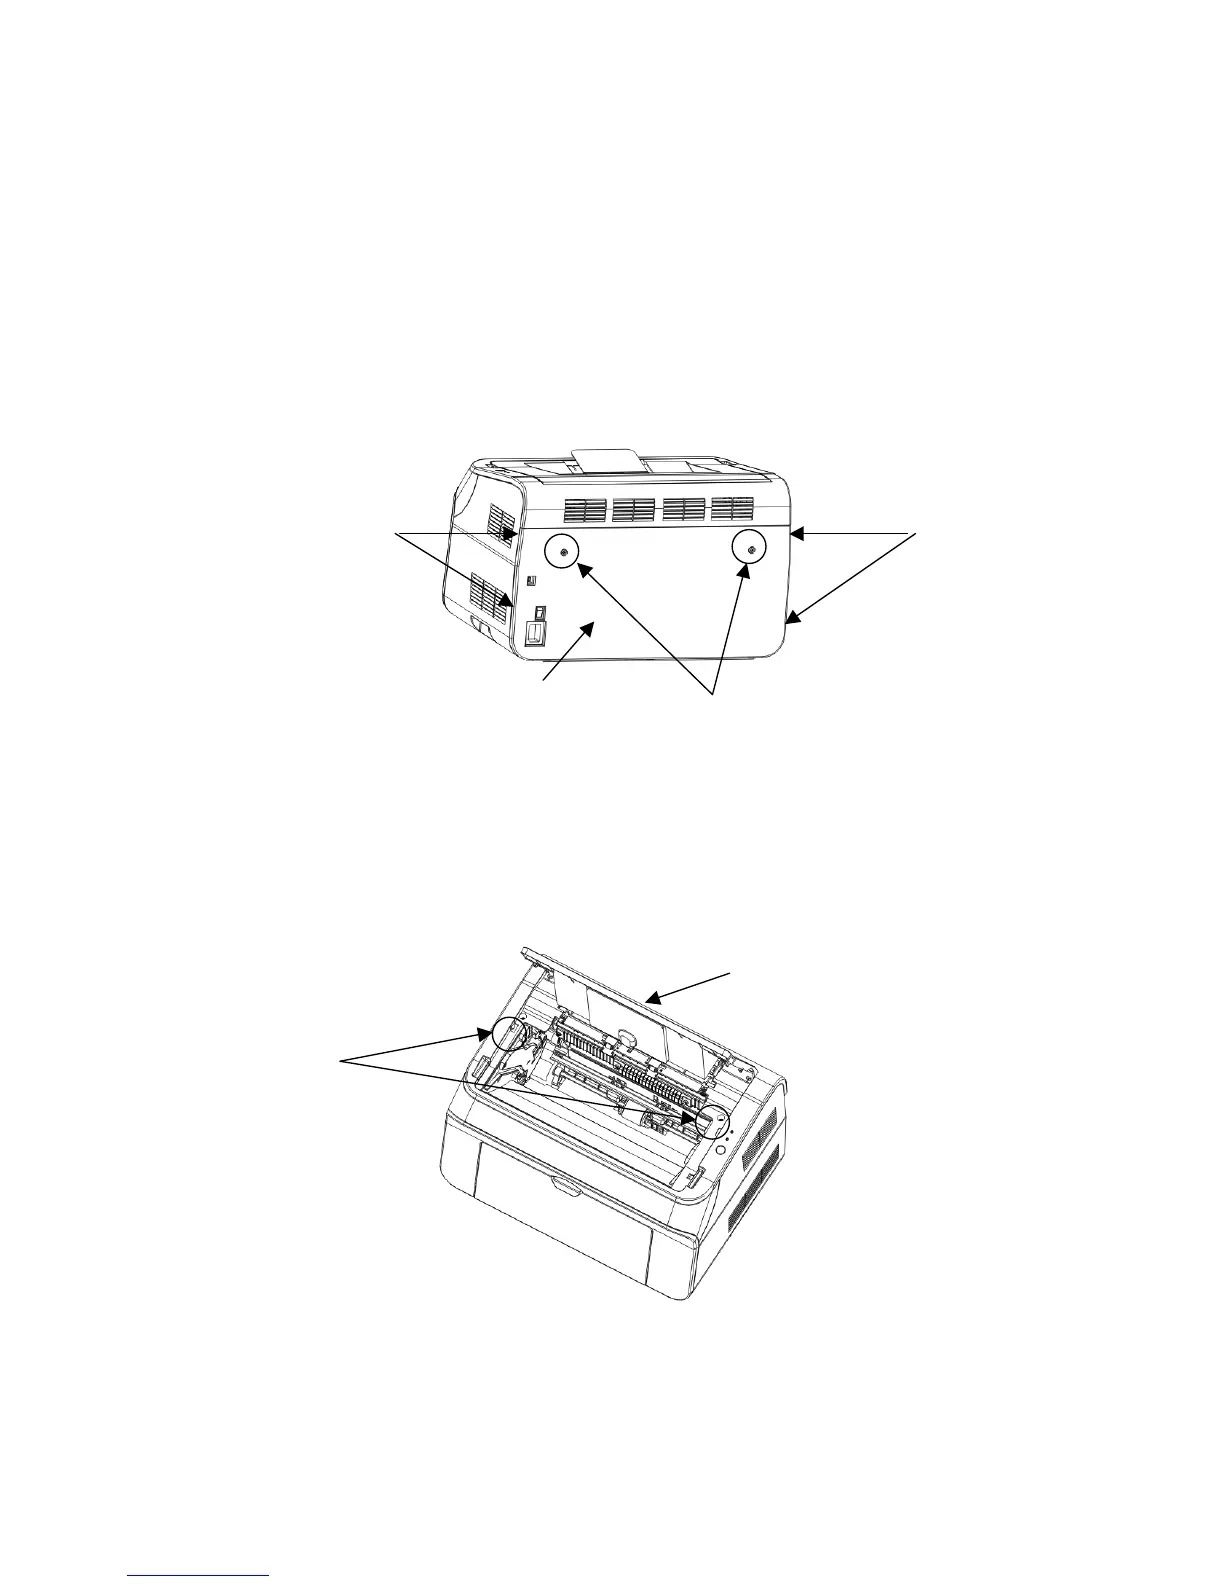
4.3.5 Top cover
1(See section 4.3.4 above) After removing the rear cover, you can open the discharge tray
to release the top cover screws .
Note: remove toner cartridge before removing the top cover.
(2) After removing the screws, raise the top cover slightly to see the hooking tabs and

Table of Contents

Other manuals for Pantum P1000 Series

Questions and Answers:

Question and Answer IconNeed help?

Do you have a question about the Pantum P1000 Series and is the answer not in the manual?

Pantum P1000 Series Specifications

General IconGeneral
BrandPantum
ModelP1000 Series
CategoryPrinter
LanguageEnglish

Related product manuals