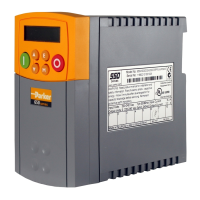
Installing the Drive 3-1
650 Series AC Drive
0INSTALLING THE DRIVE
IMPORTANT: Read Chapter 10: “Certification for the Drive” before installing this unit.
Mechanical Installation
W
H2
D
SIDE VIEW - Frame 1 illustrated
The DIN clip is repositioned on Frames 1 and 2
to provide the upper fixing hole when wall-mounting
W
2
H1
H4
H3
C
DIN
centreline
H2
REAR VIEW - Frame 3
H1
H3
C
DIN centreline
W
2
H4
W
DIN
centreline
REAR VIEW - Frame 1 illustrated
(Frame 2 similar)
Fixing Torque Weight H1 Fixing Centres H2 H3 H4 C W D
Frame 1 M4 1.5Nm 0.85kg 132 143 35 139 6 73 142
(5.2”) (5.6”) (1.4”) (5.5”) (0.2”) (2.9”) (5.6”)
Frame 2 M5 3.0Nm 1.4kg 188 201 35 194 6.5 73 173
(7.4”) (7.9”) (1.4”) (7.7”) (0.24”) (2.9”) (6.8”)
Frame 3 M5 3.0Nm 2.7kg 242 260 38 112 5 96 200
(9.5”) (10.2”) (1.5”) (4.4”) (0.2”) (3.8”) (7.9”)
Dimensions are in millimetres ( inches )
Mounting the Drive
To maintain compliance with European Electrical Safety Standard VDE0160(1994)/EN50178
(1998) the unit must be mounted inside a control cubicle that requires a tool for opening. The
cubicle should provide 15dB attenuation to radiated emissions between 30-100MHz.
Mount the drive vertically on a solid, flat, non-flammable, vertical
surface. It can be panel-mounted, or rail-mounted on a rail
complying with EN50022 (35mm DIN).
DIN Mounting
To DIN mount the unit, hang the unit on the top DIN rail and push
the unit onto the bottom DIN rail until it snaps in to position. Secure
with a lower screw fixing. To release the unit, use a flat bladed
screwdriver as shown.
Ventilation
Maintain a minimum air clearance for ventilation of 100mm (4 inches) above and below the
unit. When mounting two or more 650 units together, these clearances are additive. Ensure that
the mounting surface is normally cool. Be aware that adjacent equipment may generate heat and
also have clearance requirements. Provided the minimum clearance for ventilation is maintained,
650 drives may be mounted side-by-side.
lower
fixing
hole

 Loading...