83
4
Taking Pictures
6 Press the shutter release button
fully.
The screen for taking the second frame is
displayed after you take the first frame.
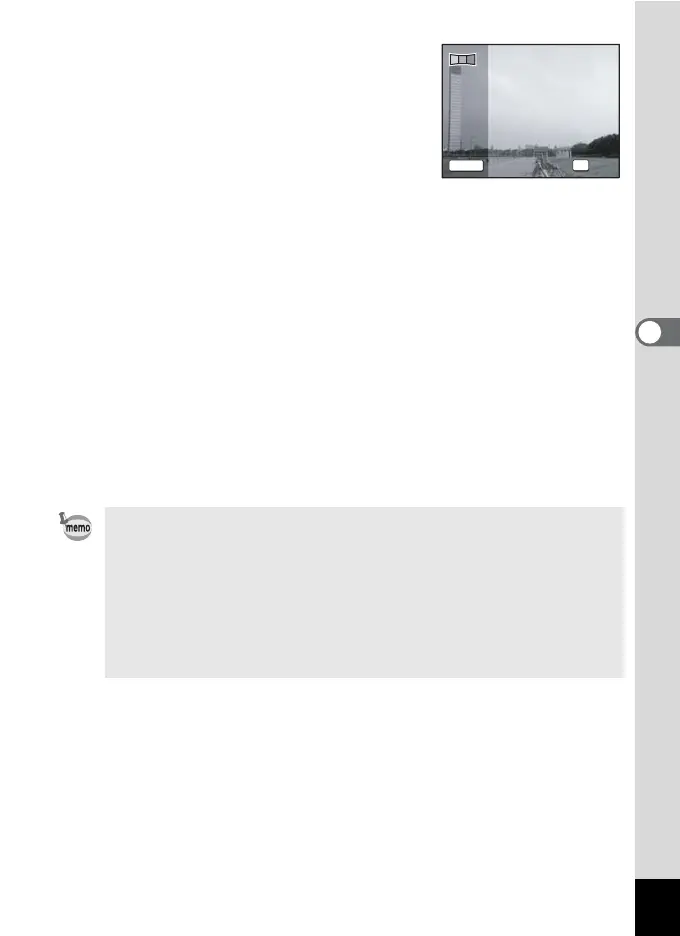
If you select right (5) in Step 4:
The right edge of the first frame appears in
semi-transparent form on the left edge of the display.
If you select left (4) in Step 4:
The left edge of the first frame appears in semi-transparent form on the
right edge of the display.
7 Move the camera horizontally to the selected direction
and take the second frame.
Move the camera so that the semi-transparent image and the actual
view overlap and press the shutter release button. Repeat Steps 5 to
7 to take the third frame.
8 The panorama stitching starts when the third frame is
taken and the stitched image appears.
The stitched image does not appear when the Instant Review (p.44,
p.120) is off.
• When the Face Recognition is activated (p.59), it works only when
taking the first frame.
• If you press the 4 button after shooting the first or second frame,
you can save the captured image(s). (If you press the 4 button
after shooting the second frame, you can save the first and the
second frames as a stitched image.)
• When you cancel shooting after shooting the first frame, the frame
is saved at i (1600×1200).
Exit
2nd frame
OK
1 2
SHUTTER