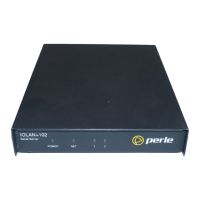
Powering Up the IOLAN
29 IOLAN DS1/TS2 User’s Guide, Version 4.3
Powering Up the IOLAN
Models with Barrel Connector
To power up the IOLAN, perform the following steps:
1. Plug the external power supply into the IOLAN and then into the electrical outlet.
2. You will see the LEDs cycle for several seconds and then remain a solid green, indicating that it
is ready to configure/use.
Before you start to configure the IOLAN, you should set the IOLAN jumpers if you want to
terminate the line or use the power in pin feature (instead of an external power supply, if your
desktop IOLAN model supports it).
In some circumstances, the setting of jumpers may be required:
z IOLAN DS models where EIA-422/485 line termination is required.
z IOLAN I/O models with Digital I/O for setting the channels as input or output.
z IOLAN I/O models with Analog I/O for setting Voltage/Current.
See Appendix C, Setting Jumpers on page 216 to see how to set the jumpers for your IOLAN
desktop model.
Models with Terminal Block Connector
To power up the unit, perform the following steps:
1. Unplug the power plugable terminal block from the back of the unit.
2. Loosen the screws and then insert your positive (+) wire into the left terminal and screw it down.
Insert the negative (-) wire into the right terminal and screw it down as shown below:
+
-
9-30 VDC
Left
Right
3. Plug the power terminal block back into the unit
4. Plug the power supply into the electrical outlet.
5. You will see the LEDs cycle for several seconds and then remain a solid green, indicating that it
is ready to configure/use.
Before you start to configure the IOLAN, you should set the IOLAN jumpers for Digital I/O (see
Digital I/O Module on page 219) or Analog Input (Analog Input Module on page 220) channels.


 To Next Page