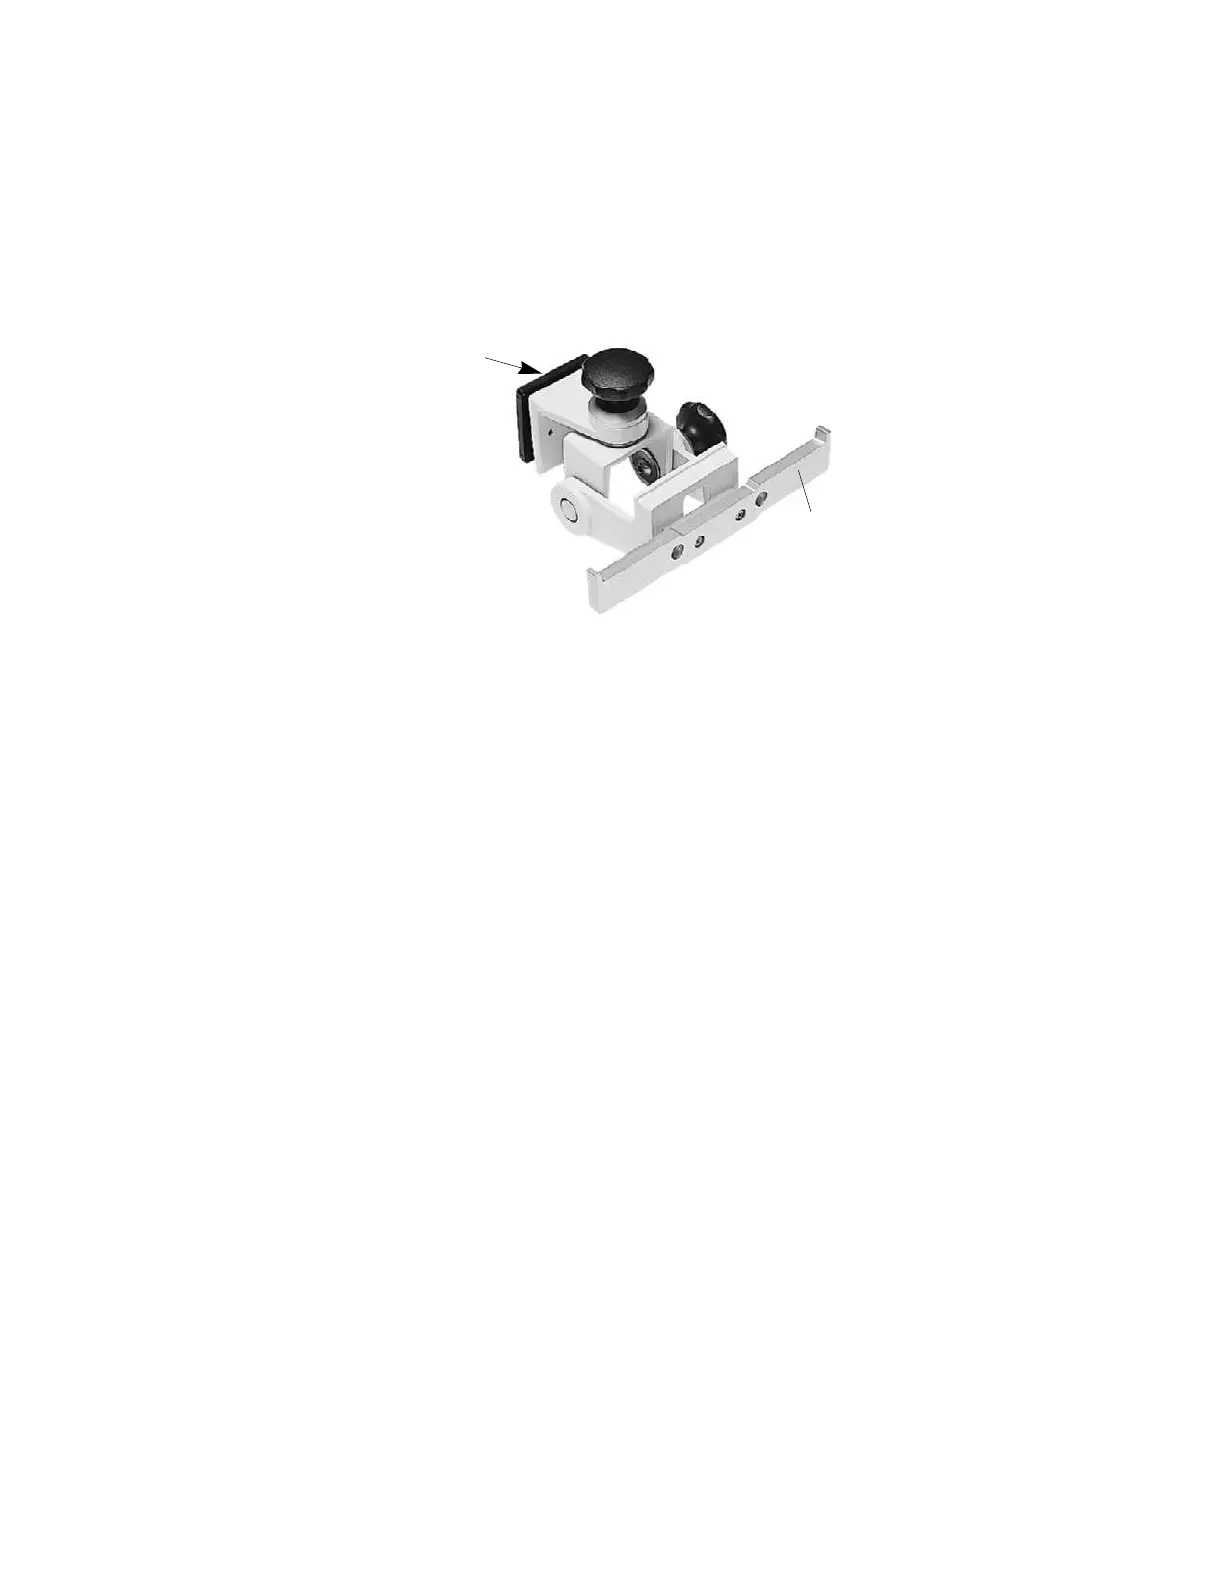
Installing the Tilt/Swivel Mount (M3080A #A14)
102
Installin
the Instrument
Screwed Directly to a Wall
This option is used to mount the Monitor on a wall but to also provide tilt and swivel
capability. To mount the assembly securely, you need 3 screws. These are not provided
because the type of surface dictates the type of screw used.
Step 1 Unpack the Tilt/Swivel mount and check all parts are available.
Step 2 Remove the adapter plate (this is only necessary for the GCX Wall Channel).
Step 3 Secure the rail to the Tilt/Swivel mount with the 2 screws provided.
Step 4 Select 3 screws (appropriate to surface material).
Step 5 Insert the 3 screws through the screw holes provided in the plate.
Step 6 Tighten the screws to secure the mount to the wall.
Step 7 Use adjustment knobs to adjust to the required tilt/swivel angle.
Hang the bed hanger over the rail.
Adapter
Plate
Rail