onlinecomponents.com
UM EN ILC 1XX
2-14
PHOENIX CONTACT 7805_en_02
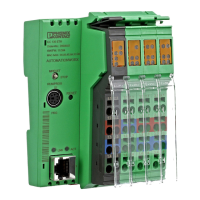
2.11 Mounting and removing the Inline Controller
An Inline station is set up by mounting the individual components side by side. No tools are
required. Mounting the components side by side automatically creates potential and bus
signal connections between the individual station components.
The modules are mounted perpendicular to the DIN rail.
Mounting location Like all other terminals of the Inline product range, the Inline Controller has IP20 protection
and is designed for use in a closed control cabinet or control box (terminal box) with IP54
protection or higher.
DIN rail The Inline Controller is mounted on a 35 mm standard DIN rail.
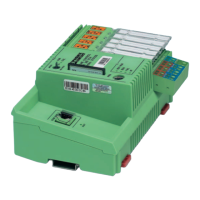
End clamps Mount end clamps on both sides of the Inline station. The end clamps ensure that the Inline
station is correctly mounted. End clamps secure the Inline station on both sides and keep it
from moving from side to side on the DIN rail. Phoenix Contact recommends using
CLIPFIX 35-5 end clamps (Order No. 3022276).
End plate The mechanical end of an Inline station is the end plate. It has no electrical function. It
protects the station against ESD pulses and the user against dangerous contact voltages.
The end plate is supplied together with the Inline Controller and does not need to be ordered
separately.
Mounting position Mount the Inline Controller horizontally (as shown in Figure 2-11 on page 2-15). The
specified temperature range (see "Ambient conditions" on page 5-6) is only guaranteed if
the Inline Controller is mounted in this position.
For notes and instructions on mounting and removing Inline terminals, please refer to the
IB IL SYS PRO UM E user manual (for INTERBUS), the IL SYS INST UM E Inline
installation manual or the Inline system manual for your bus system.
NOTE:
Before mounting or removing the Inline Controller, ensure that the power supply is
switched off and cannot be switched on again by unauthorized persons.
Fix the DIN rail on which the Inline Controller is mounted several times, especially in the
area around the Inline Controller. This makes it easier to remove the Inline Controller.
NOTE:
When mounting or removing the Inline Controller it must be tilted. This means that no
Inline terminal should be installed directly to the right of the Inline Controller during
mounting and removal. The terminal must be removed prior to mounting or removing the
Inline Controller. Otherwise, the locking clips and jumper contacts will be damaged.
 Loading...