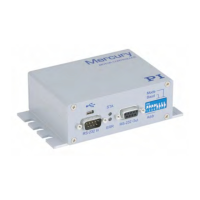
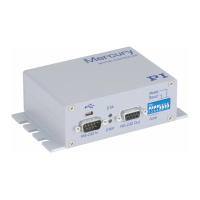
110 Version: 1.2.1 MS249E C-863.12 Mercury Controller
If error code 10
interferes: Record
alternative HALTVAR
macro which uses a
variable. Details see
"Variables" (p. 118).
MAC BEG haltvar
MVR 1 5
JRC 2 DIO? 1 = 1
JRC -1 ONT? 1 = 0
CPY TARGET POS? 1
MOV 1 ${TARGET}
VAR TARGET
MAC END
The macro has the same tasks as the HALT macro.
However, axis 1 is not stopped by pushbutton via the
HLT command; instead the result of the POS? 1
query is copied to the TARGET variable. Then this
variable is used as the target position for the MOV
command. As a result, the axis stays right where it
was. To clean up, TARGET is defined as empty with
the VAR command which deletes the variable.
Start the HALTVAR
macro on the
controller.
Axis 1 starts to move. It is stopped by switching digital
input line 1 to the high state (e.g., by pushbutton).
Error code 10 is not set because no halt or stop
command is used.
7.7.7 Macro Example: Joystick Control with Storage of Positions
Task:
Axis 1 is to be controlled with a joystick. Joystick control is to be activated only when the
joystick button is pressed at the same time. By using the buttons of a connected pushbutton
box, in addition up to four positions are to be stored in the controller or approached by the axis.
The LEDs of the pushbutton box should indicate whether the controller is ready to save the
current position and whether it has been saved.
Approach:
The STARTUP, MAINLOOP, TESTJOYB, TESTDION, and MVAX2ST macros are recorded on the
controller. They use the global variables STORE1, STORE2, STORE3, STORE4, COUNTER, and the
local variables 1 and 2.
When macros are recorded on the Controller macros tab in PIMikroMove, the MAC BEG and
MAC END commands must be left out.
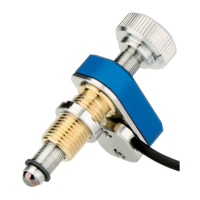
Connect C-170.PB
pushbutton box from PI
to the I/O socket.
Digital input lines 1 to 4 are switched to high state as
long as the respective button is pressed. The states of
digital output lines 1 to 4 are indicated by the LEDs
which are integrated in the buttons.
Connect C-819.20 or C-
819.30 joystick to the
Joystick socket.
For commands, the joystick axis connected is
accessible as axis 1 of joystick 1 and the joystick
button is accessible as button 1 of joystick 1.
The servo mode must be switched on, so that axis 1