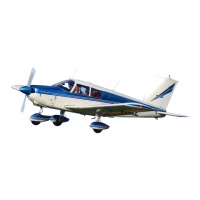
PIPER
CHEROKEE SIX
SERVICE MANUAL
7-14.
ENGINE.
7-15.
REMOVAL
OF ENGINE.
a.
Turn off all electrical
switches
inthe cockpit and
then disconnect
the battery
ground wire at the battery.
b. Move the
fuel selector lever in the
cockpit to "OFF".
c. Remove the engine cowling by the following procedure:
1. Release the cowl fasteners,
two on each side and two at
the top aft of
cowl.
2. Lift the aft end of the cowl
and then slide it forward to
release the two
stud
type front fasteners.
Remove the top
cowl.
3. Disconnect
the landing
light lead
at the quick disconnect
at the right
rear
side of the
bottom cowl.
4. Remove
the screws
securing the
bottom cowl at
its aft end and
brace
across
bottom aft of cowl. Remove
the bottom cowl.
d.
Remove the propeller.
(Refer
to paragraph
7-4 or
7-6.)
e. Disconnect the cabin heat
line and cabin defroster line from
the heat muff.
f. Disconnect
primer line at the tee
connection.
g. Disconnect
the mechanical
fuel pump
inlet line connected
to the right
side
of the
pump.
h.
Disconnect
the starter lead.
i. Disconnect
alternator
leads.
j . Disconnect
the carburetor
heat, throttle
and mixture controls
from the
en-
gine components.
k . Disconnect
the tachometer
cable from
the rear of
the engine.
1.
Disconnect hose
from vacuum pump.
m. Disconnect
magneto
"P" leads. Insert
a protective
cover over connection.
n. Disconnect
the oil
pressure line
from the rear
of the engine.
o.
Disconnect manifold
pressure line
from the left
rear cylinder of
the engine.
p. Attach
a one-half
ton (minimum) hoist
to the hoisting
strap and relieve
the
tension on
the engine mount.
NOTE
Place
a tail stand
under
the
tail of the
airplane
before
removing
the engine.
q. Check
the engine for
any attachments
remaining to
obstruct its removal.
r. Drain
the engine
oil, if desired,
and then
close drain.
s. Remove the
four engine mount
assemblies and
swing the engine
free, being
careful
not
to damage
any attaching
parts.
POWER PLANT
Issued:
8/17/72
2E24