ENGLISH
15
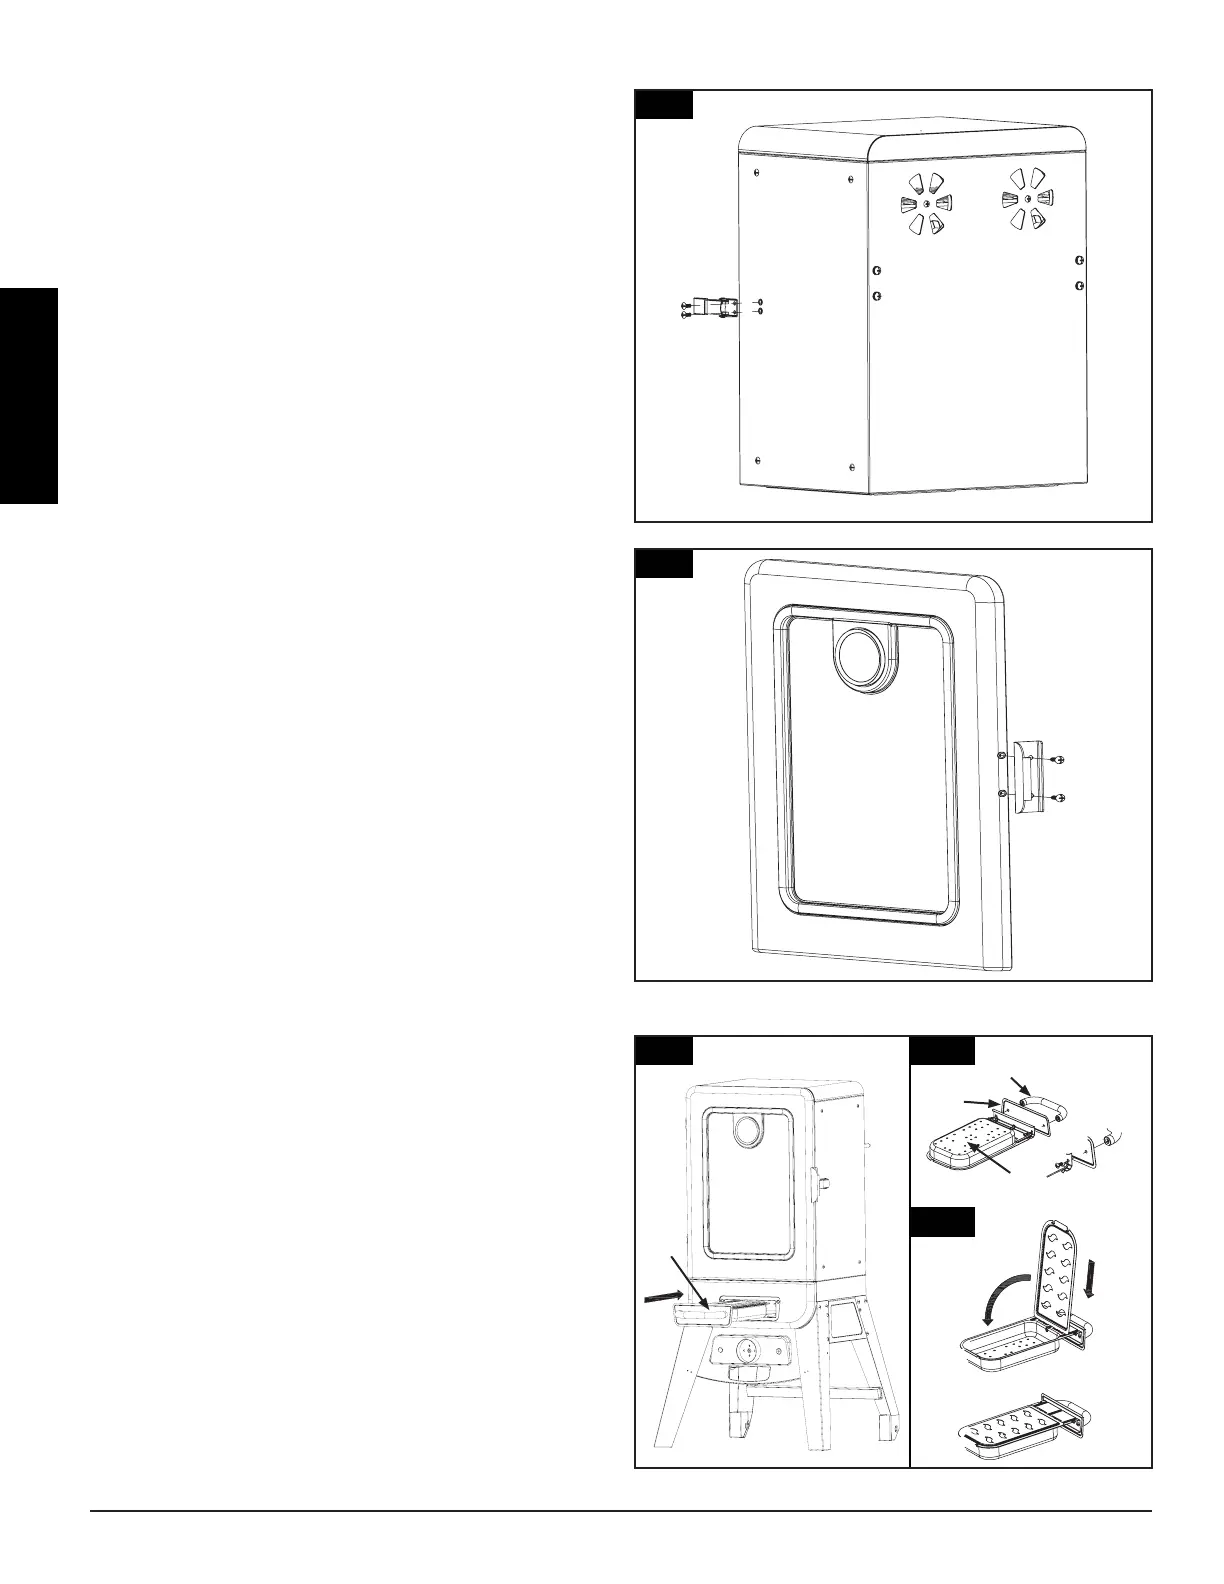
Fig.16
8
Fig.17
7
Fig.18
Fig.18.1
Fig.18.2
11
11.2
11.3
11.1
16.
Parts Required:
1 x Door Latch Assembly (#8)
1 x Upper Smoker Cabinet Assembly (#2)
2 x #10-24*1/2”(#C)
Installation:
• Attach the Door Latch Assembly (#8) to the
Upper Smoker Cabinet Assembly (#2) using 2 x
#10-24*1/2”(#C) as Fig.16 shown.
17.
Parts Required:
1 x Door Handle (#9)
1 x Door Assembly (#7)
2 x #10-24*1/2”(#C)
Installation:
Attach the Door Handle (#9) to the Door Assembly
(#7) using 2 x #10-24*1/2” (#C) as Fig.17 shown.
18.
Parts Required:
1 x Wood Chip Box Lid (#10)
1 x Wood Chip Box Assembly (#11)
1 x Lower Smoker Cabinet Assembly (#14)
1 x Wood Chip Box (#11.1)
1 x Wood Chip Box Front Panel (#11.2)
1 x Wood Chip Box Handle (#11.3)
2 x #10-24 x 1/2” (#C)
Installation:
• Assemble the Wood Chips Box Handle (#11.3)
and Wood Chips Box Front Panel (#11.2) onto
the Wood Chips Box (#11.1) using 2x #10-
24x1/2" (#C) as Fig. 18.1 shown.
• Put the Wood Chip Box Lid (#10) on the Wood
Chip Box Assembly (#11) and slide Wood Chip
Box onto the Wood Chip Box support rails
of Lower Smoker Cabinet Assembly (#14) as
Fig.18.2 shown.
Note: When removing the Wood Chip Box from the smoker, lift
up on the handle and pull out the Wood Chip Box.
 Loading...