ATLAS 35 of 44 User’s Manual
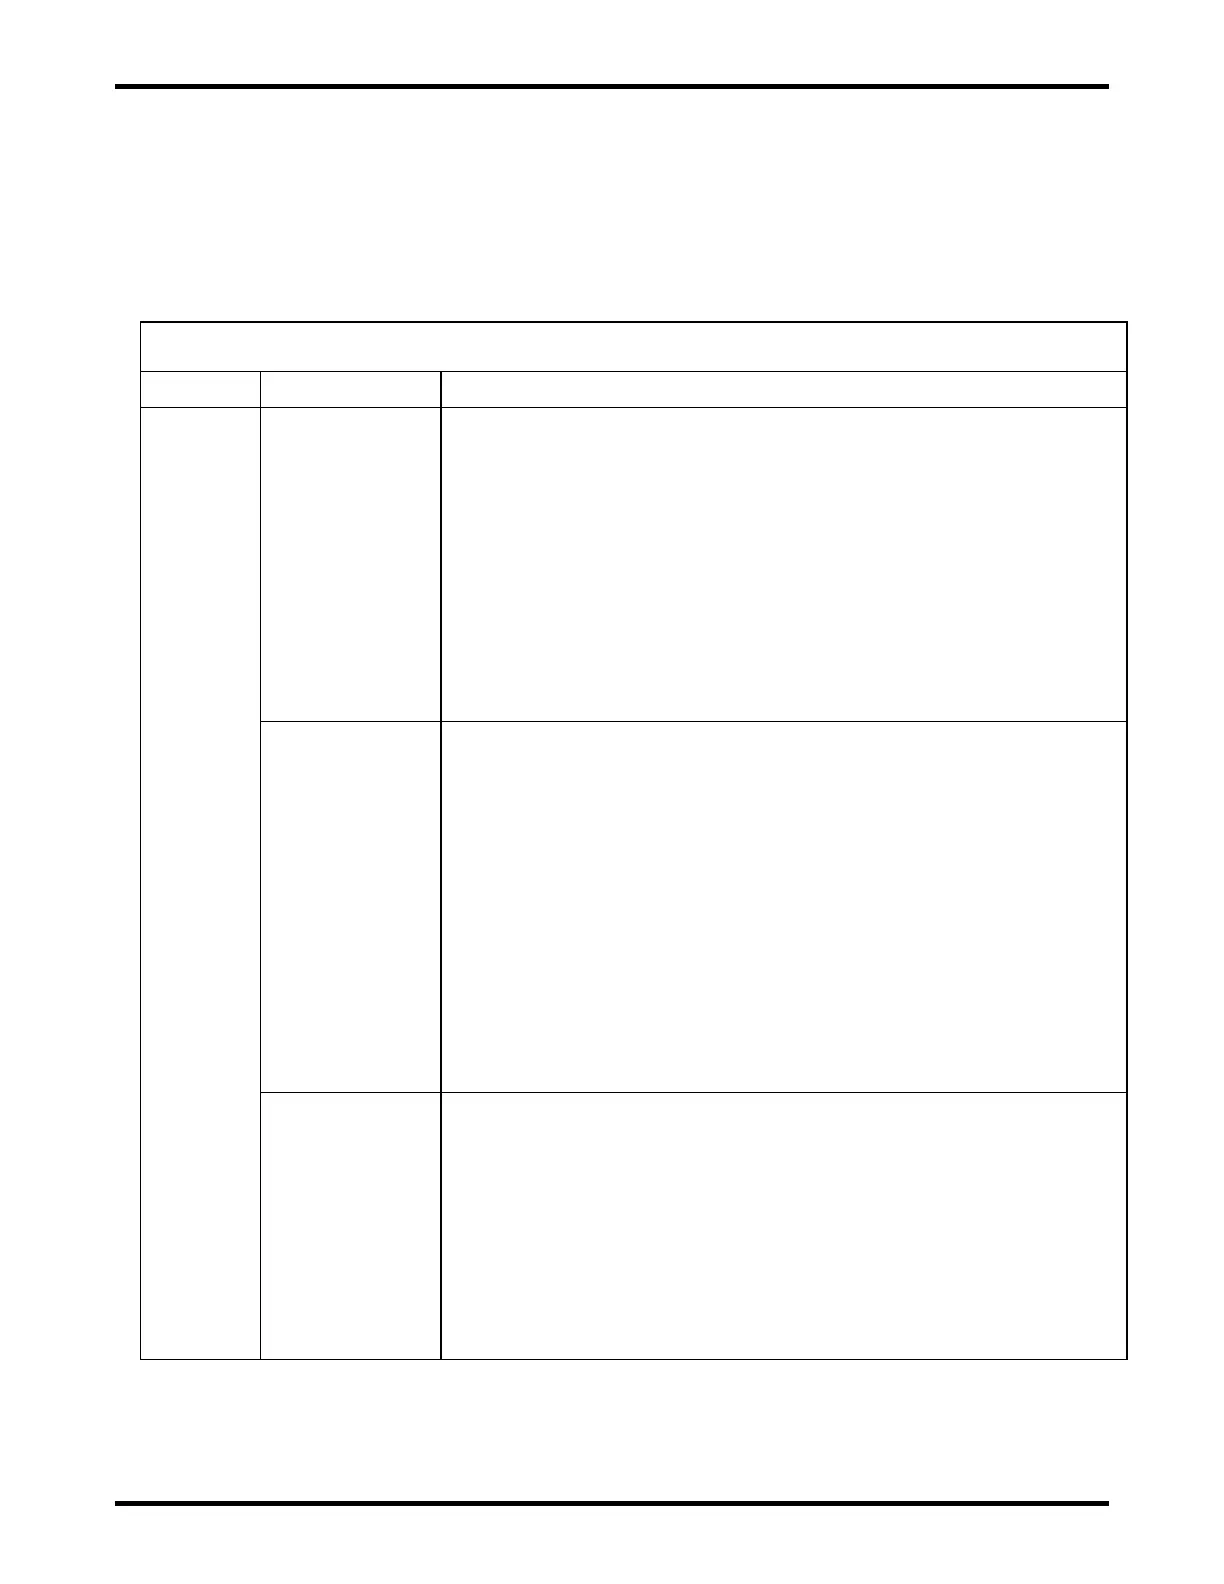
13.1. ATLAS Charger Troubleshooting Chart
The charts below and the UIM and iPM LEDs will assist with troubleshooting of charger issues. Refer to
sections 9.1 and 9.2 of this manual for LED information. If available, use the web server, as the dashboard
display of the battery voltage, DC output current, AC input voltage, iPM information, and manual control
information can assist in troubleshooting. See the charger wire diagram in section 14 for additional
assistance.
ATLAS CHARGER TROUBLESHOOTING
UIM Blue
AC
Present
LED Off
AC Input Fuse or
Fuses are Bad
1) Are any iPM LEDs on? If iPM LEDs are on, then you have AC power to
the charger chassis and the AC fuses are good. See next possible
cause. If no IPM LEDs are on, then check step 2.
2) Carefully check AC input voltage at input A.A.R. terminals behind the
access panel door. If AC voltage at the terminals is good, then continue
to step 3. If there is no AC voltage at terminals, then check the AC
source.
3) Check AC input fuses behind access panel door. (Be sure to disconnect
AC input voltage before removing fuses to verify they are not bad. Be
cautious of touching the DC connections if the DC battery voltage is still
connected. If AC input fuses are bad, then replace them with same type
and rating after doing a visual check of the charger unit.
1) The UIM module gets its AC input from the 2 pin connector on the small
circuit board of the module. Continuity can be measured at this
connection before replacing the UIM module.
2) For safety, disconnect both the AC input and DC battery voltages from
the chassis.
3) For a four module shelf, remove the screws on the top of the UIM cover
and tilt the UIM out to access this connector. On a two module case,
just open the access door and the connector is visible thru a hole in the
UIM shield on the left. To access this connector the back shield will
need removed. The white wire should have continuity to one AC input
A.A.R. post and the black wire to the other. If necessary, the AC input
voltage can be measured here if very cautious.
4) If connections are bad, then the chassis will need replaced. If
connections are good, see next possible cause.
1) The UIM module is powered by both AC and DC (minimum 6 Vdc).
Remove both power sources at the A.A.R. terminal connections, and
then reconnect either AC or DC. This will reboot the UIM. On power up,
watch for the UIM reboot LED sequence. All LEDs should go on, and
then off in a sequence. If not, then replace the UIM.
2) Reapply AC input to the unit. If the blue AC Present LED is now on,
then verify normal charger function.
3) If blue AC Present LED is still off, replace the UIM module. Follow
replacement part instructions to remove and replace with a new UIM
module.